> For the complete documentation index, see [llms.txt](https://documentation.2pintsoftware.com/llms.txt). Markdown versions of documentation pages are available by appending `.md` to page URLs; this page is available as [Markdown](https://documentation.2pintsoftware.com/deployr/reference/step-definitions/register-with-autopilot.md).
# Register with Autopilot
The **Register with Autopilot** step adds the current computer to the Autopilot service (for Autopilot v1) or to the Intune list of corporate device IDs (for Autopilot v2). Multiple options can be configured:

With Autopilot v1, a group tag can be configured (not applicable for v2) and the step can be instructed to wait for the profile assignment to complete. For either version, the device can be added to a specified Entra ID group.
If the device is already enrolled in Windows Autopilot (v1) or a corporate identifier already exists (v1), no additional actions will be performed for the device.
{% hint style="info" %}
If you're using the "Entra ID group name" option, ensure that the group is an Assigned type, not a Dynamic group. If you get errors about permissions, first confirm your API access using the link below, then ensure the group is not Dynamic.
{% endhint %}
This requires configuring [Microsoft Graph API access](/deployr/getting-started/microsoft-graph-api-access.md).
This step must be run in the Full OS, it will not work while in WinPE.
### Simple Implementation Test
To test this step in a task sequence, once the requirements in Graph as linked to above are complete, create a new task sequence: Add -> Select from Template -> Autopilot pre-provisioning
{% hint style="info" %}
The "Register with Autopilot" step does not require this template. It can be added to any task sequence where it is still running in the Full OS to do additional steps. Just make sure the step is added into the Full OS part of the task sequence.
{% endhint %}
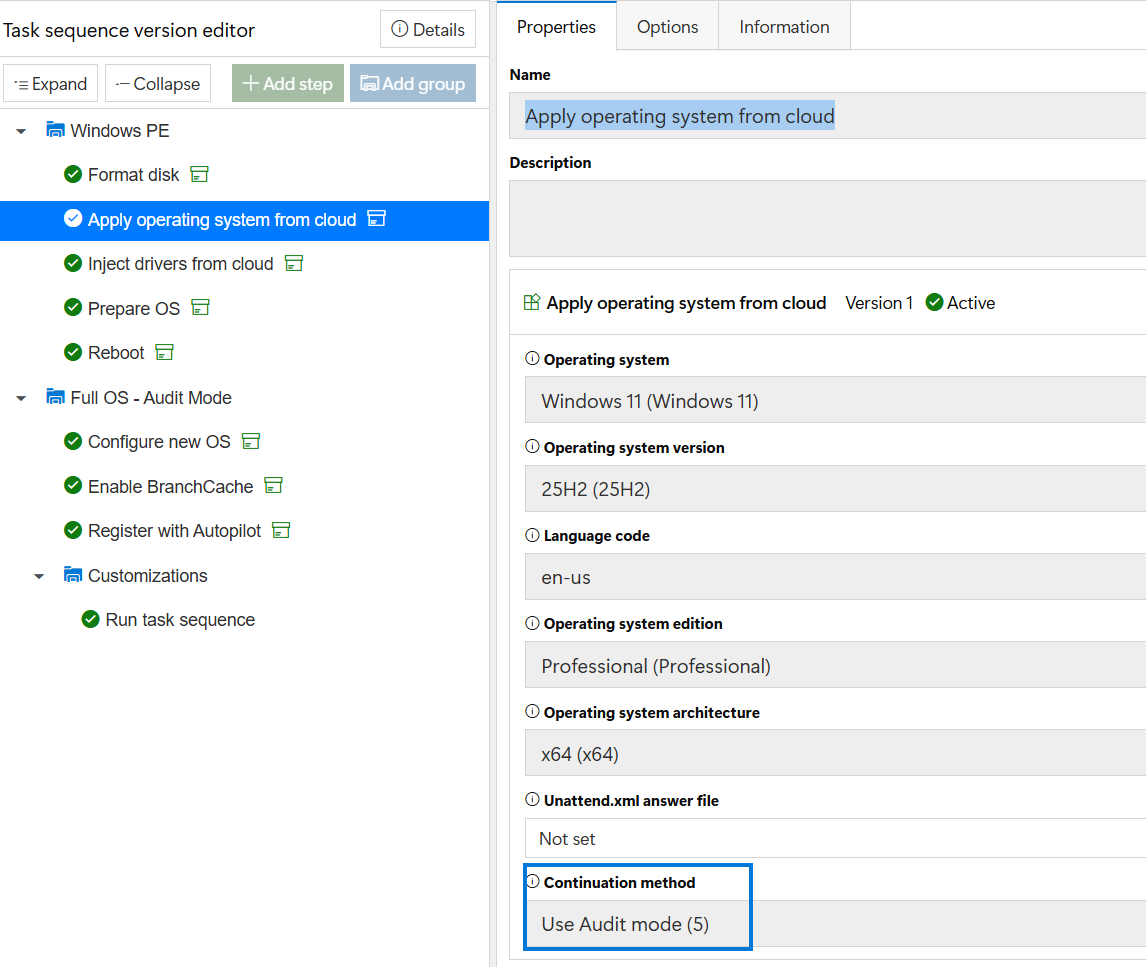
* Either update the Apply OS step or replace it with the Apply OS from cloud and configure. In this example I replaced it and configured
* Apply operating system from cloud
* Set Continuation Method to "Use Audit mode" \[for the test, you can use any of the continuation methods, more on that later]
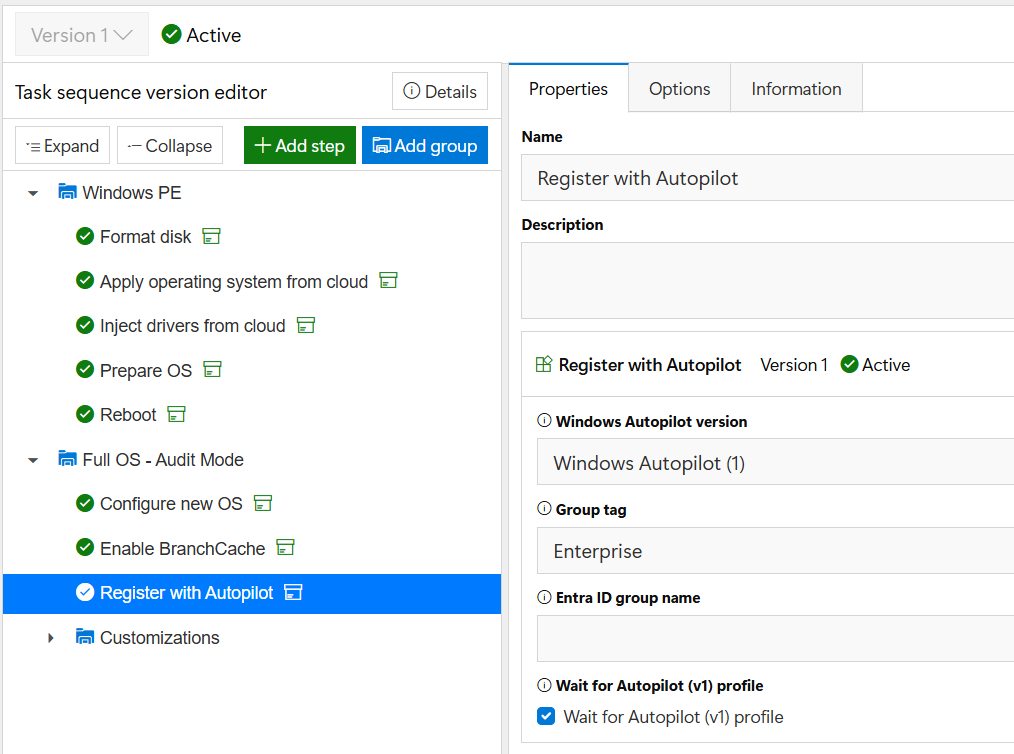
* Add a step in the "Full OS" section of the Task Sequence
* Register with Autopilot
* Optional, add the group tag
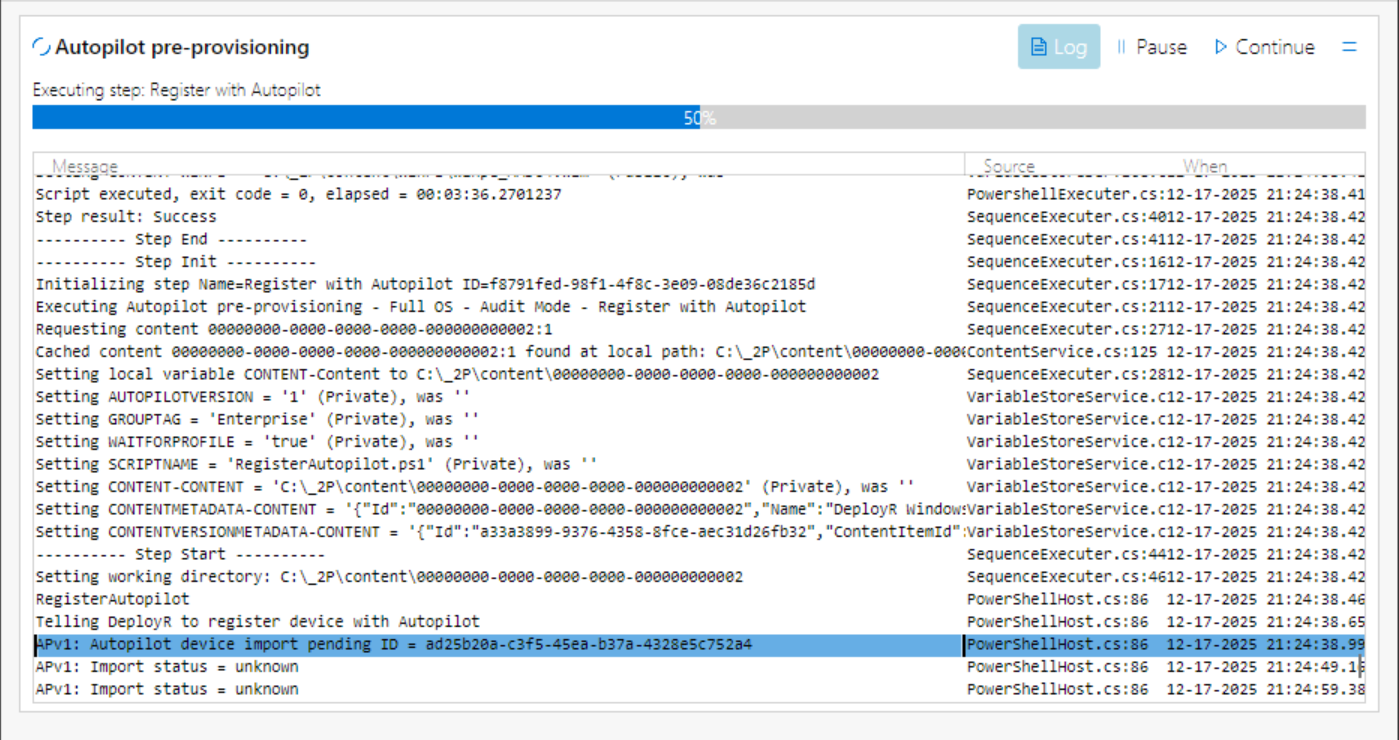
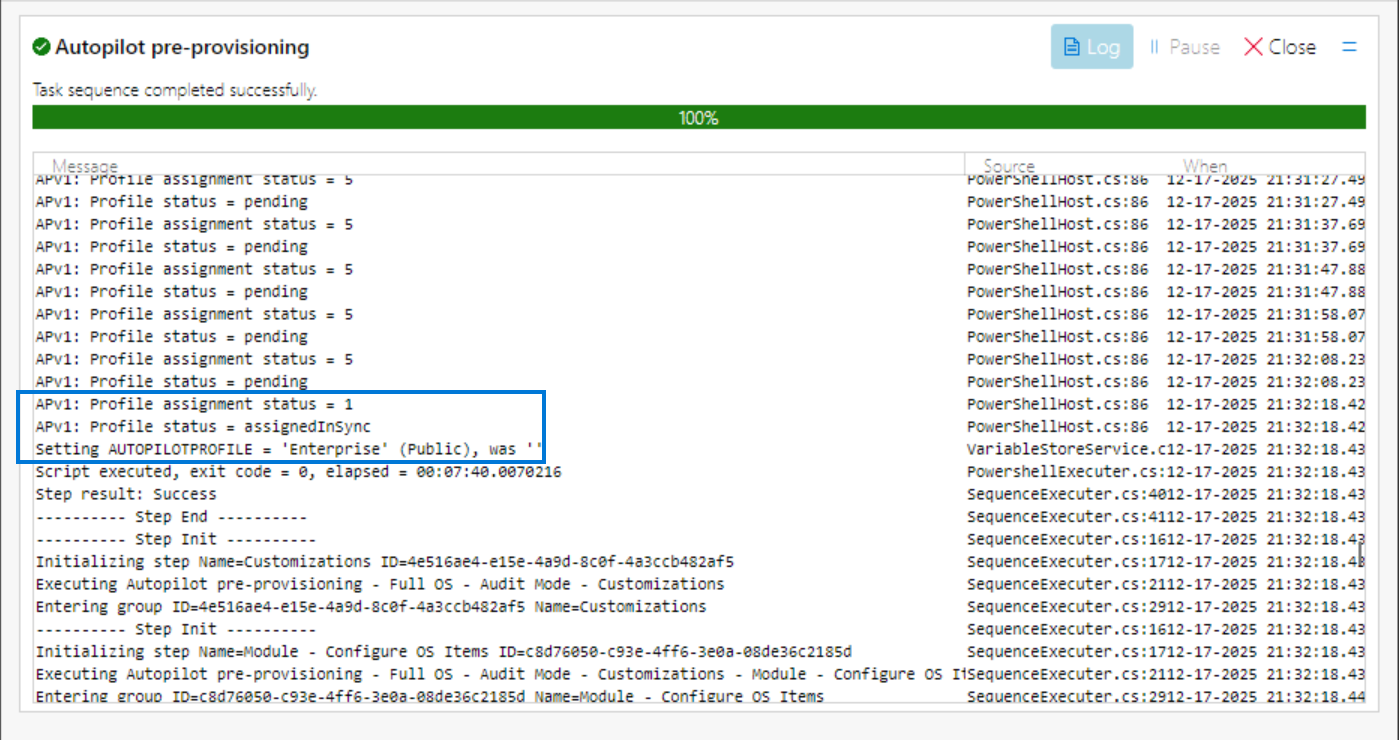
During the Task Sequence, the log will show it first is importing the ID, then loop until it confirms it has been imported
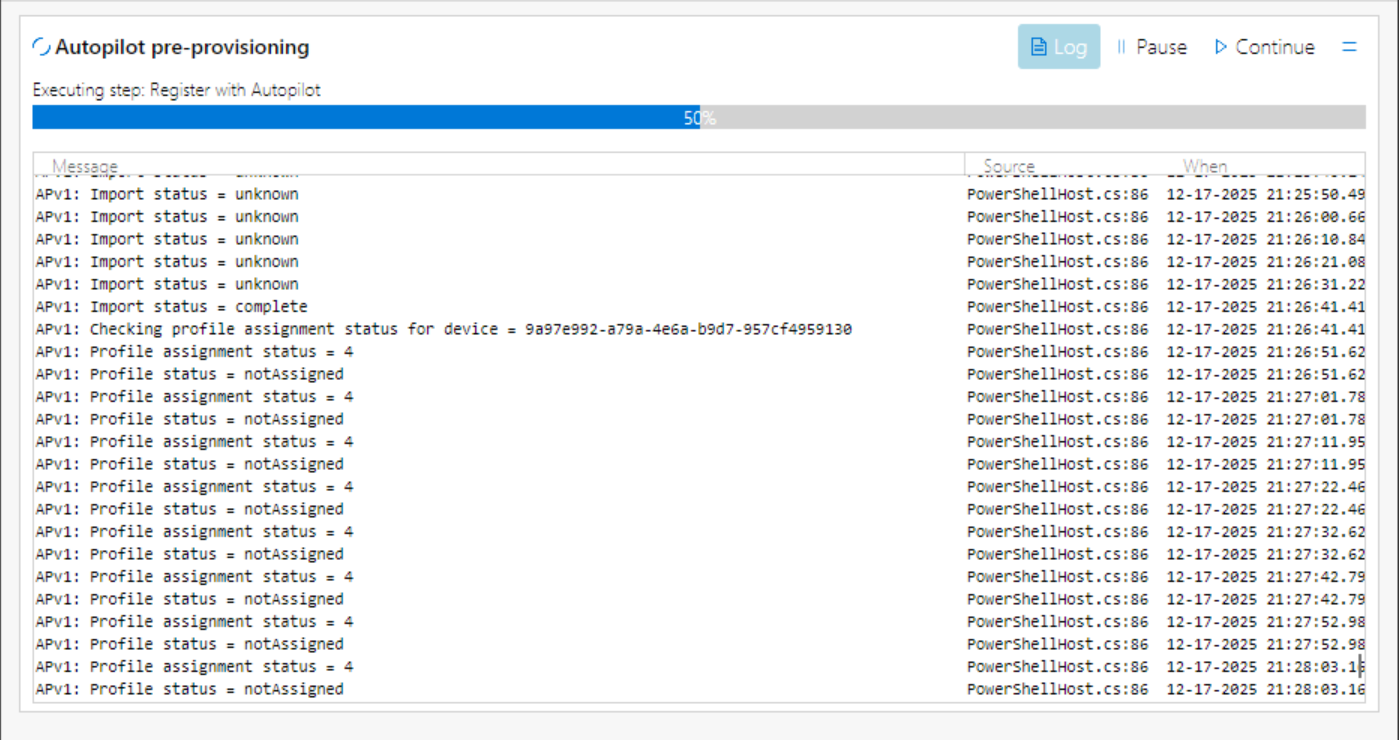
Once confirmed it imported (status = complete), it will then loop waiting for the profile assignment to be assigned.
It will eventually report back status = assignedInSync and the step will end
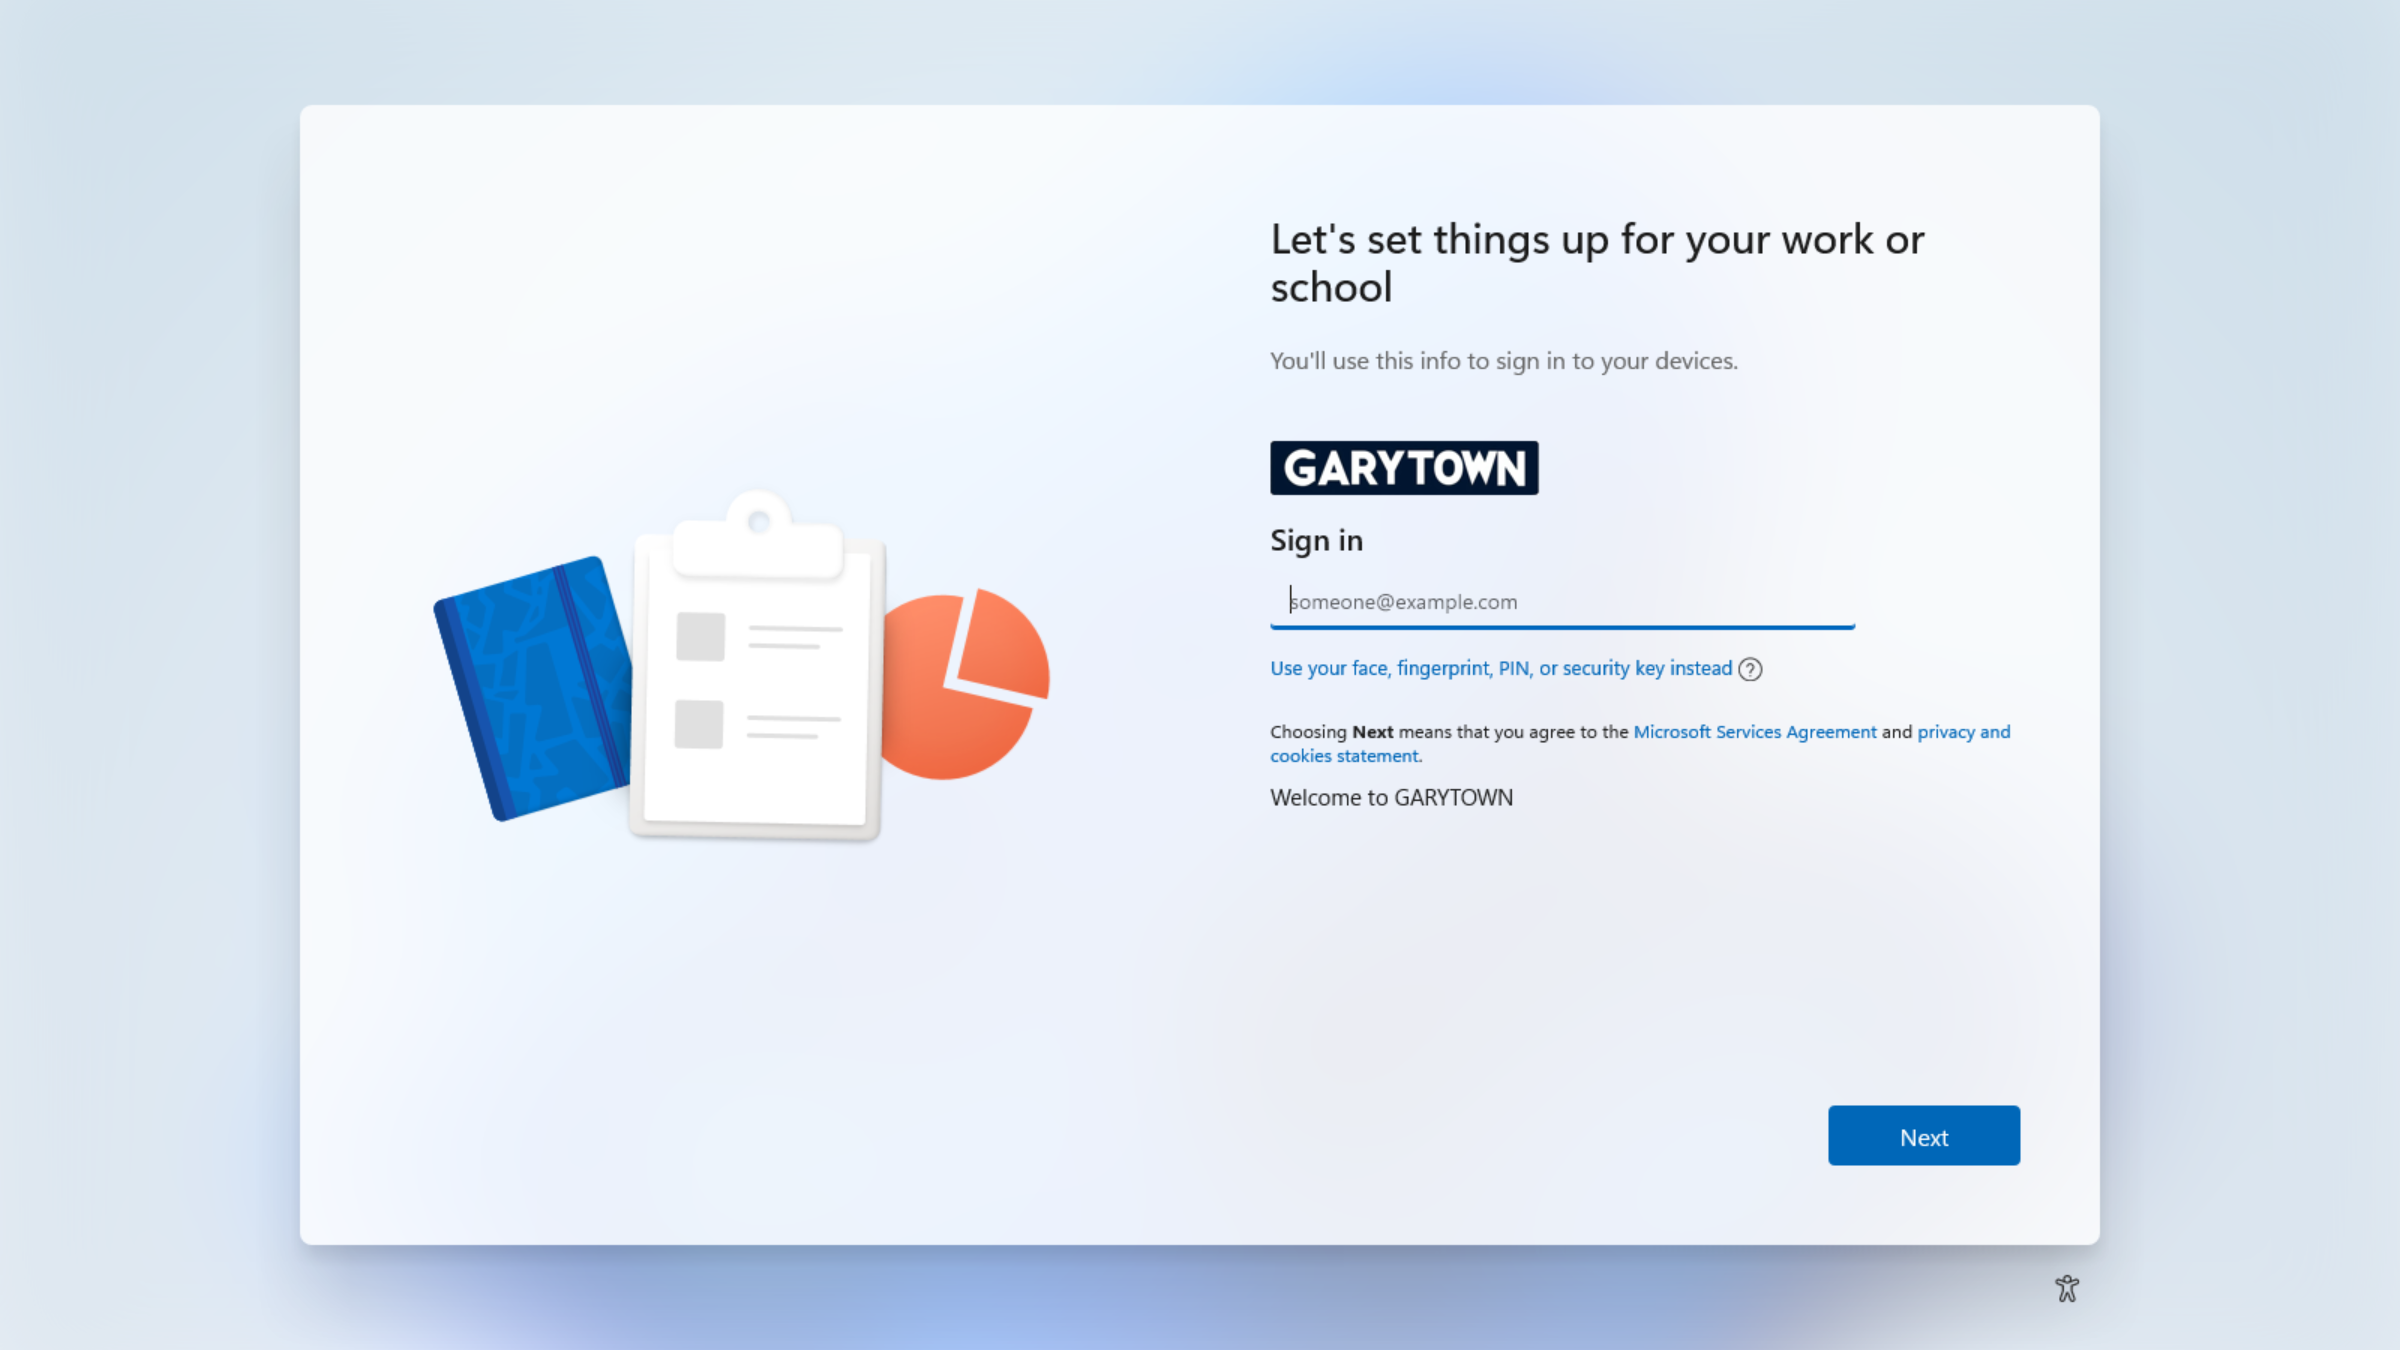
After the task sequence completes successfully the device will be waiting at the Autopilot logon page:
### Continuation methods and Autopilot
In the test, Audit Mode was used, as it will automatically dump the device out at the OOBE screen when completed. However there are several nuances with Audit Mode, like windows updates don't work, settings do not persist, etc, which might be fine if the plan is to do all of that with Autopilot, however, if the desired outcome is to pre-set many of those settings, like computer name, language options, time zone, etc, stick with Setup Complete or Auto Logon as your [Continuation methods](/deployr/getting-started/continuation-methods.md). \
When using other continuation methods, ensure your **FINISHACTION** variable is set to **Reseal**, so when completed, the machine will be at the OOBE screen.
---
# Agent Instructions
This documentation is published with GitBook. GitBook is the documentation platform designed so that both humans and AI agents can read, navigate, and reason over technical content effectively. Learn more at gitbook.com.
## Querying This Documentation
If you need additional information that is not directly available in this page, you can query the documentation dynamically by asking a question.
Perform an HTTP GET request on the current page URL with the `ask` query parameter, and the optional `goal` query parameter:
```
GET https://documentation.2pintsoftware.com/deployr/reference/step-definitions/register-with-autopilot.md?ask=&goal=
```
`ask` is the immediate question: it should be specific, self-contained, and written in natural language.
`goal` is optional and describes the broader end goal you are ultimately trying to accomplish on behalf of the user. GitBook uses it to tailor the answer towards what is most useful for that goal.
The response will contain a direct answer to the question and relevant excerpts and sources from the documentation.
Use this mechanism when the answer is not explicitly present in the current page, you need clarification or additional context, or you want to retrieve related documentation sections.