# Entra ID authentication
Entra ID authentication is ideal for DeployR servers deployed in the cloud, i.e. those that are accessible from anywhere on the internet. All task sequences and content are protected; only those who properly authenticate are able to access the DeployR server. An audit trail is available showing who logged in.
In order to authenticate using Entra ID, it is necessary to:
1. Create an Entra ID application that allows authentication of users in your Entra ID tenant.
2. Configure DeployR with the details for your Entra ID tenant and application.
See [the Microsoft documentation](https://learn.microsoft.com/en-us/entra/identity-platform/v2-oauth2-device-code) for more information on this authentication mechanism.
### Configure Entra ID
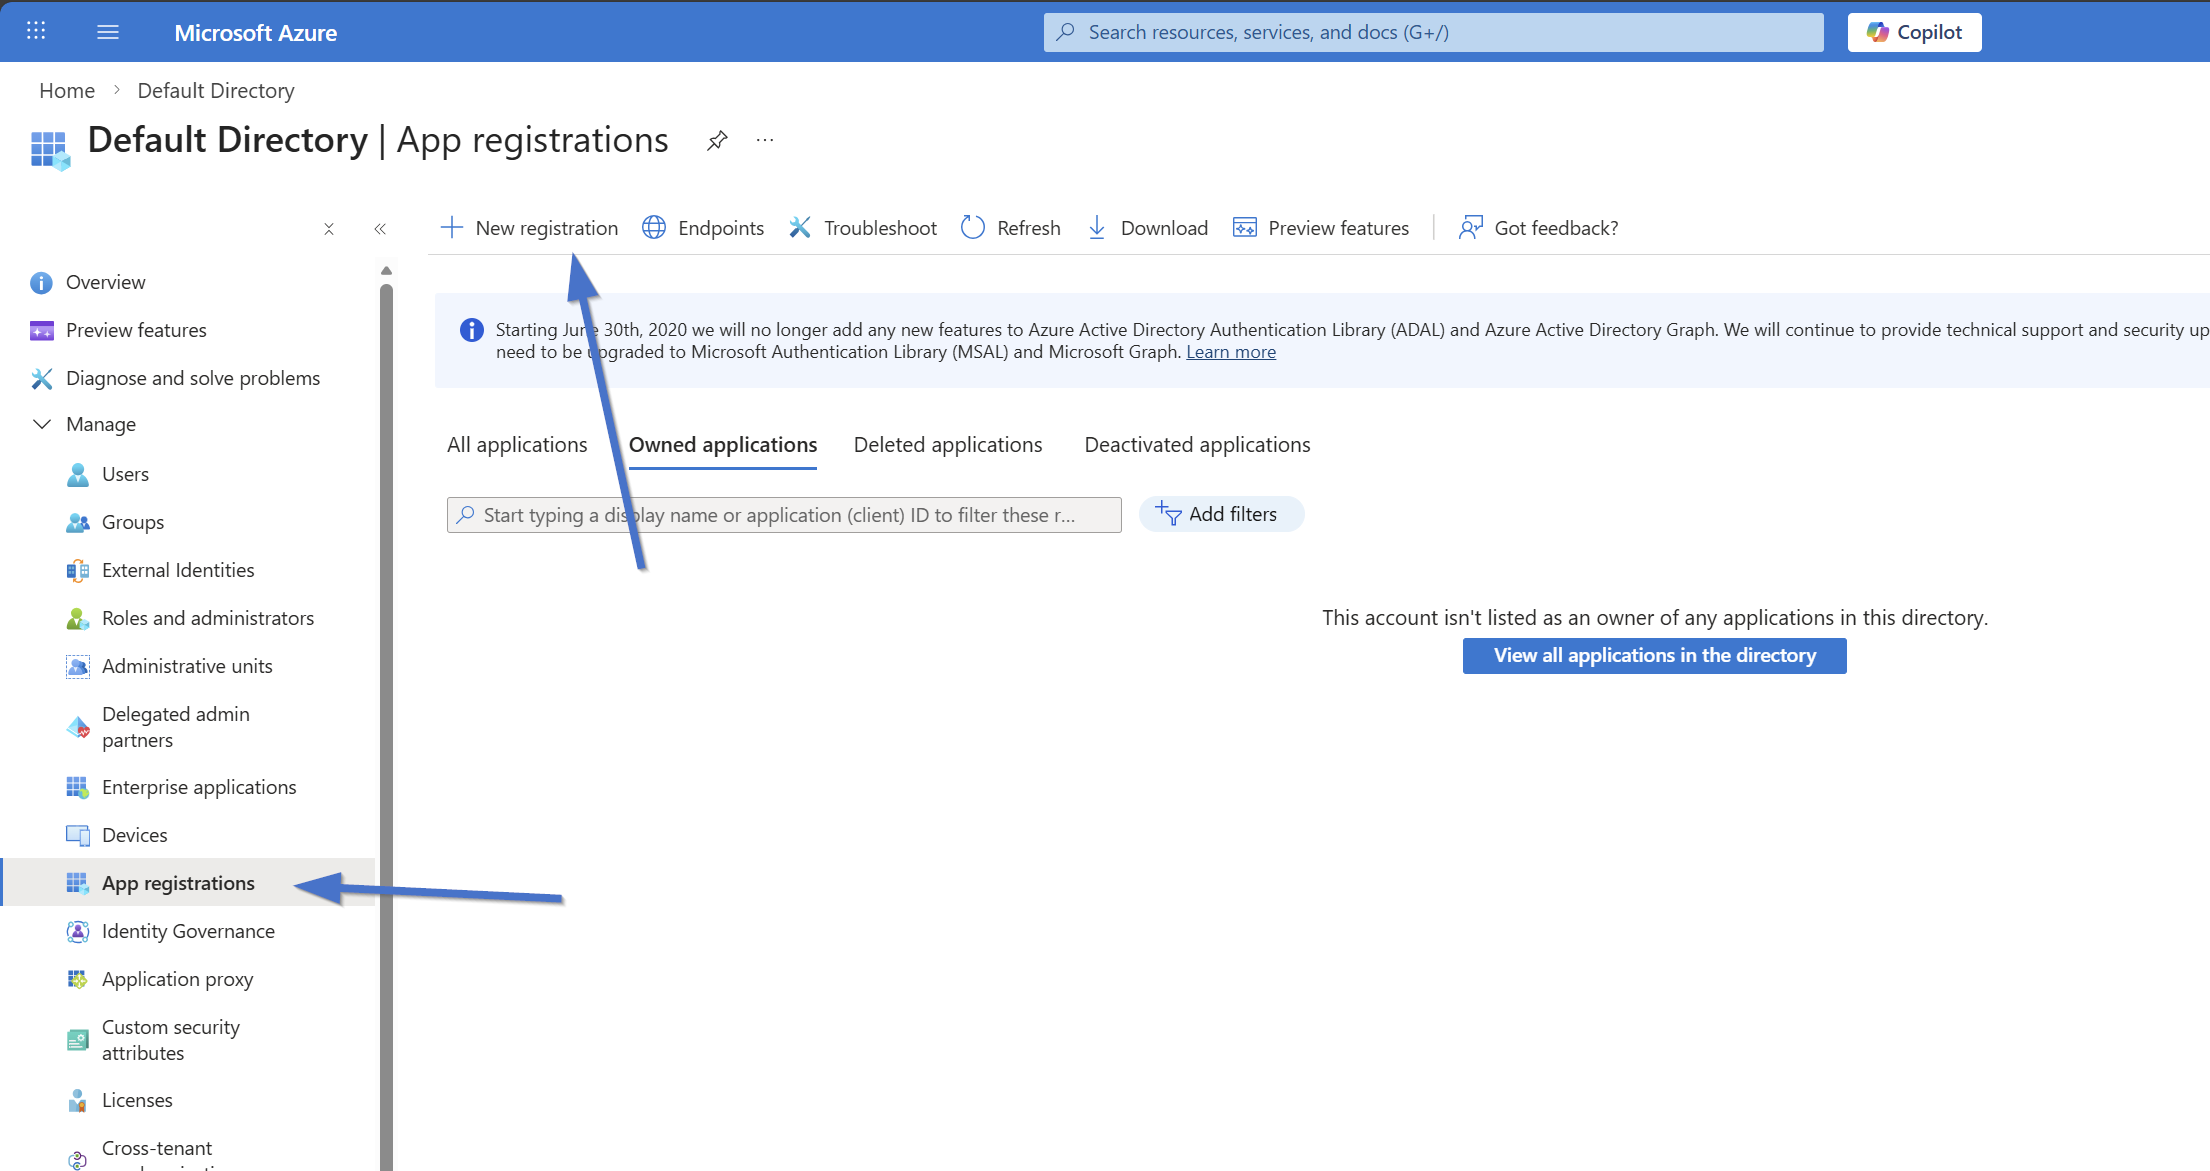
To create an Entra ID application, log into [Entra ID](https://portal.azure.com/#view/Microsoft_AAD_IAM/ActiveDirectoryMenuBlade/~/RegisteredApps) as a global administrator or other user with sufficient permissions, then click "New registration" from the "App registrations" page.
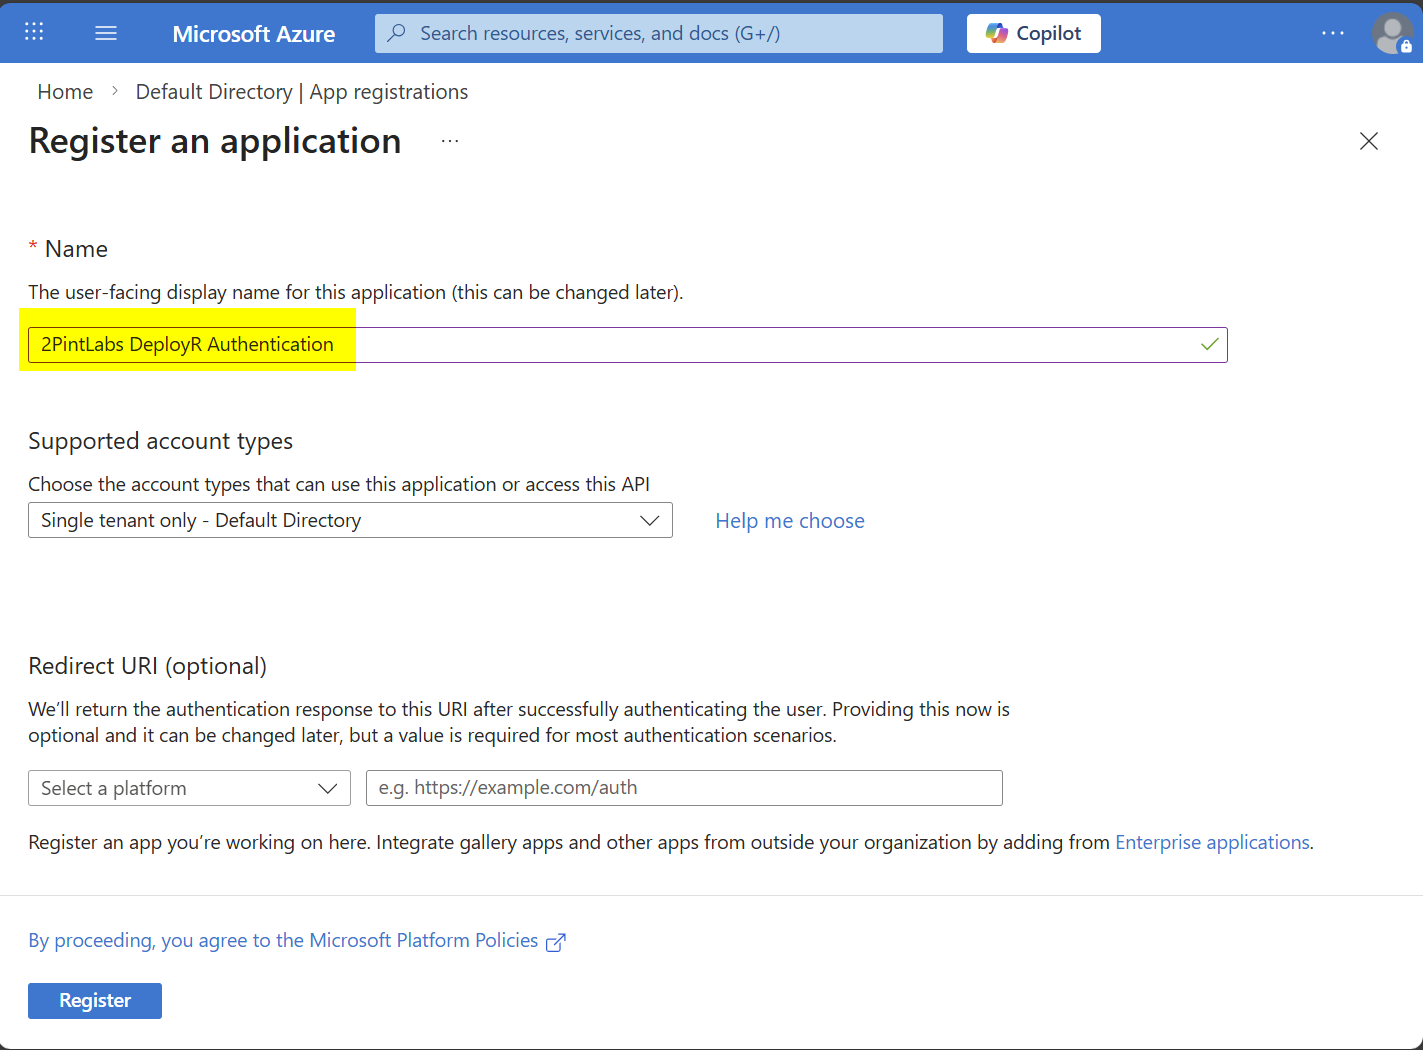
On the subsequent page, specify the user-facing name (e.g. "Contoso DeployR authentication") which will be shown to the user when they attempt to log in; the remaining settings can be left as defaults.
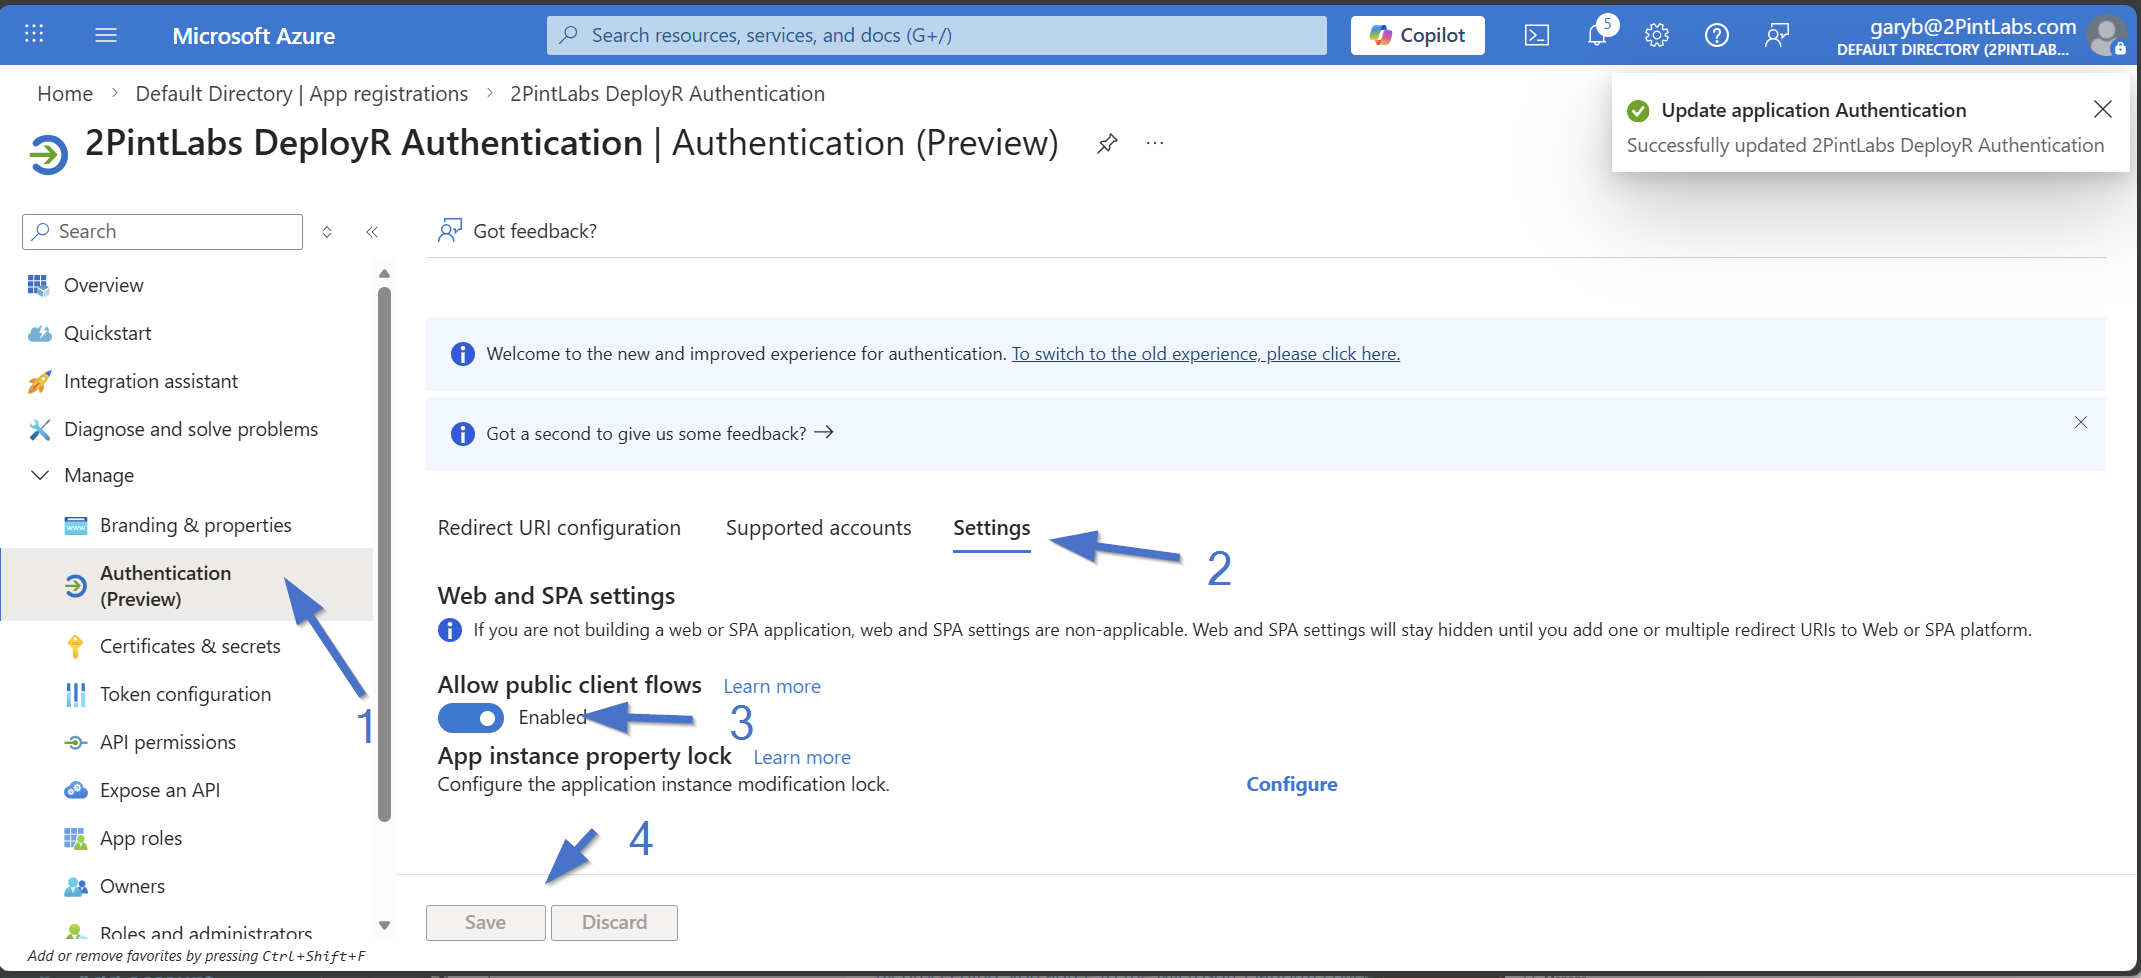
Click "Register to create the application. One the applications' "Authentication (Preview)" page, click on the Settings, then enable "Allow public client flows" and save.
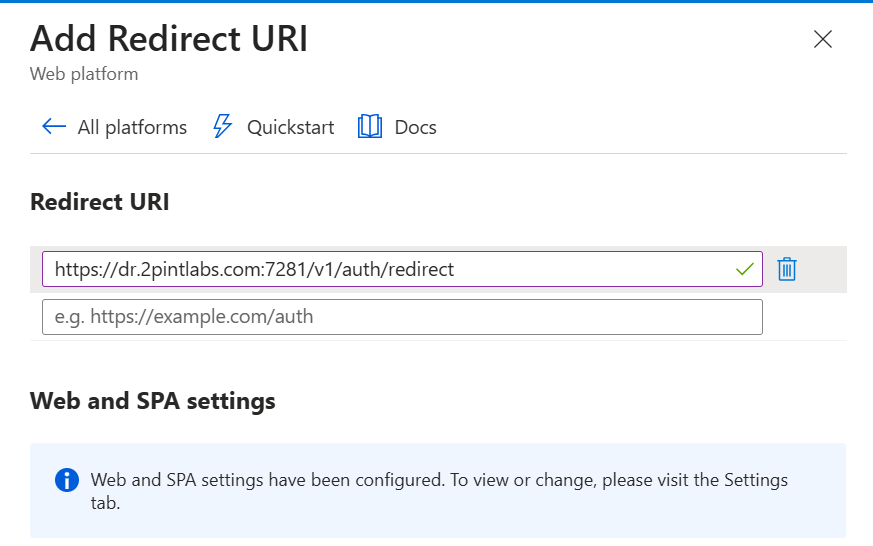
Next, whlle still on the Authentication (Preview) page, go to the "Redirect URI configuration", then click "Add Redirect API", which will open a menu on the right, select "Web" tile.
When asked for a "Custom redirect URIs" value, type "" as shown below:[ ](https://dr.2pintlabs.com:7281/v1/auth/redirect)
```
Examples:
https://YOURSERVER.FQDN:7281/v1/auth/redirect
https://dr.2pintlabs.com:7281/v1/auth/redirect
```
Click "Configure" to save those changes, and you'll now see it listed:
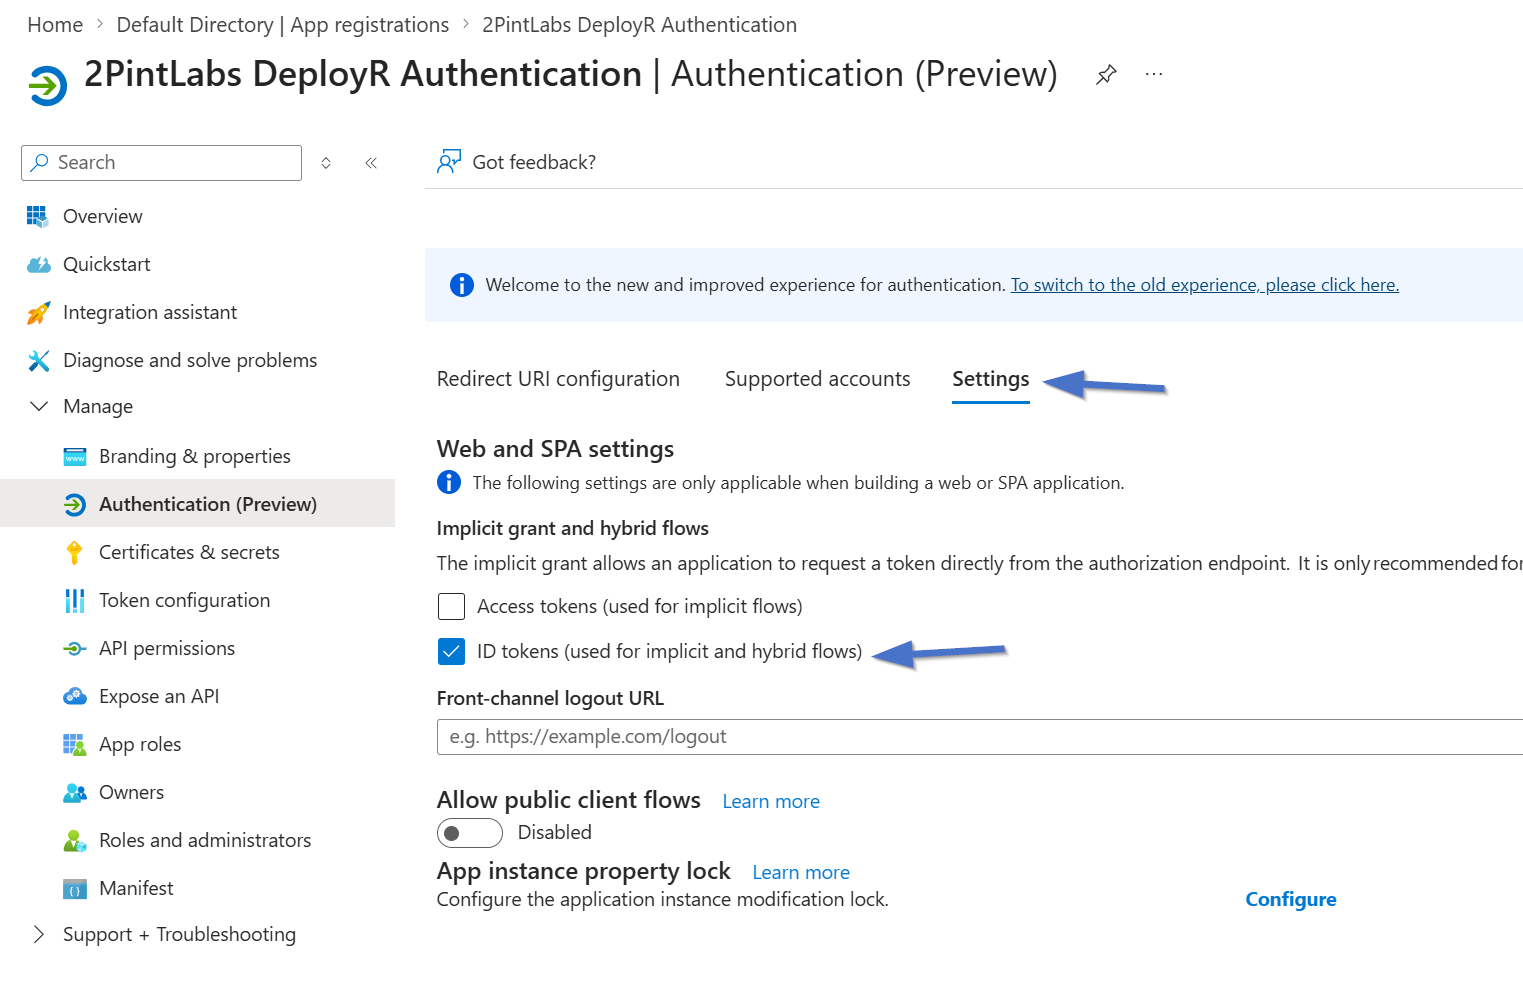
Back on the "Settings Tab, make sure "ID tokens (used for implicit hybrid flows) is set:
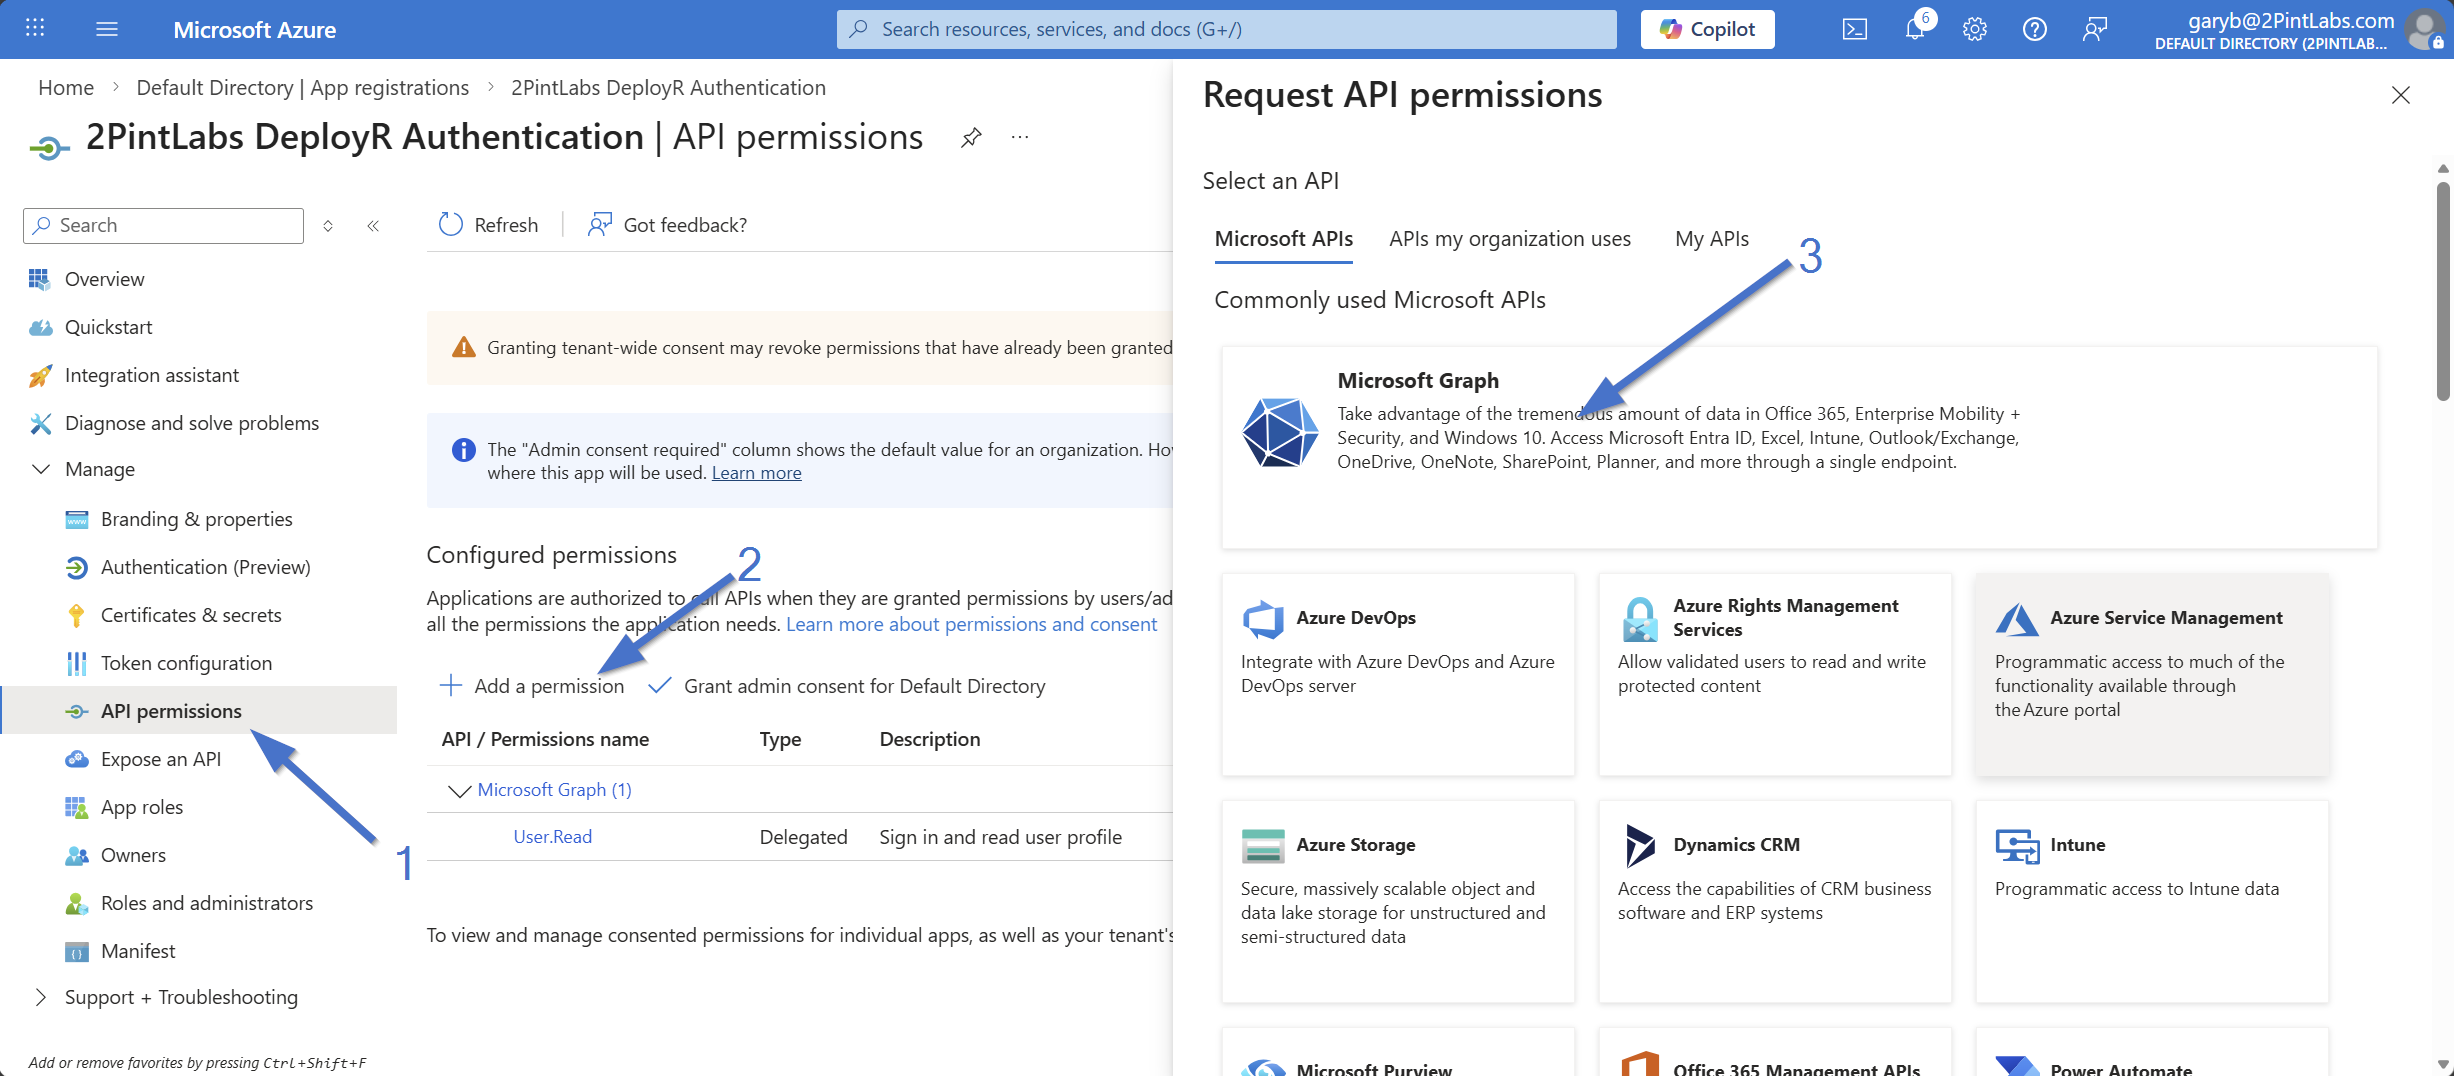
On the "API permissions", click "Add a permission", several options will appear on the right, choose "Microsoft Graph"
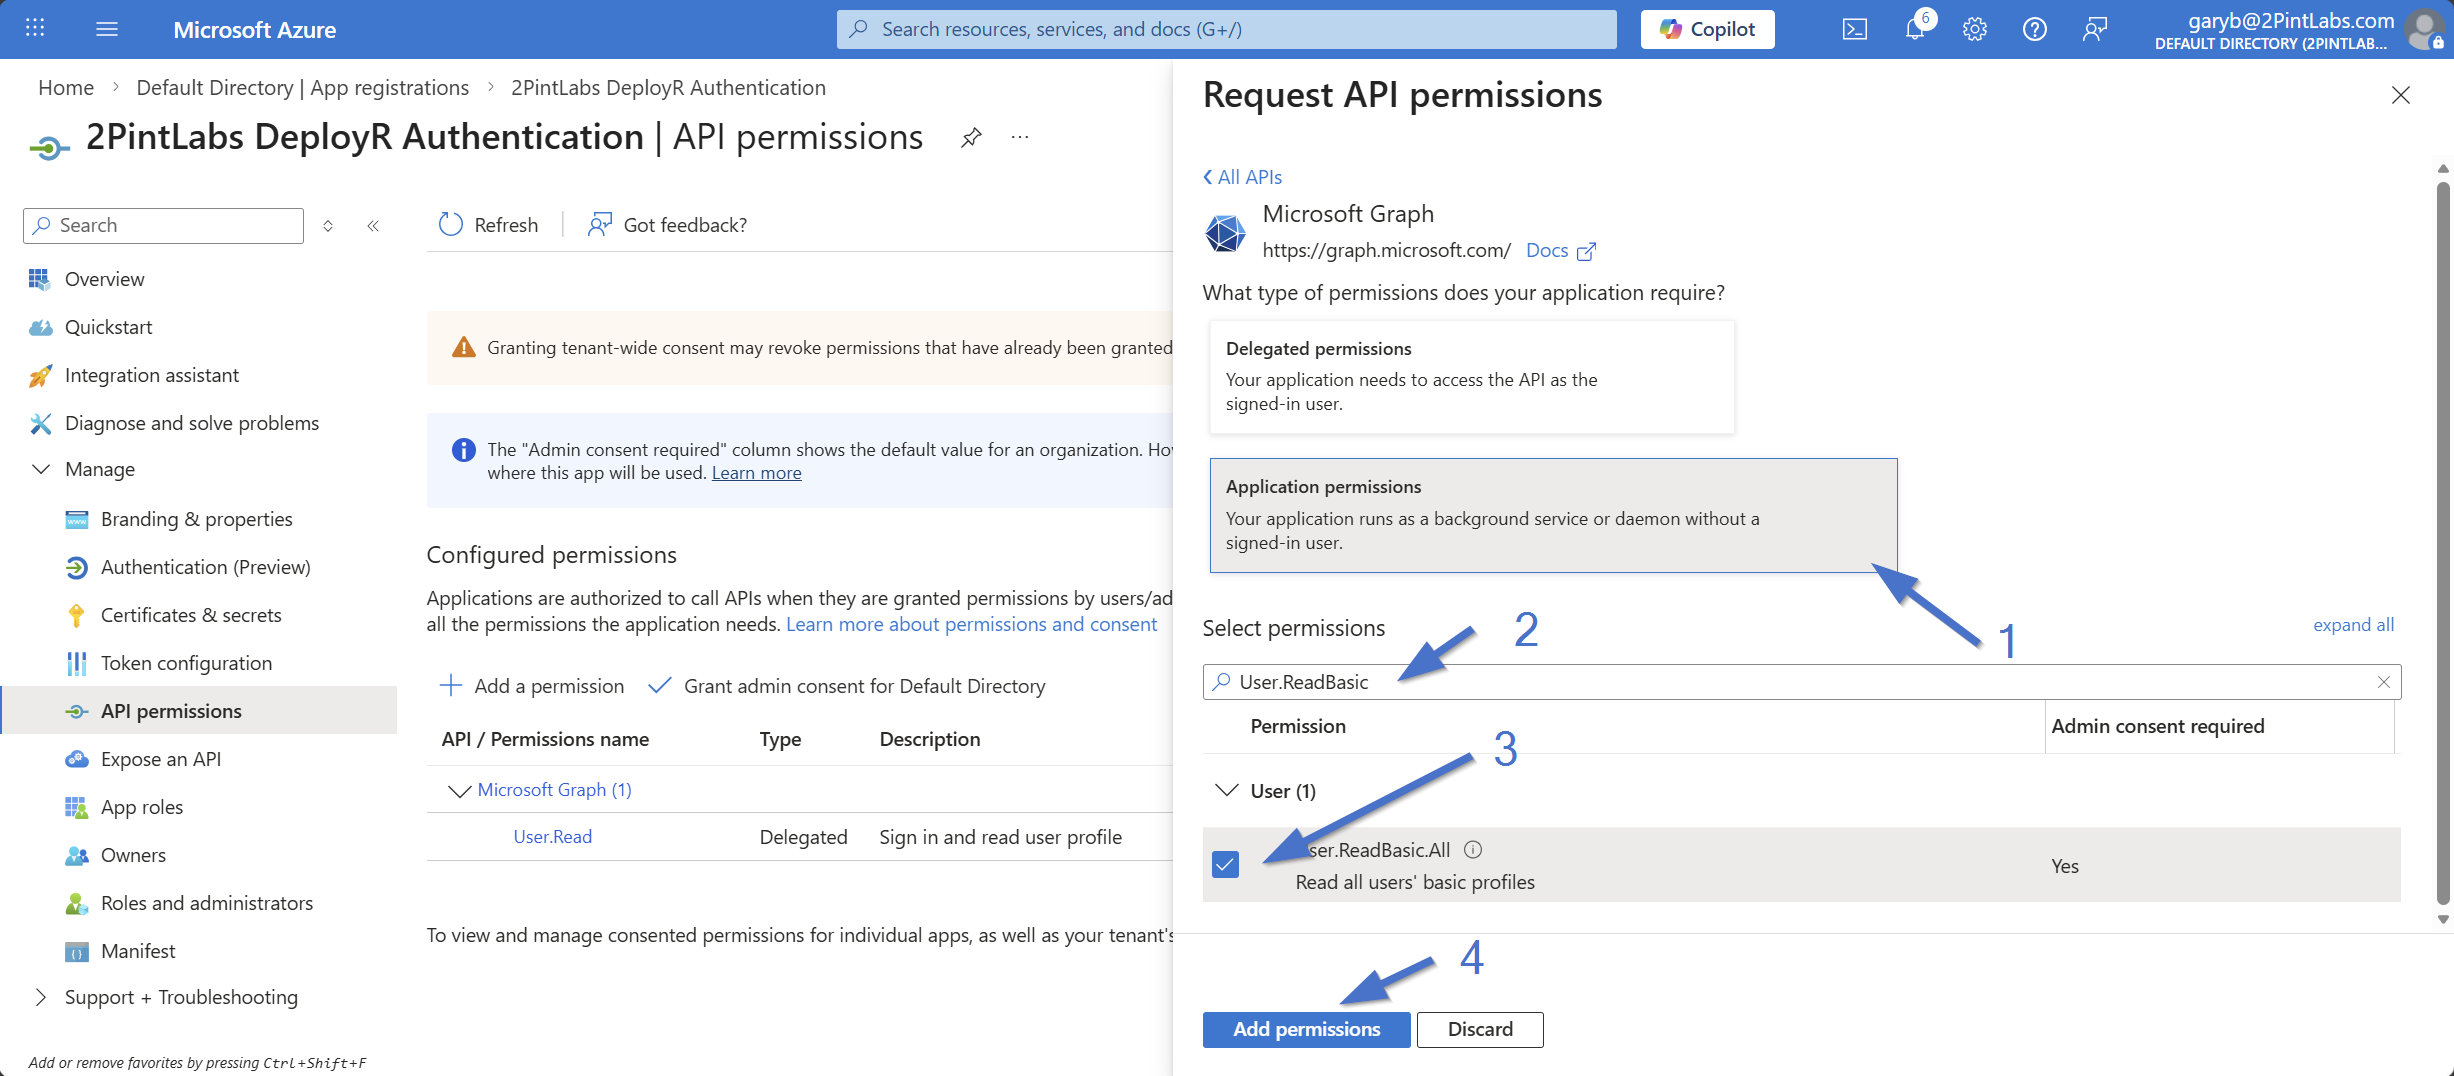
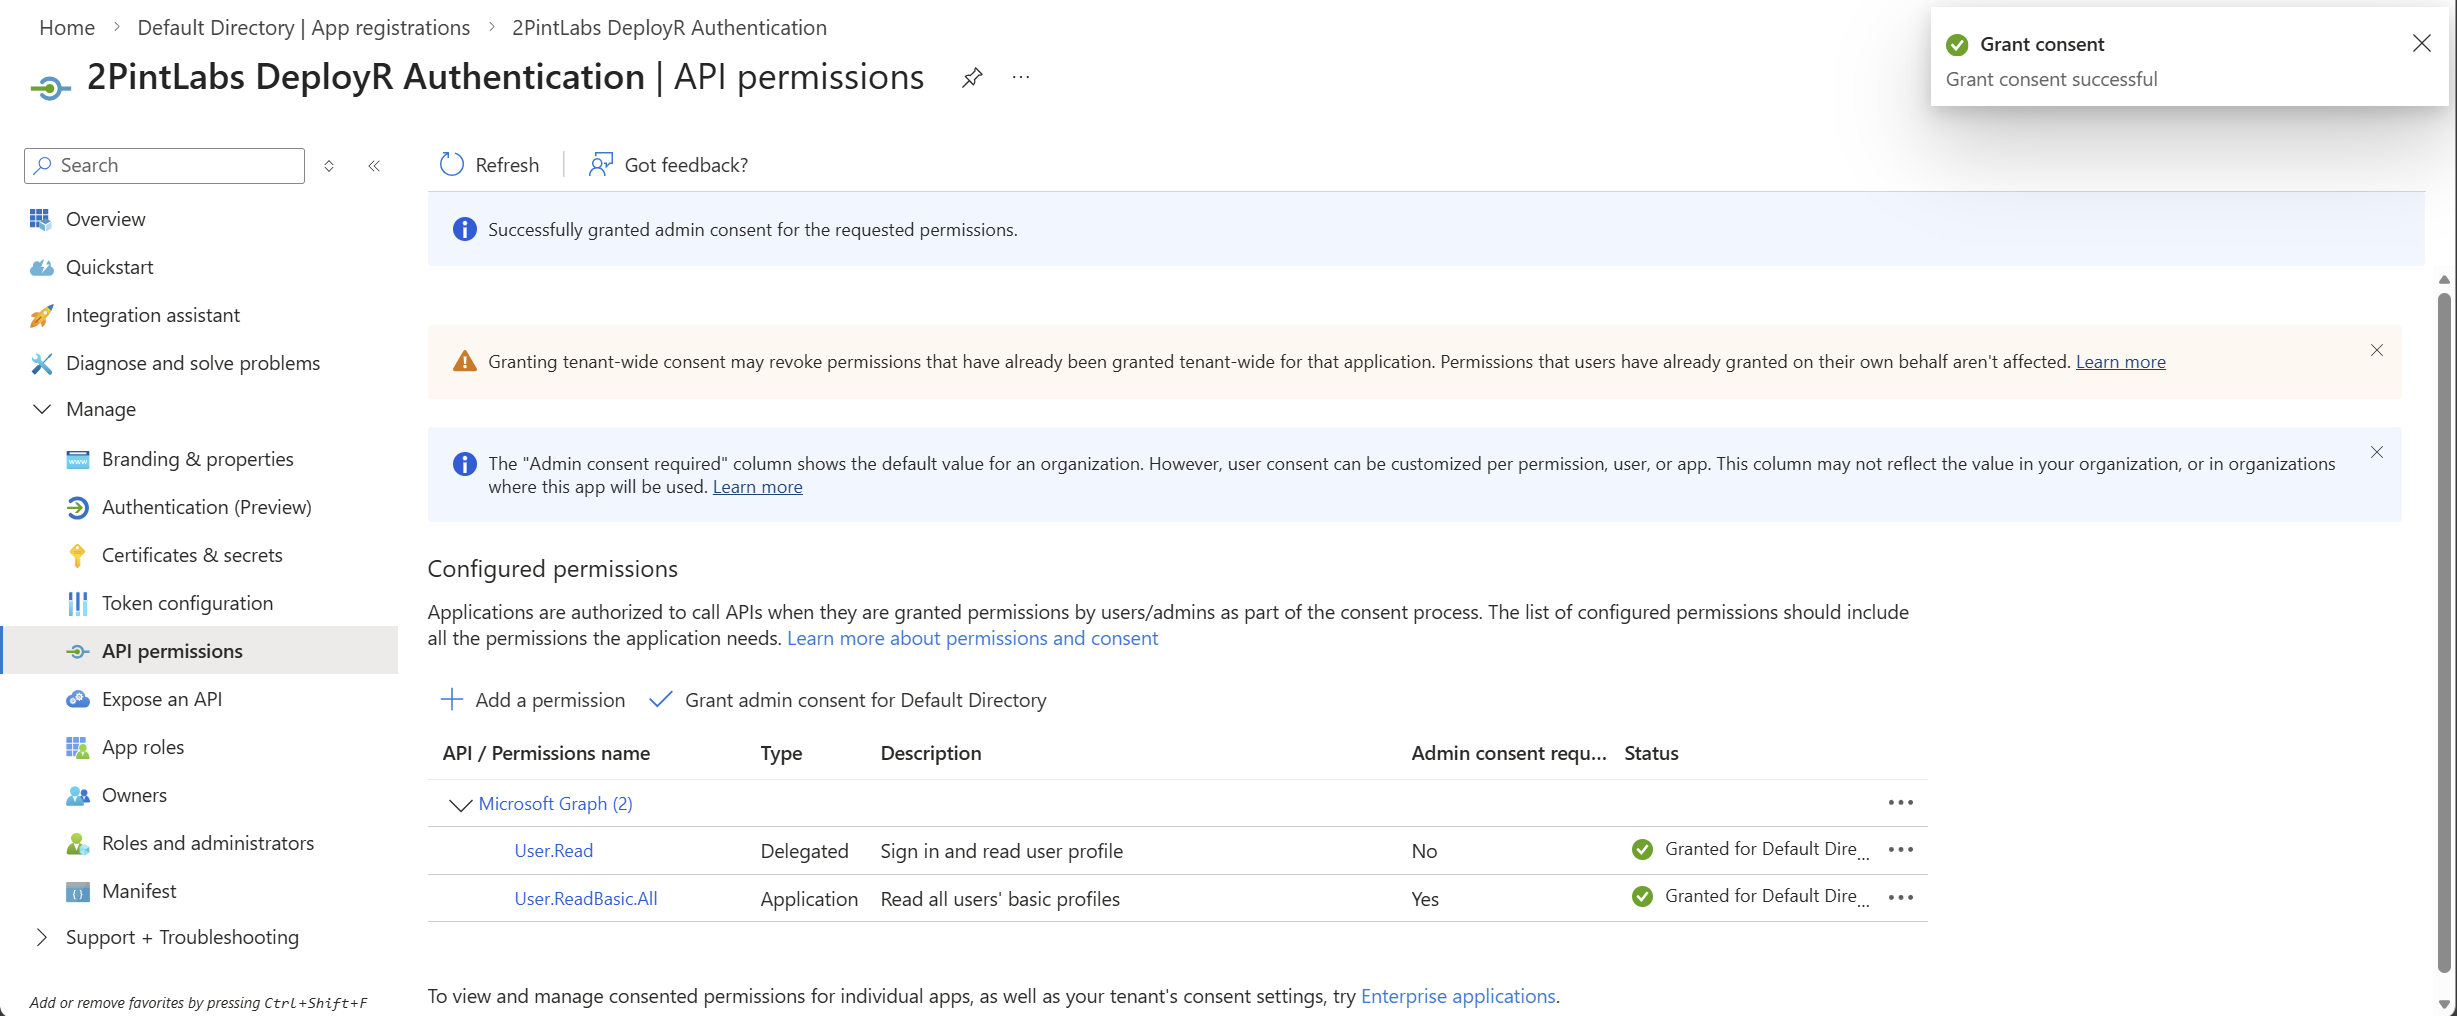
Once you click on "Microsoft Graph", it will expand giving you options. Choose "Application Permissions", then search on User.ReadBasic, expand the "User" area, then check the box for "User.ReadBasic.All" and click "Add permissions"
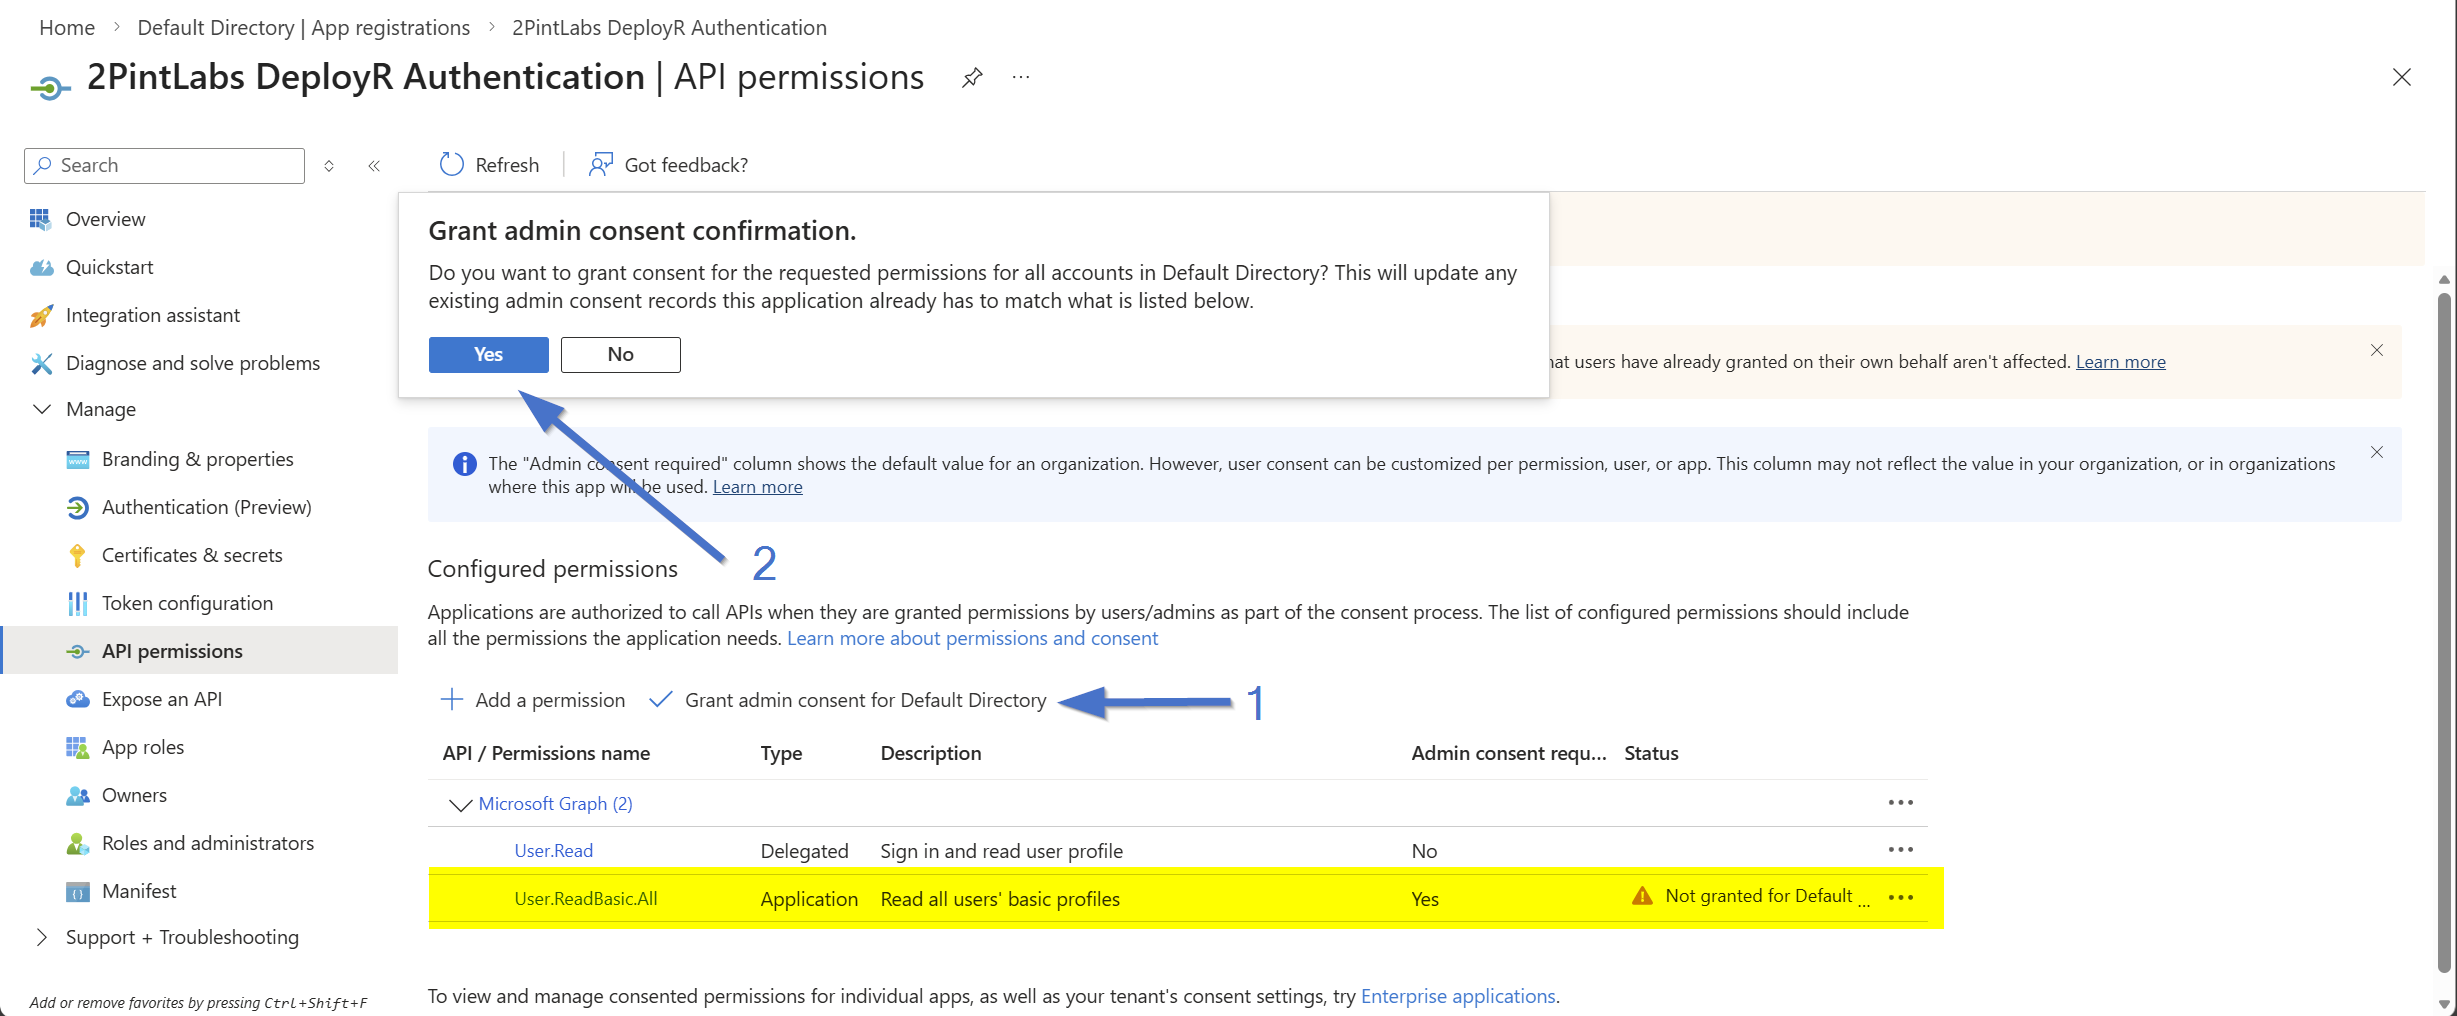
Once you've clicked "Add permissions", you'll now see this below, click on "Grant admin consent for Default Directory", a dialog will appear, click "Yes"
On the "Expose an API" page, click the "Add" link next to the "Application ID URL" text. Keep the default value, then click "Save".
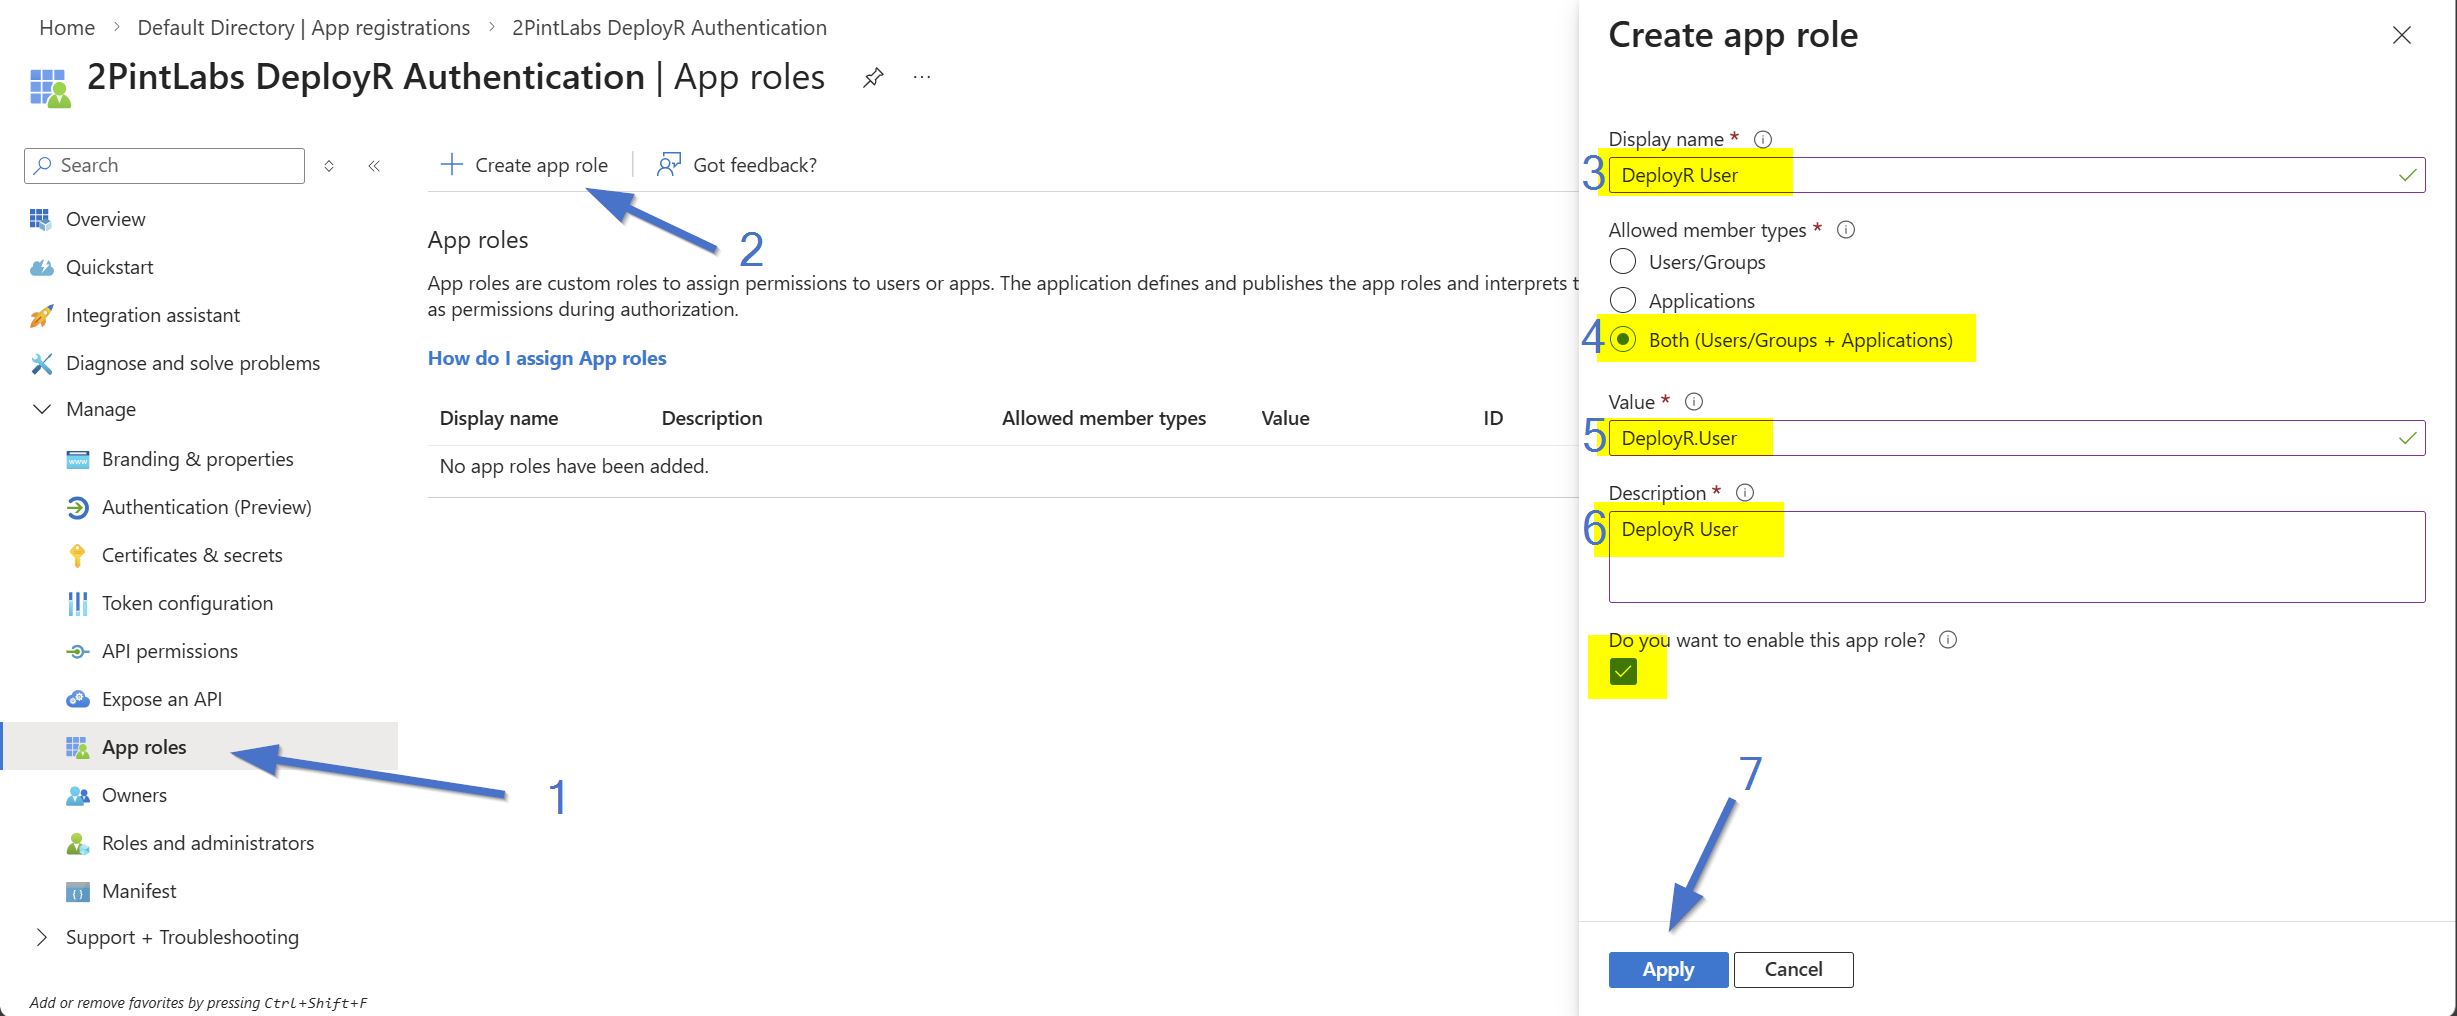
On the "App roles" page, click to "Create app role". Fill in the values as indicated and then click "Apply" to create the role.
* DeployR User (Display name)
* Both (Users/Groups + Applications)
* DeployR.User (Value)
* DeployR User (Description)
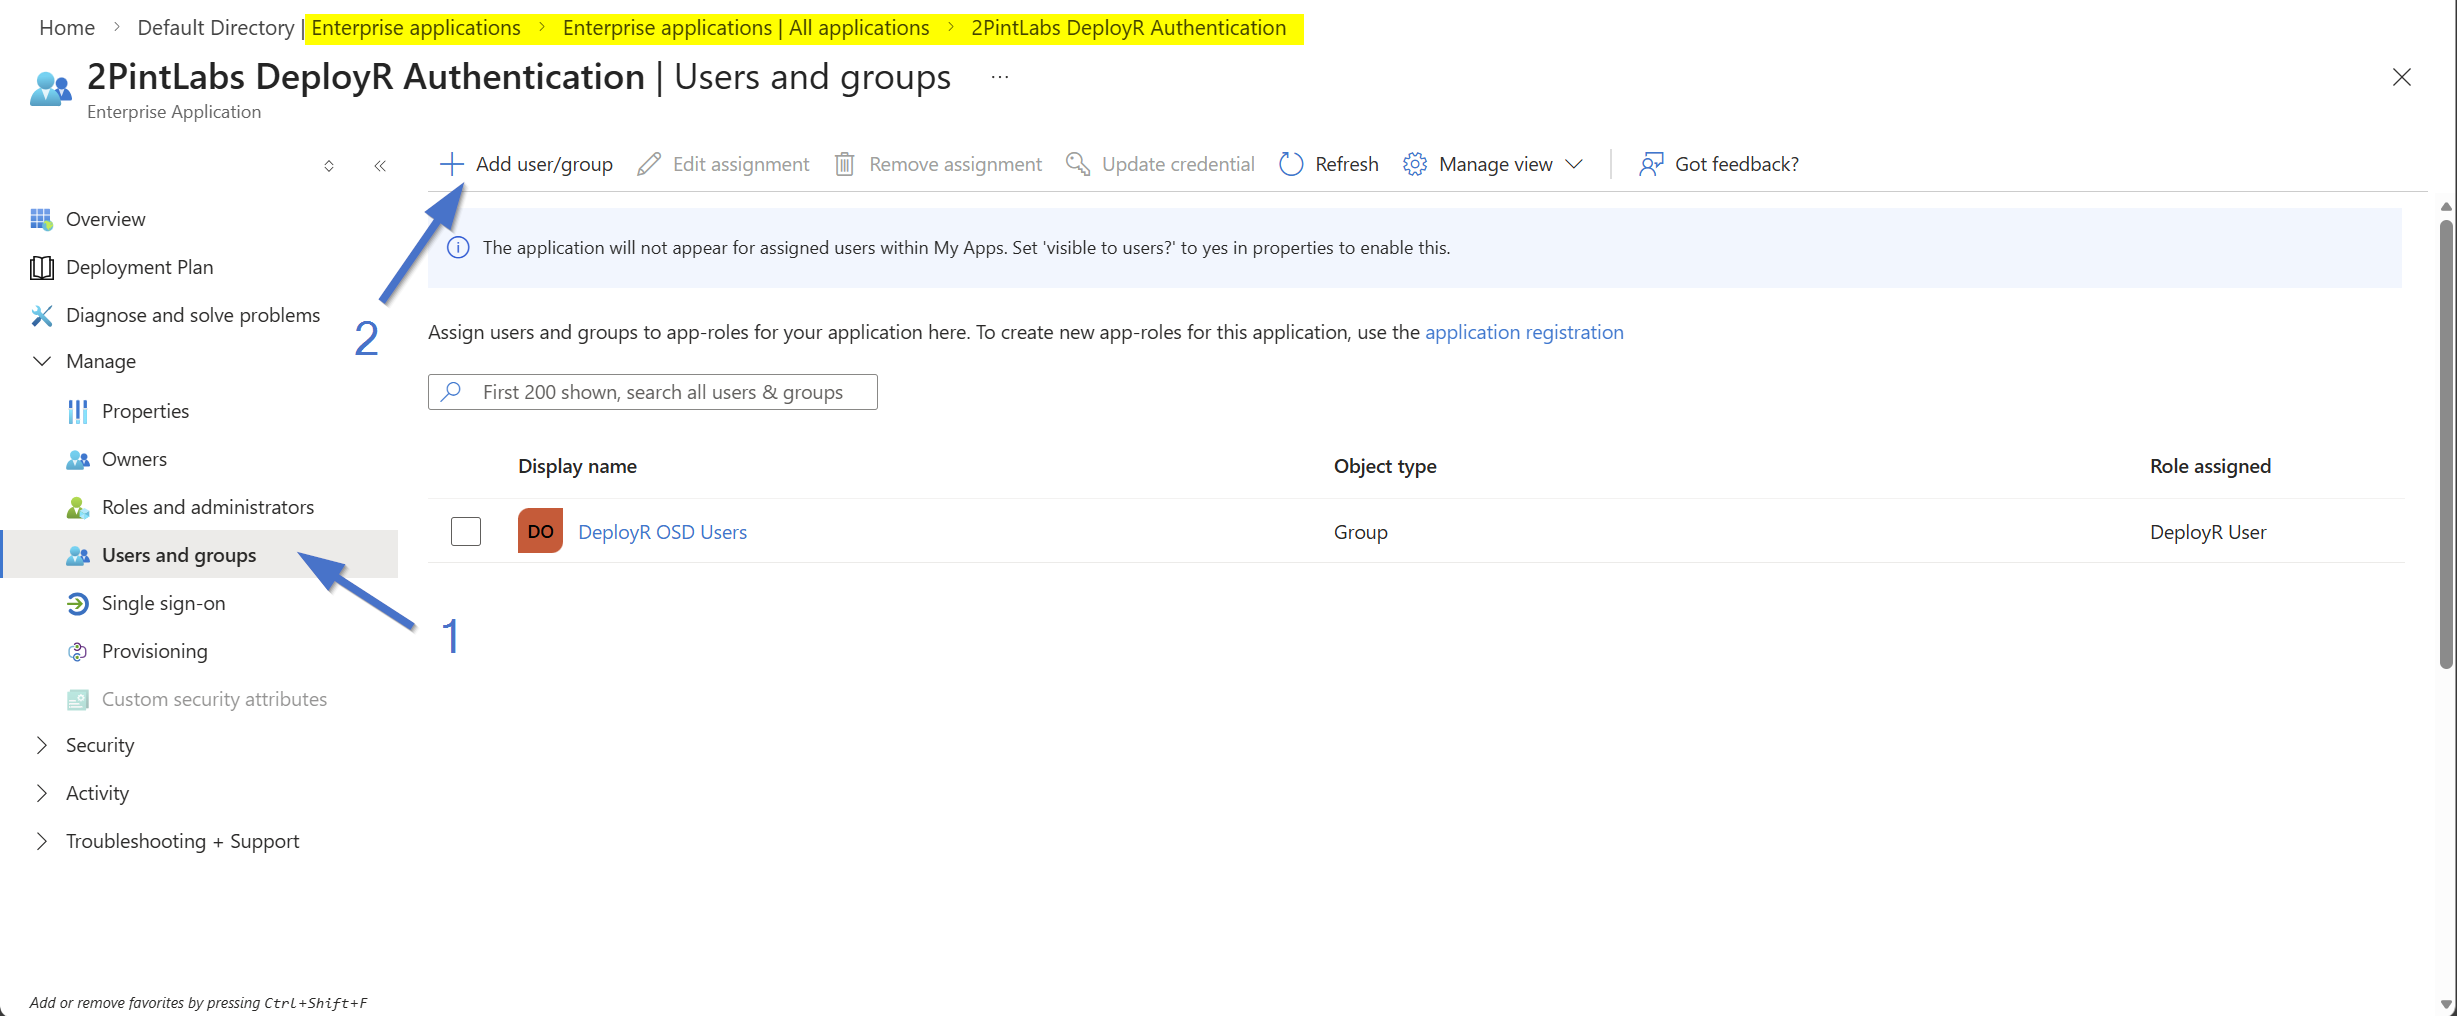
Switch to the "Enterprise applications" node in the Entra portal and find the application that you just created and configured. Click on the "Users and Groups" node, then click to "Add user/group" and specify the user or group that should be granted access. (Since there is only one role defined, that will be pre-selected.) In this Example, a pre-created group called "DeployR OSD Users" was created and populated with Entra Users who will have rights to authenticate the DeployR OSD task sequences.
### Configure DeployR
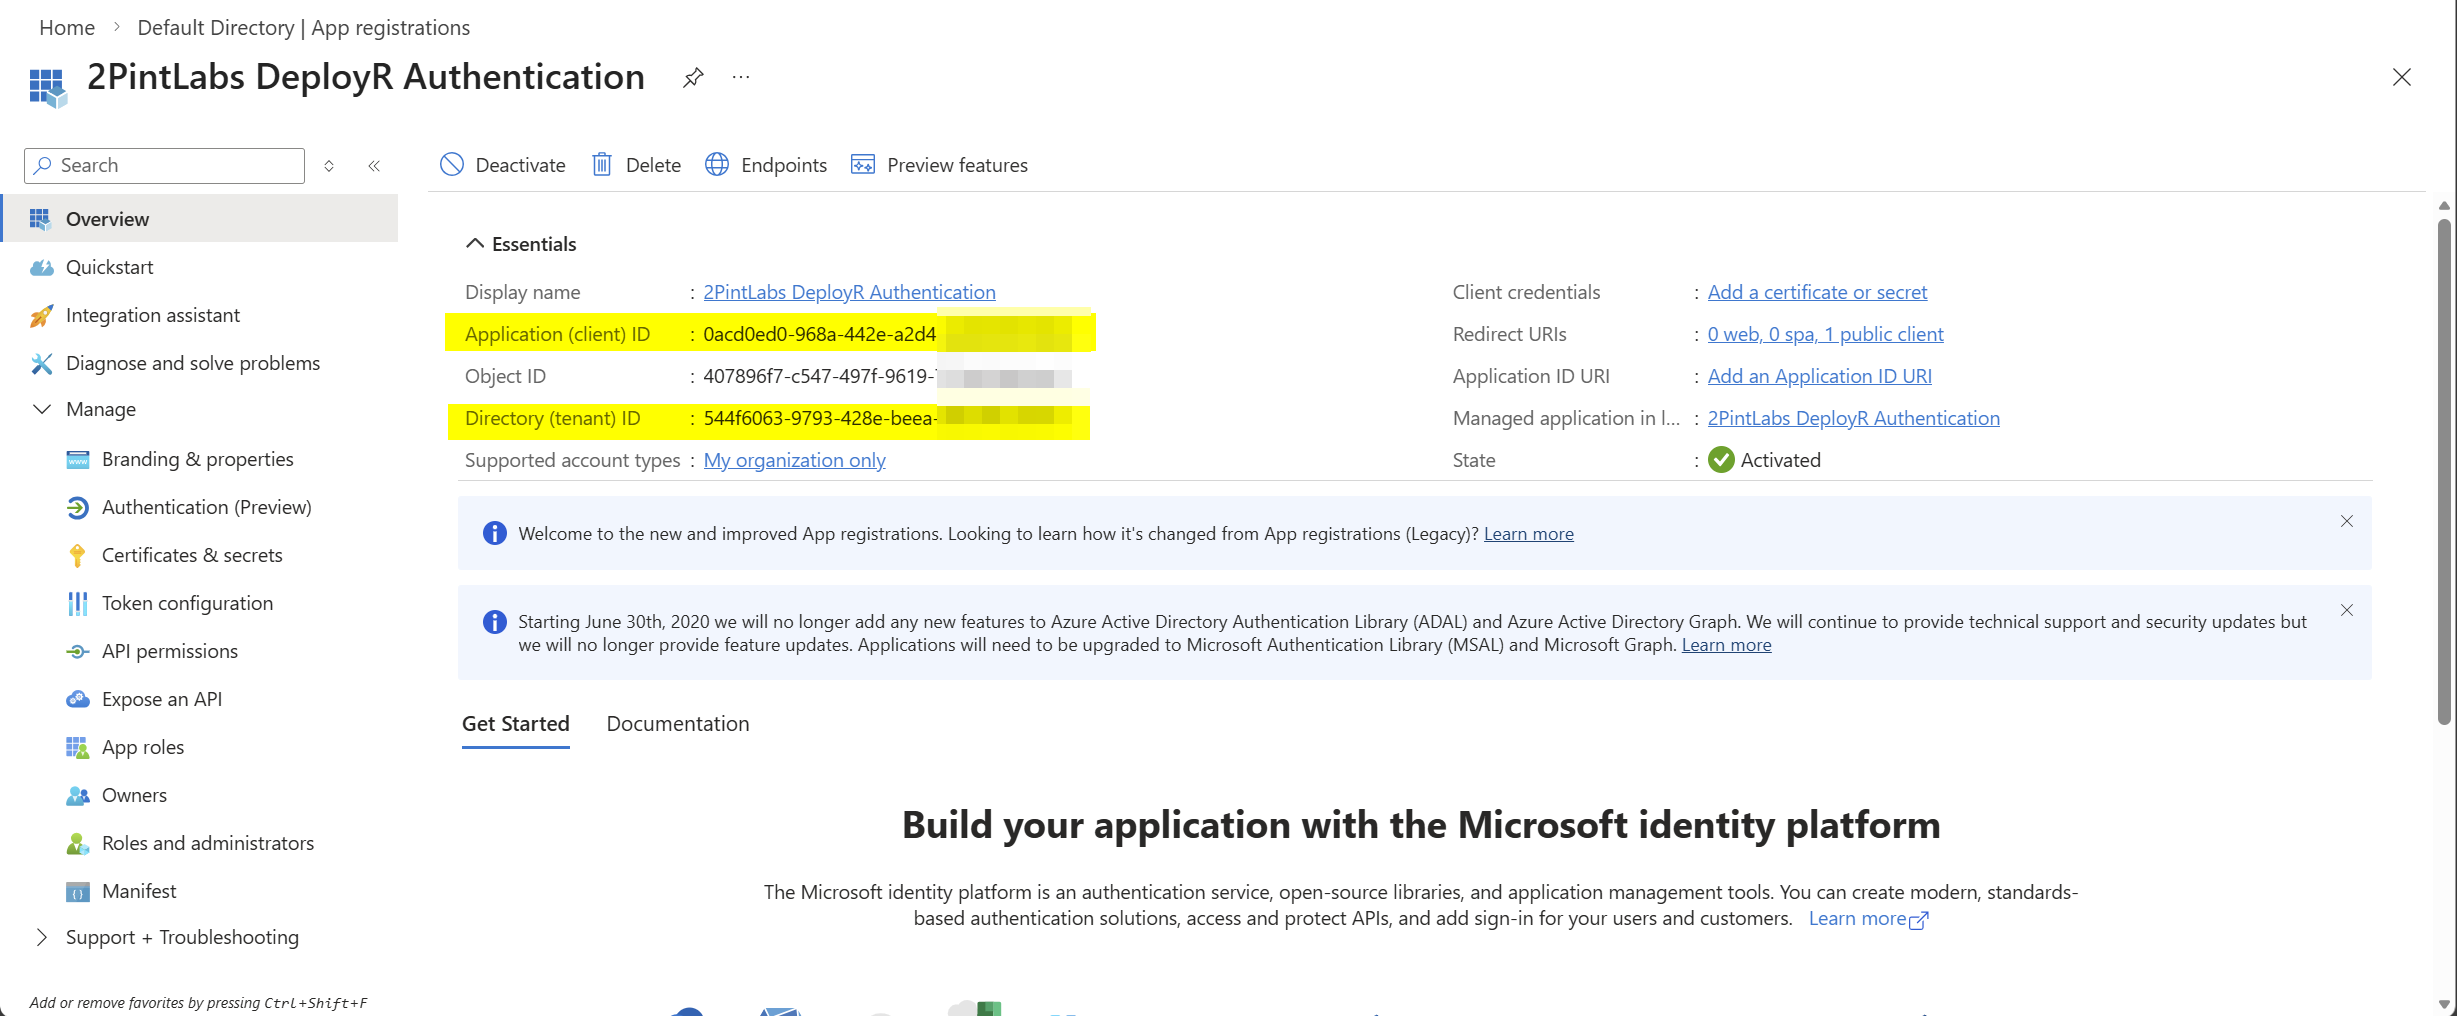
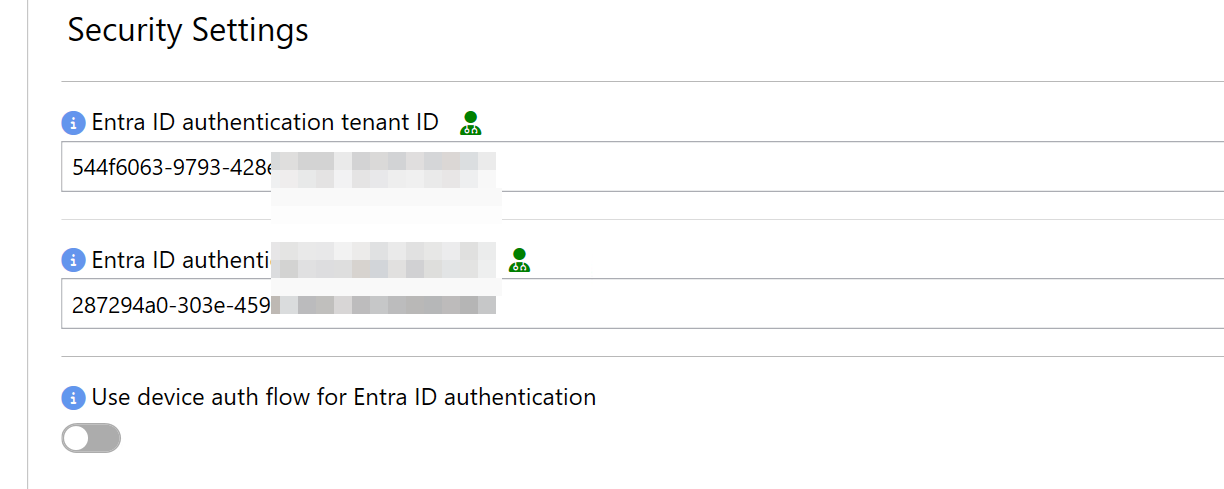
With the Entra app created and configured, you can now configure DeployR to use this. Open the "Configure DeployR" shortcut from the Start menu, then select "Show advanced." Scroll down to the "Security Settings" section. You can copy the "Entra ID authenticaiton tenant ID" and "Entra ID authentication application ID" values from the app registration in Entra:
Once configured, click "Verify" and then "Save" to save the configuration, then ensure that the DeployR service starts as expected.
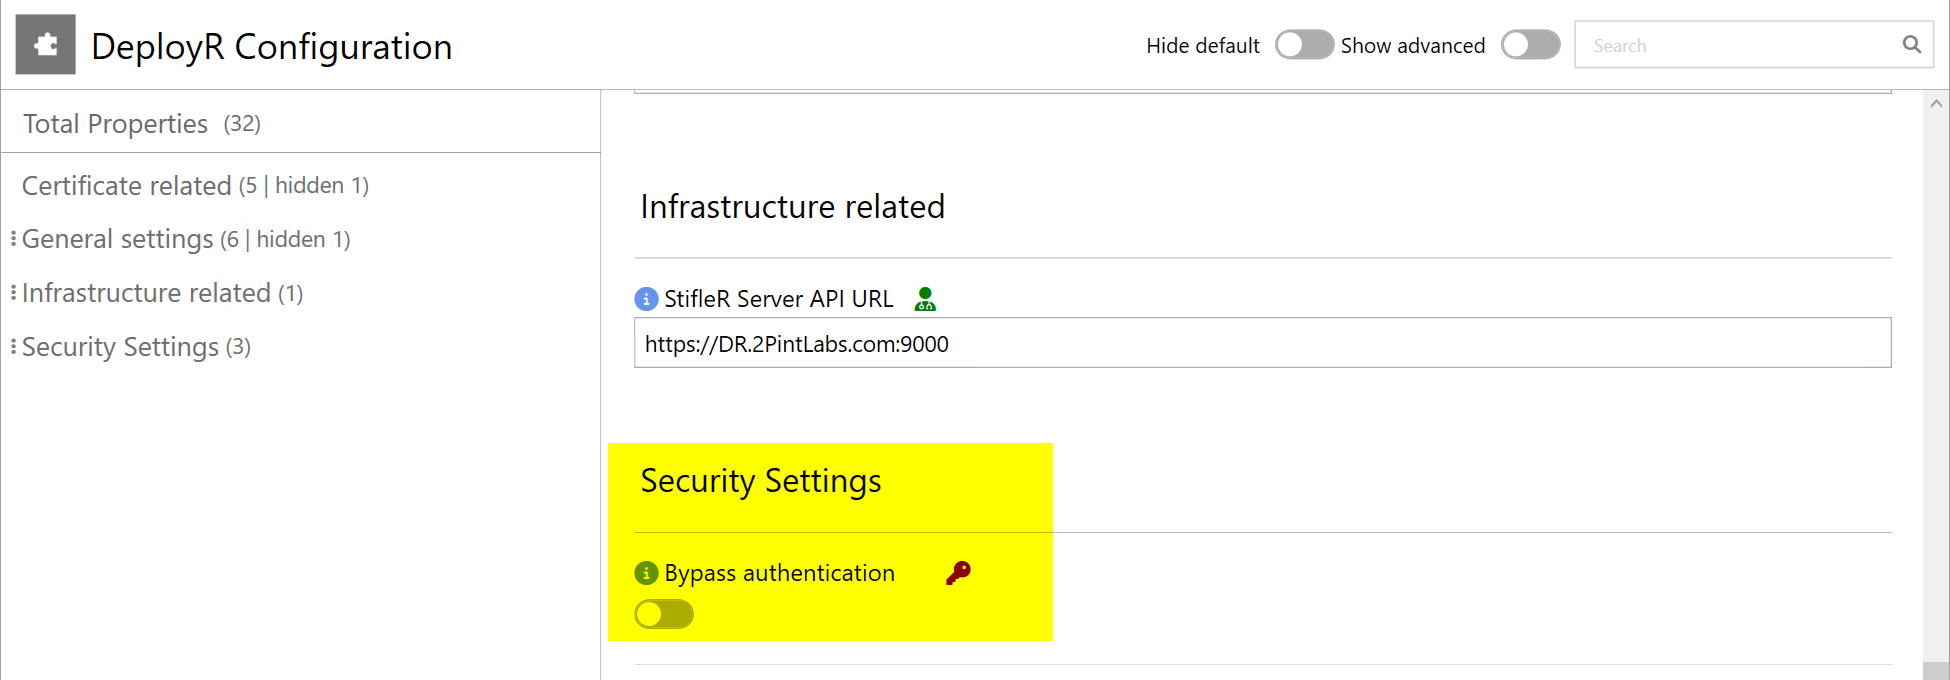
Double check other settings, make sure you do not have "Bypass authentication" enabled. It should be disabled so you are forced to authenticate during OSD.
### Validation
To ensure everything is configured and working, boot into Windows PE (using an ISO, PXE, etc.). You should be challenged to complete the sign-in process:
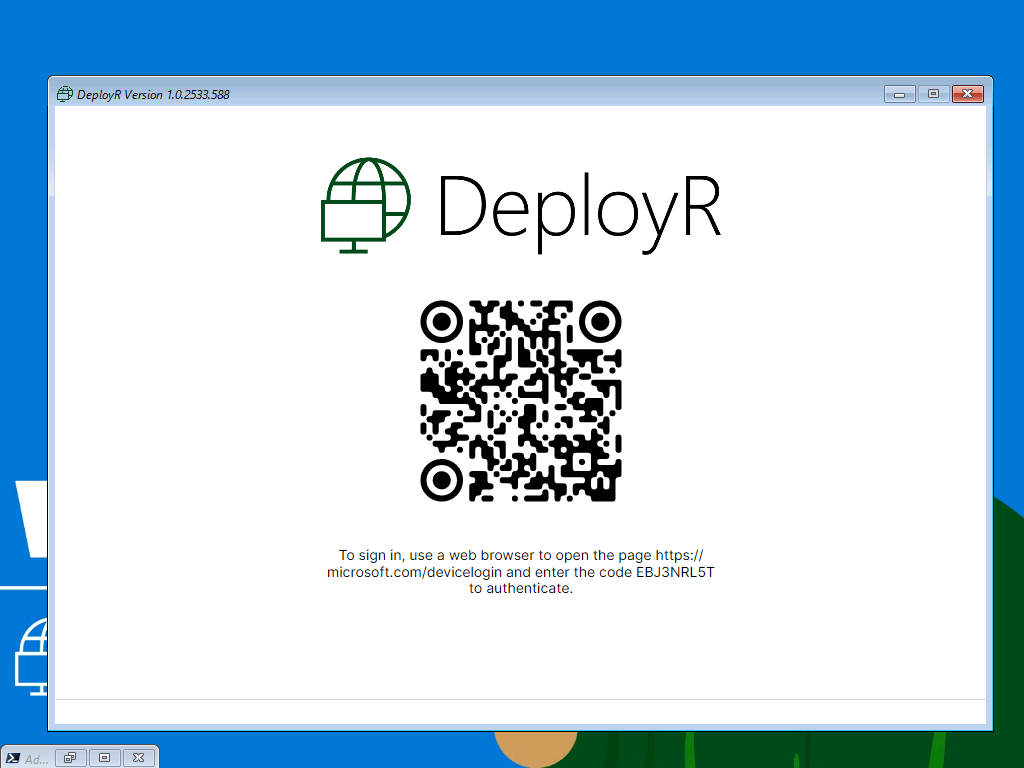
If you toggle "Use device auth flow for Entra ID authentication", you will see this QR code instead when authenticating:
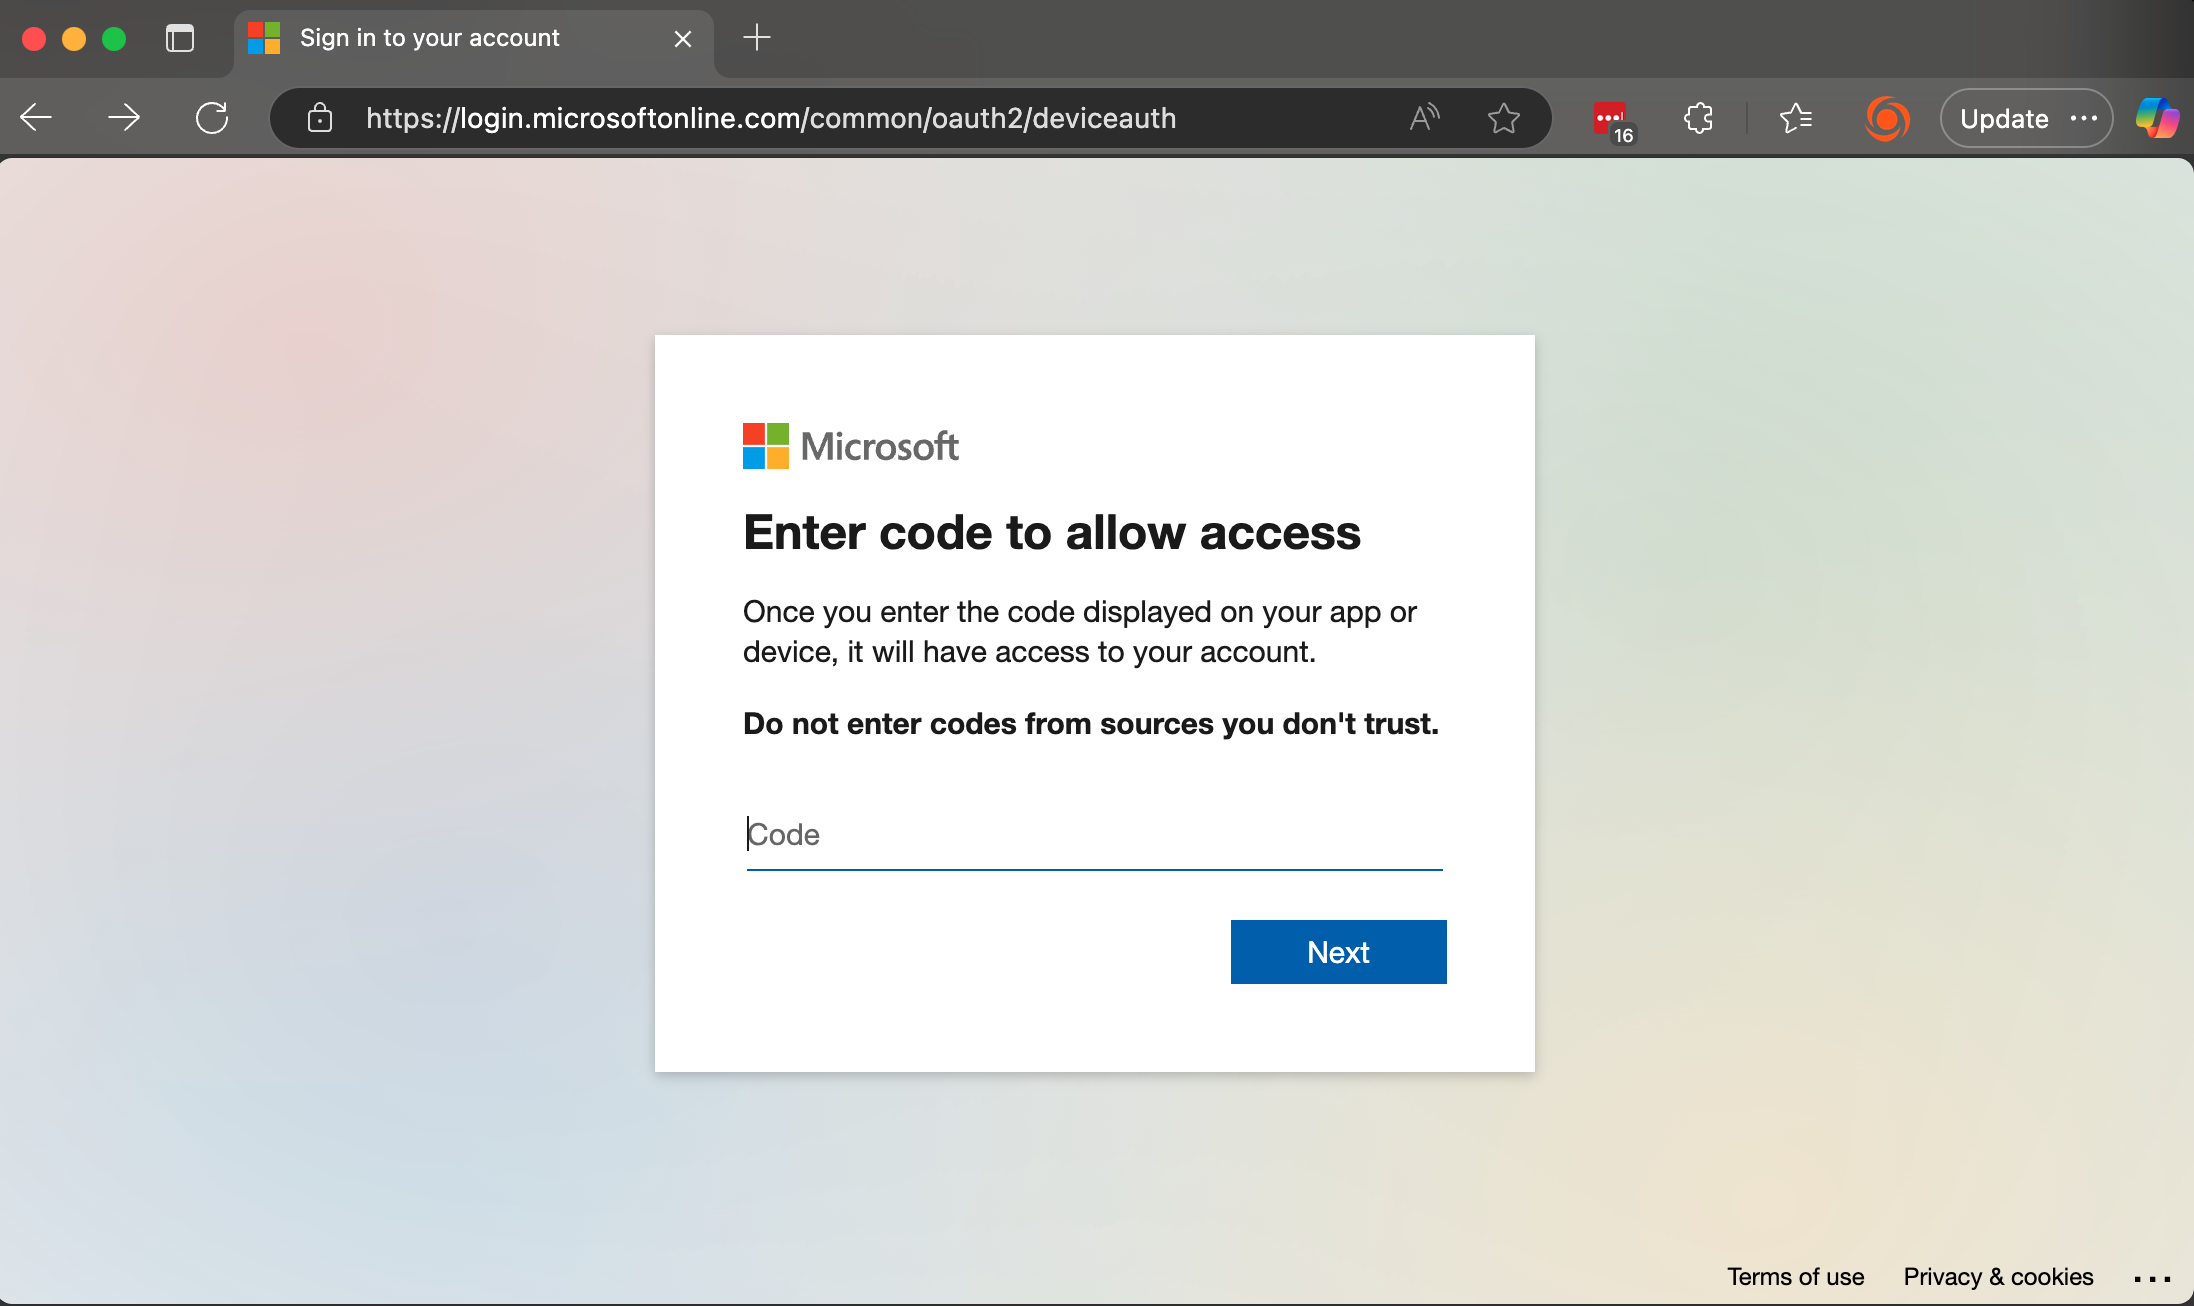
From a browser, you should see a generic prompt asking for the code specified:
Once you type in the code (it cannot be automatically populated), you should see a company-branded page to either sign in or to select an already signed-in account:
After a final confirmation, the sign-in is completed:
And the DeployR client will then continue automatically.