

Adding and removing steps
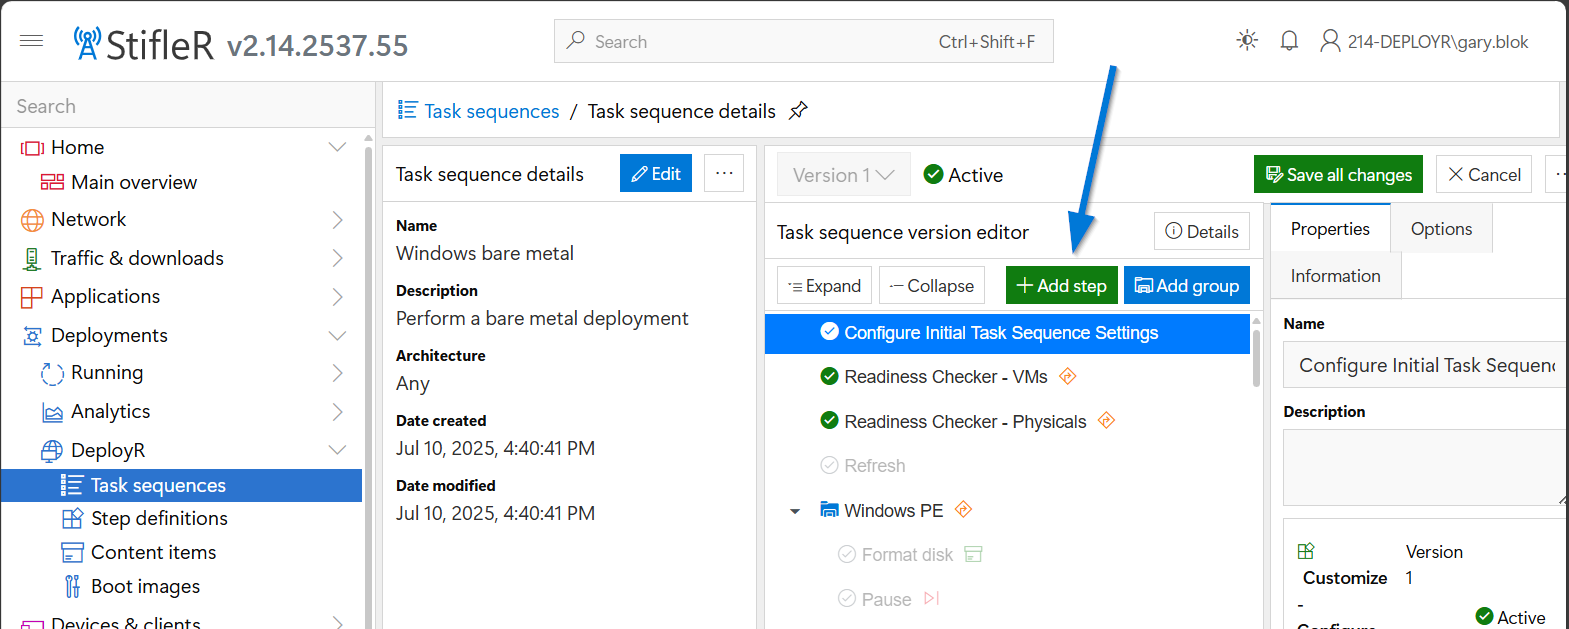
To add a step to a task sequence, open the task sequence and click the blue Edit mode button in the upper-left corner. Once in edit mode, the button will be replaced with a "Save all changes" button and a "Cancel" button.
Adding a Step
There are several ways to add steps. The Add Step button in the Task sequence version editor frame lets you select a step and add it to the task sequence. By default, the step is added at the end, but you can move it to the desired location.
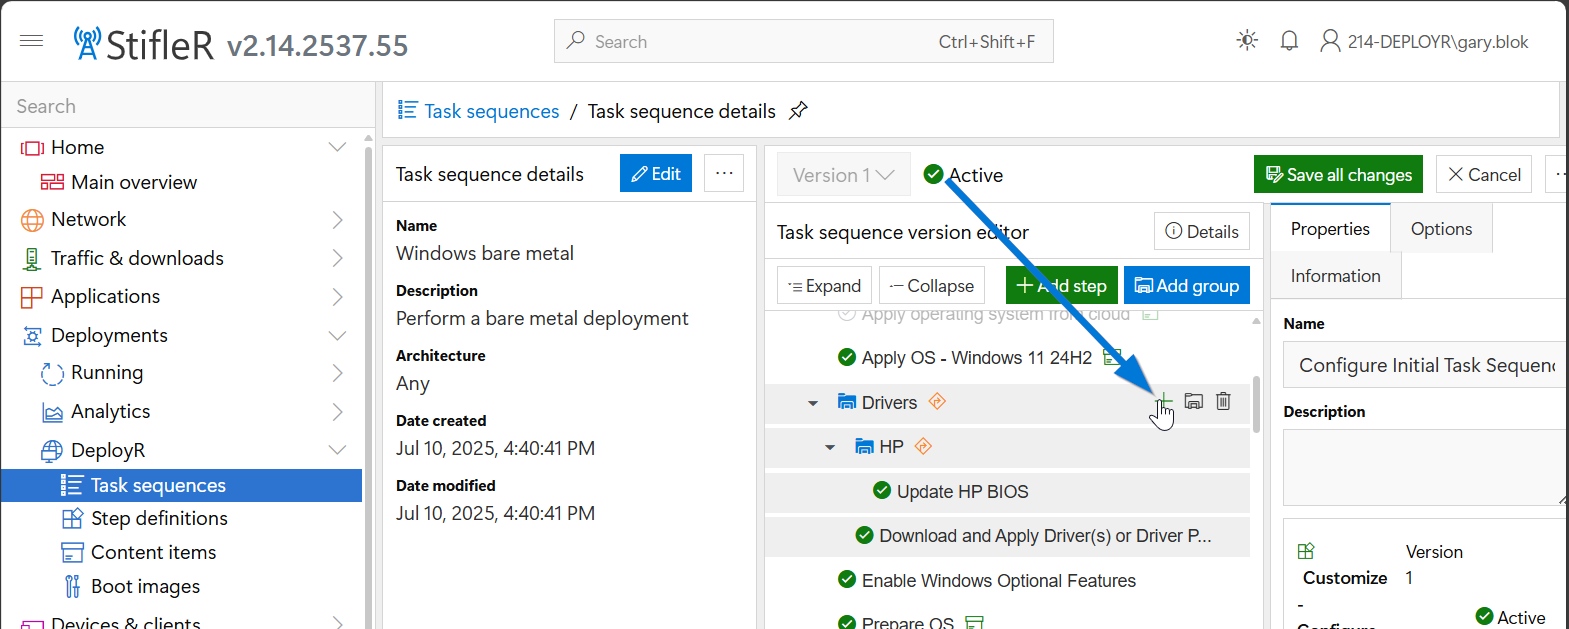
Alternatively, navigate to the group where you want to add the step and click the plus button to the right of the folder icon.
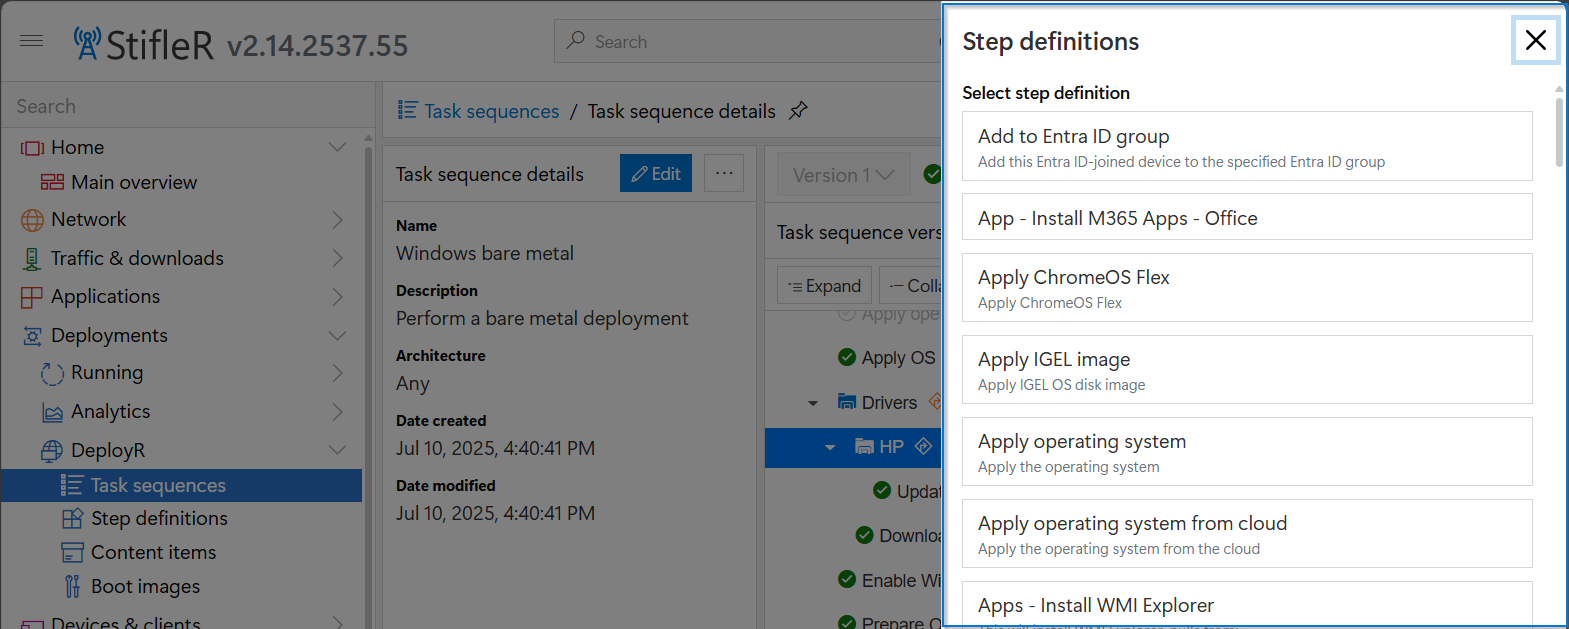
A panel appears on the right with the available step definitions:
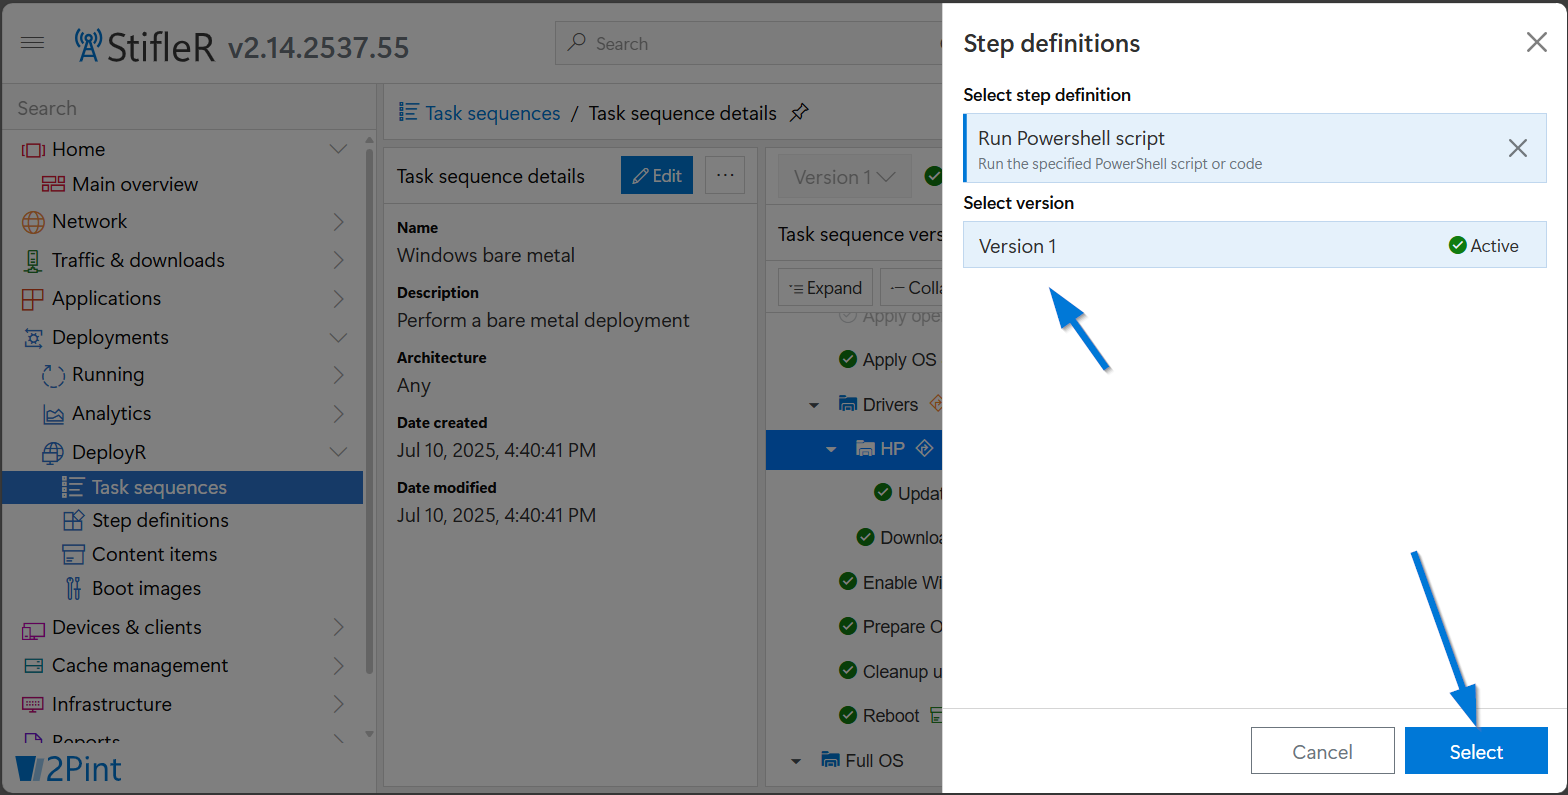
Choose the version (often there is only one), then click "Select".
The step is added as the last step in the group that was selected when you clicked the "+" icon.
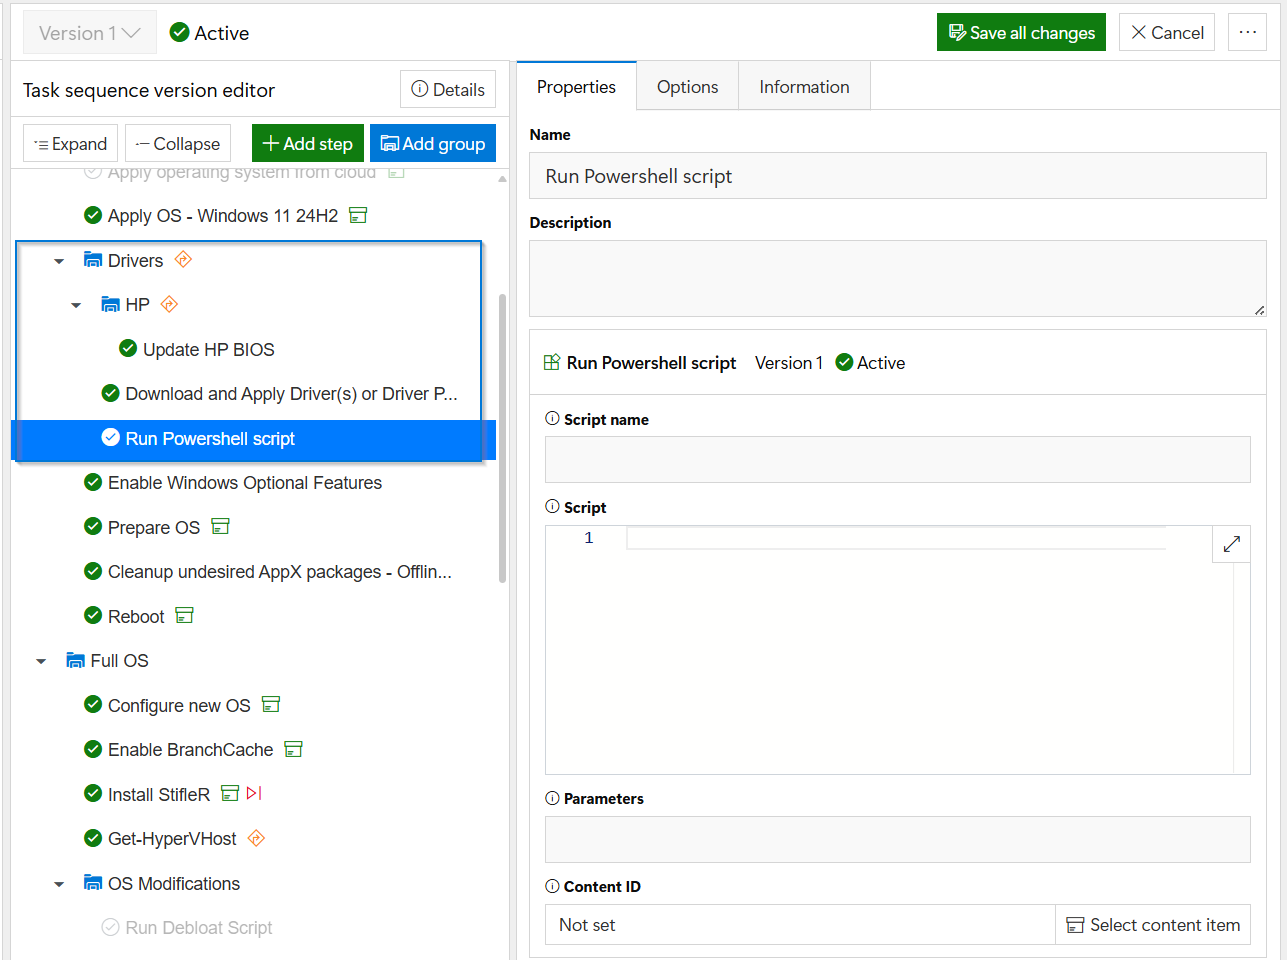
At this point, edit the step to add the name and script information, and click Save. If you move away from the page without saving, all changes completed will be lost, resulting in the same behavior as pressing the "cancel" button.
Removing a Step
To remove a step, put the task sequence in edit mode, find the step, and hover over it to display the available option icons. Then click the trash can icon.
In this example, I have the "Update HP BIOS" step highlighted, but I then hover over the new blank "Run PowerShell script" step to show the trash can icon, which I will then click to remove it.
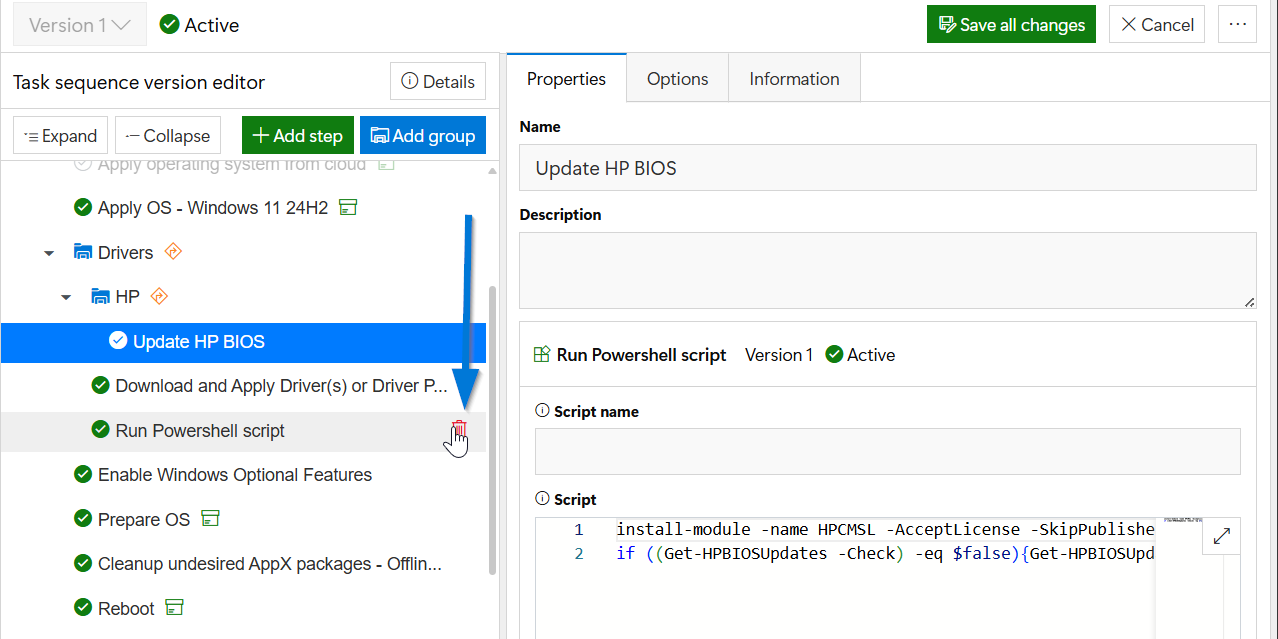
The removal is immediate; there is no "are you sure about that?" dialog box. If you accidentally delete something and have instant regret, press the cancel button! When editing is complete, press the "Save all changes" button.
Last updated