> For the complete documentation index, see [llms.txt](https://documentation.2pintsoftware.com/llms.txt). Markdown versions of documentation pages are available by appending `.md` to page URLs; this page is available as [Markdown](https://documentation.2pintsoftware.com/deployr/deployr-enterprise/deployr-server-installation.md).
# DeployR Server installation
## Prerequisites
* Server has a valid FQDN DNS entry (required even in workgroup environments), e.g. `deployr.company.local`
* Open the required inbound port: **7281 TCP** (secure client communications) — see the [StifleR Firewall Ports](/stifler/setup/prerequisites.md#firewall-configuration) and [2PXE Firewall Considerations](/2pxe-server/planning/firewall-considerations.md) pages for related components
* StifleR Server 3.1 and StifleR Dashboard 3.1 installed and reachable (only these two StifleR components are required to operate DeployR — see [StifleR Server installation](/stifler/setup/installation/stifler-server-installation.md) and [StifleR Dashboard installation](/stifler/setup/installation/stifler-dashboard-installation.md))
* A supported version of Microsoft SQL Server (Express edition or higher), for metadata storage and deployment progress tracking
* .NET Runtime 10.0.9, .NET Desktop Runtime 10.0.9, and ASP.NET Core Runtime 10.0.9 installed (DeployR versions earlier than 1.2 require .NET 8.0 runtime components instead)
* PowerShell 7.6.3 for full compatibility
* Windows ADK for Windows 11 — recommended: Release version **10.1.26100.9457**
* Version 10.1.28000.1 is **not** recommended due to known driver integration issues
* TLS/SSL certificate available for secure communications
* Decide on the service account DeployR will run under (defaults to LocalSystem; a custom service account can be configured if required)
### **Optional components**
**BranchCache (Windows feature)** — enable if you plan to use BranchCache for content distribution.
**Windows Subsystem for Linux (WSL)** — Only required if you plan to support Linux bare metal deployments. The server must support hardware-assisted virtualization, or nested virtualization if DeployR itself is running in a VM.
{% hint style="info" %}
Automation scripts to install and configure prerequisites are available on GitHub: [2Pint-DeployR Pre-Reqs](https://github.com/2pintsoftware/2Pint-DeployR/blob/main/Installs/Pre-Reqs/readme.md)
{% endhint %}
{% hint style="info" %}
Ensure the StifleR Dashboard can be reached from the DeployR server, and that Windows authentication succeeds. If sign-in works remotely but loops on the DeployR server itself, this is usually an LSA loopback check issue — commonly triggered when accessing the Dashboard via a CNAME alias. See [Microsoft's guidance](https://learn.microsoft.com/en-us/troubleshoot/windows-server/networking/accessing-server-locally-with-fqdn-cname-alias-denied) for details.
{% endhint %}
## Installation
You can also follow video guides that demonstrate the installation of the full 2Pint DeployR suite.
{% embed url="" %}
{% embed url="" %}
{% embed url="" %}
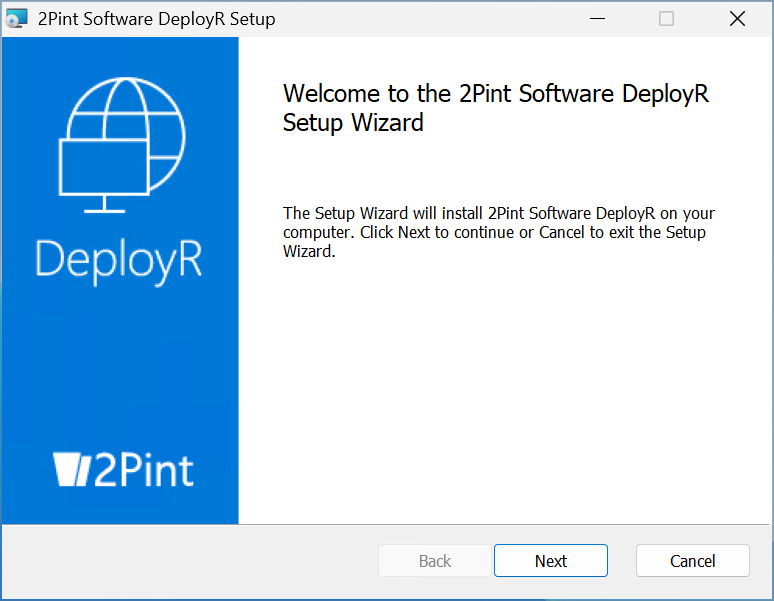
Launch the provided **TwoPint.DeployR.Installer.msi** file. At the welcome screen, click **Next**:
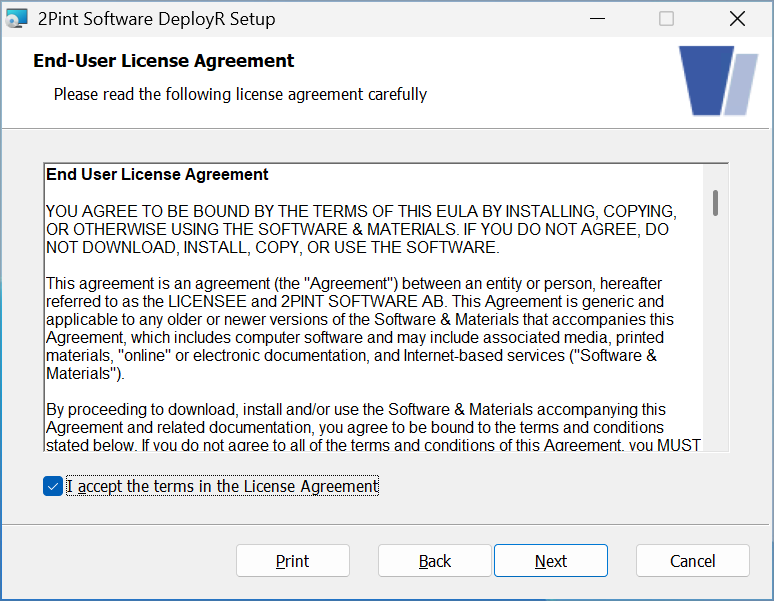
At the "End-User License Agreement" screen, once you have reviewed the EULA, check the box **I accept the terms in the License Agreement**, and then click **Next**.
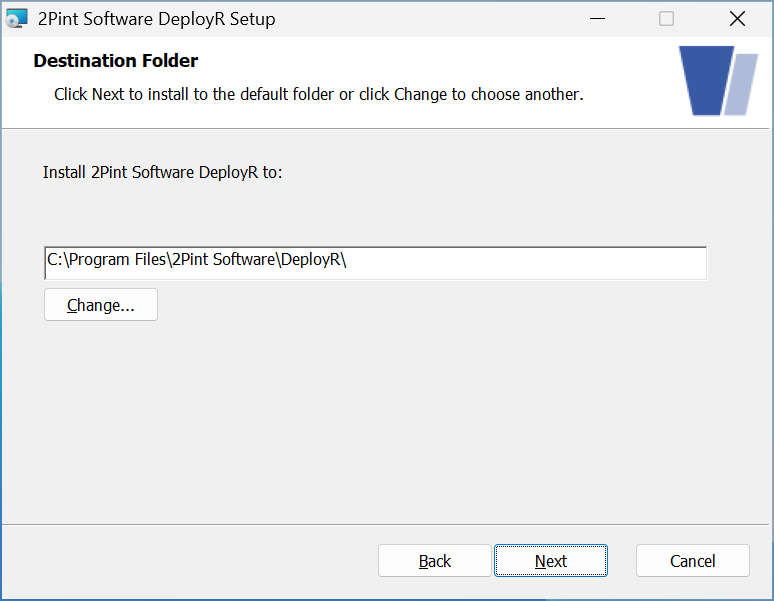
At the **Destination Folder** page, specify the desired installation location then click **Next**:
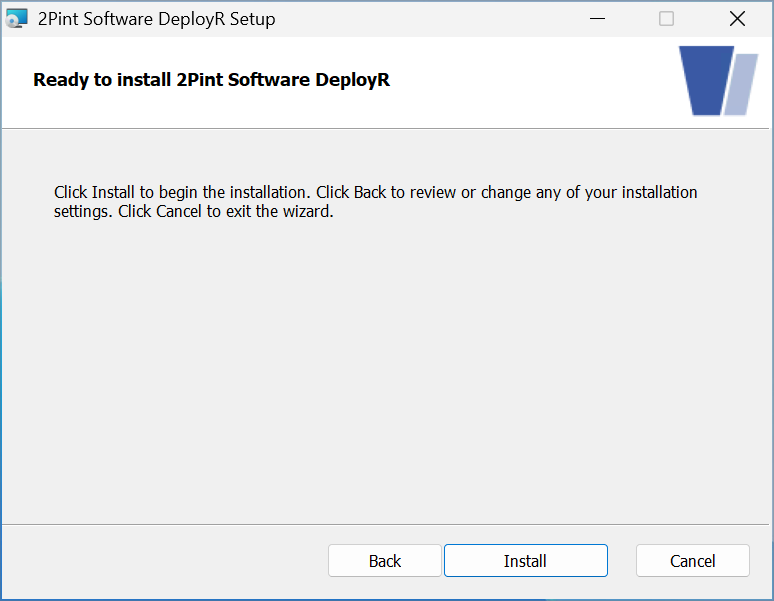
At the **Ready to Install** page, click the **Install** button to perform the installation:
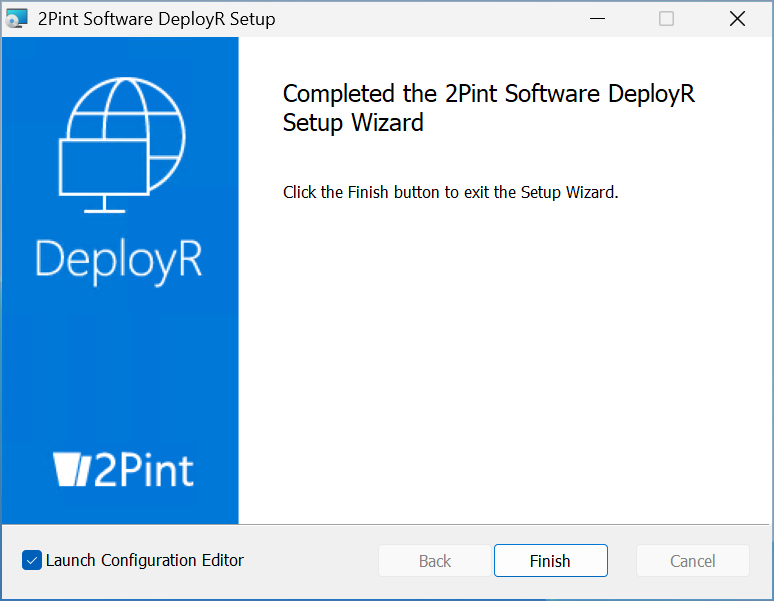
At the **Completed** page, ensure that the **Launch Configuration Editor** checkbox is checked and then click Finish.
## DeployR Configuration
{% hint style="info" %}
DeployR Service will attempt to create the specified SQL databases if they do not yet exist. For this to succeed, the default **NT AUTHORITY\SYSTEM** account needs a logon in SQL Server with the **sysadmin** role.
Alternatively, pre-create the database and assign **NT AUTHORITY\SYSTEM** the **db\_owner** role on it.
To use a different service account instead, grant that account **db\_owner** access to the database, then update the DeployR service settings and restart the service. Note that the service account reverts to NT AUTHORITY\SYSTEM after a DeployR version upgrade.
{% endhint %}
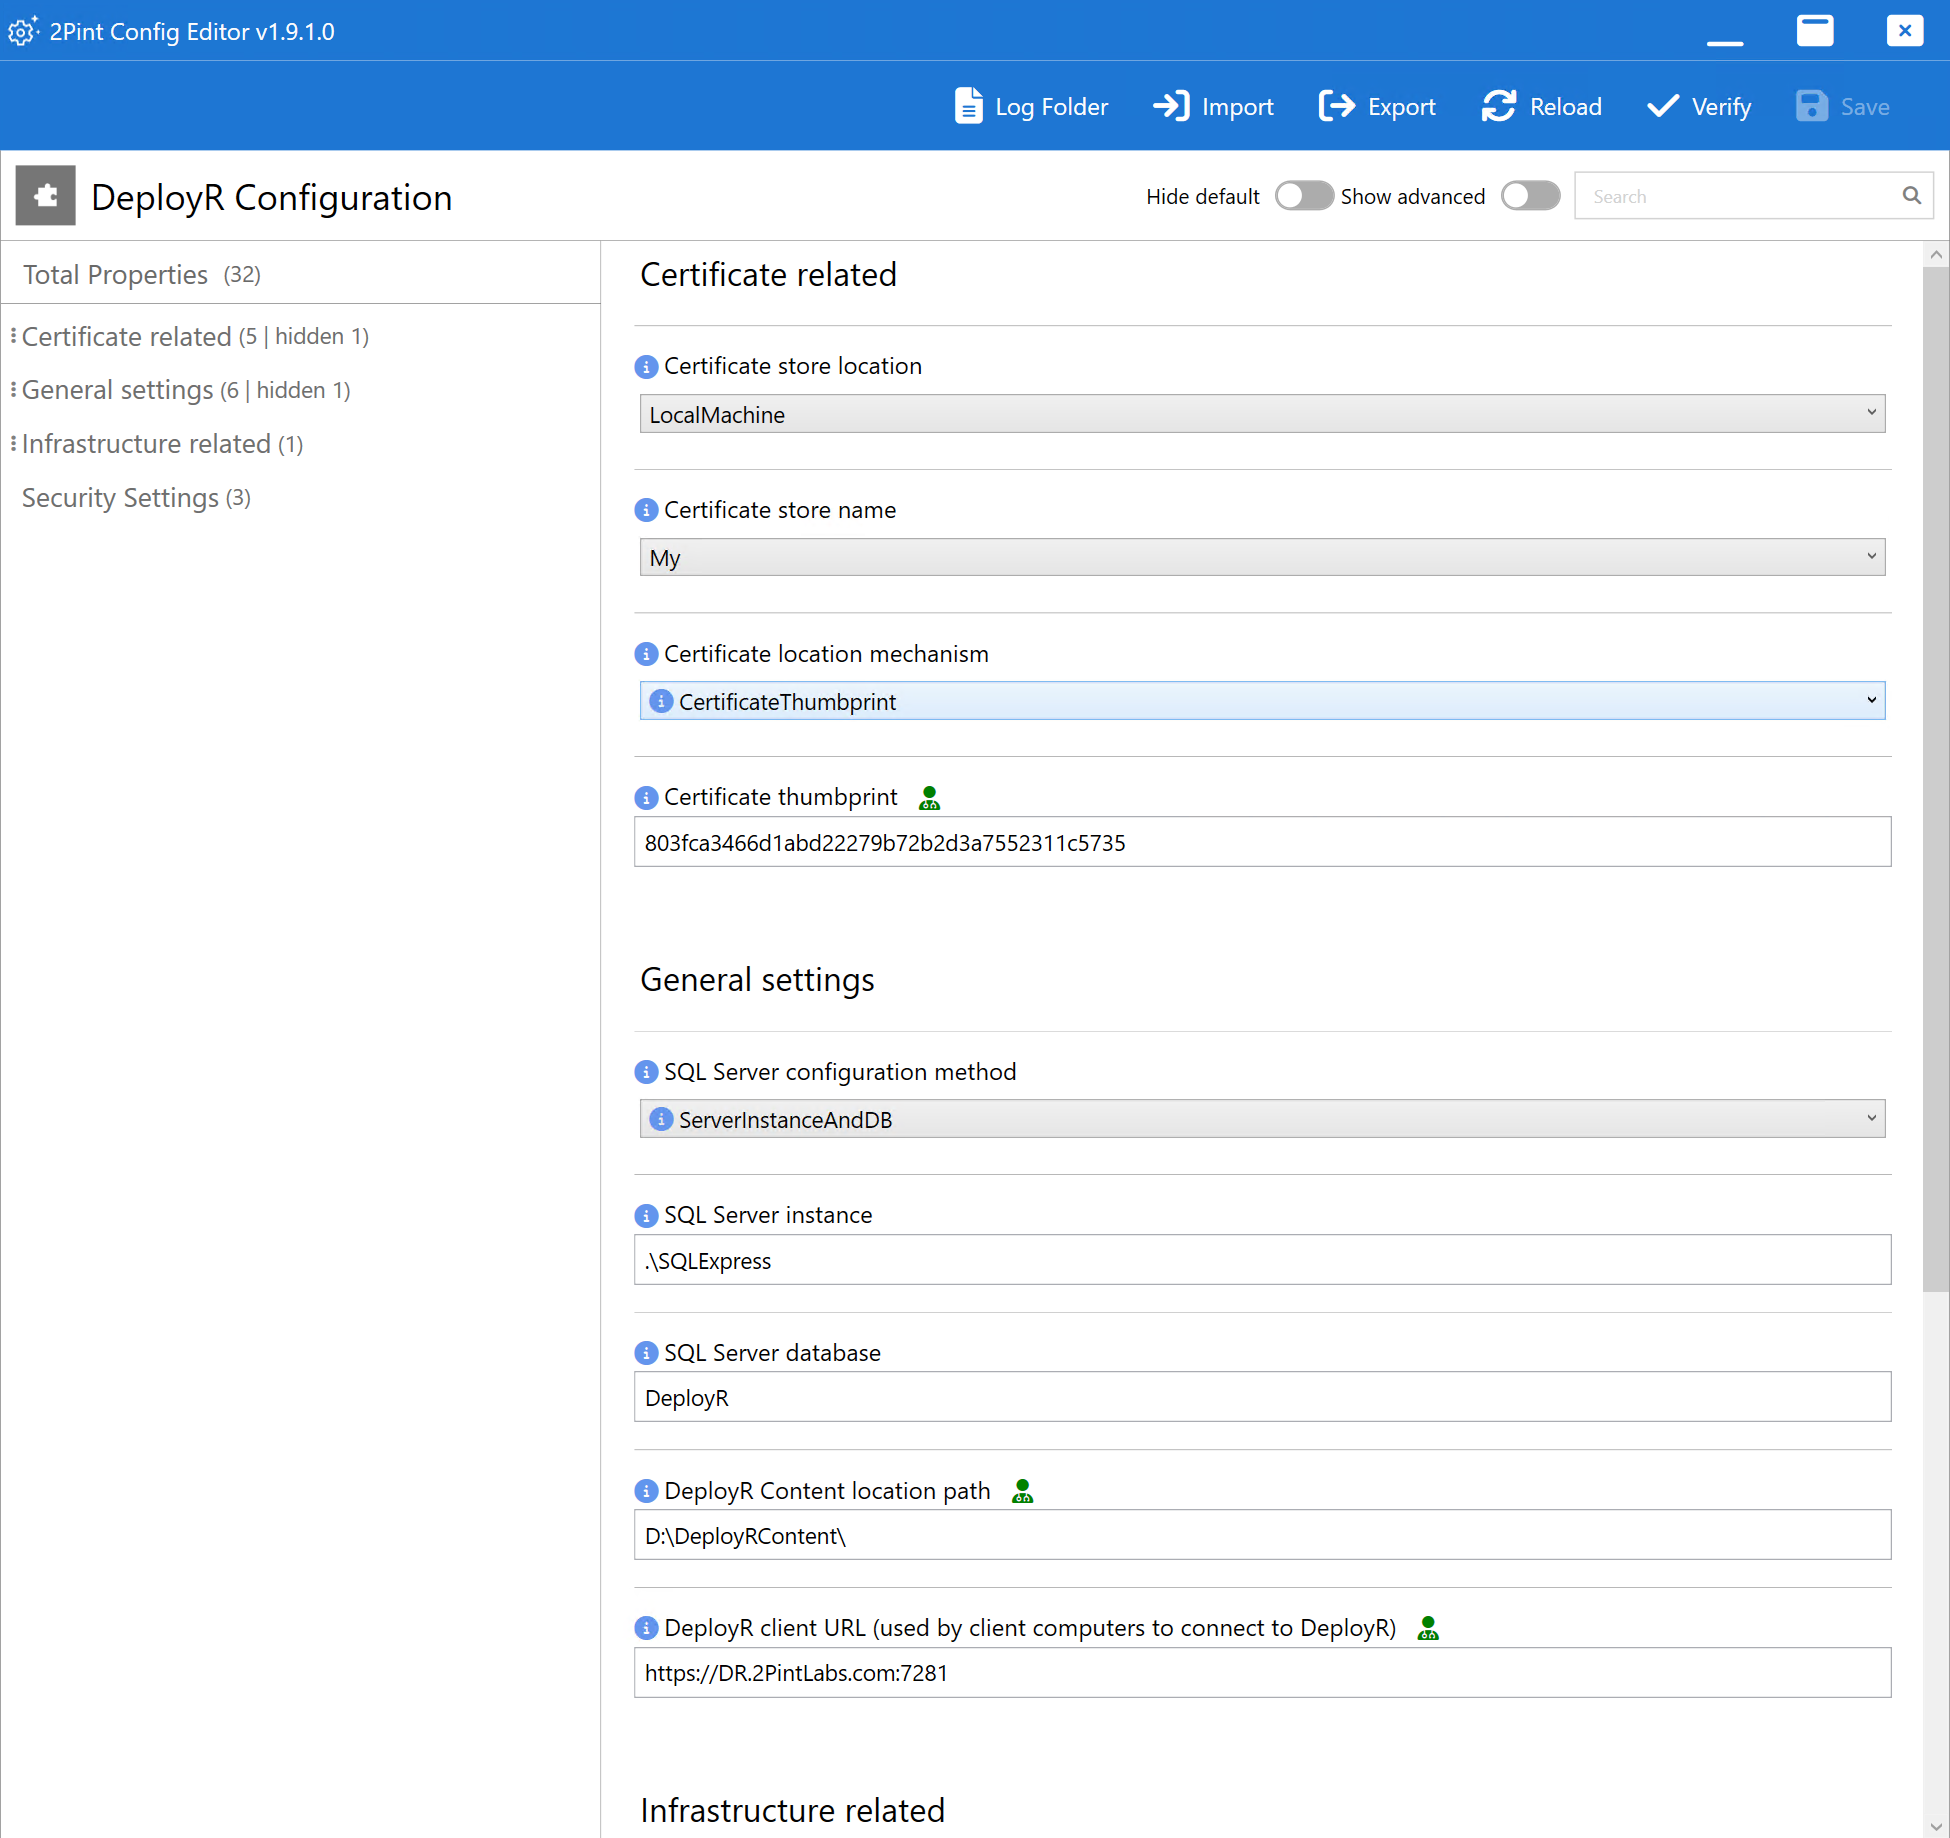
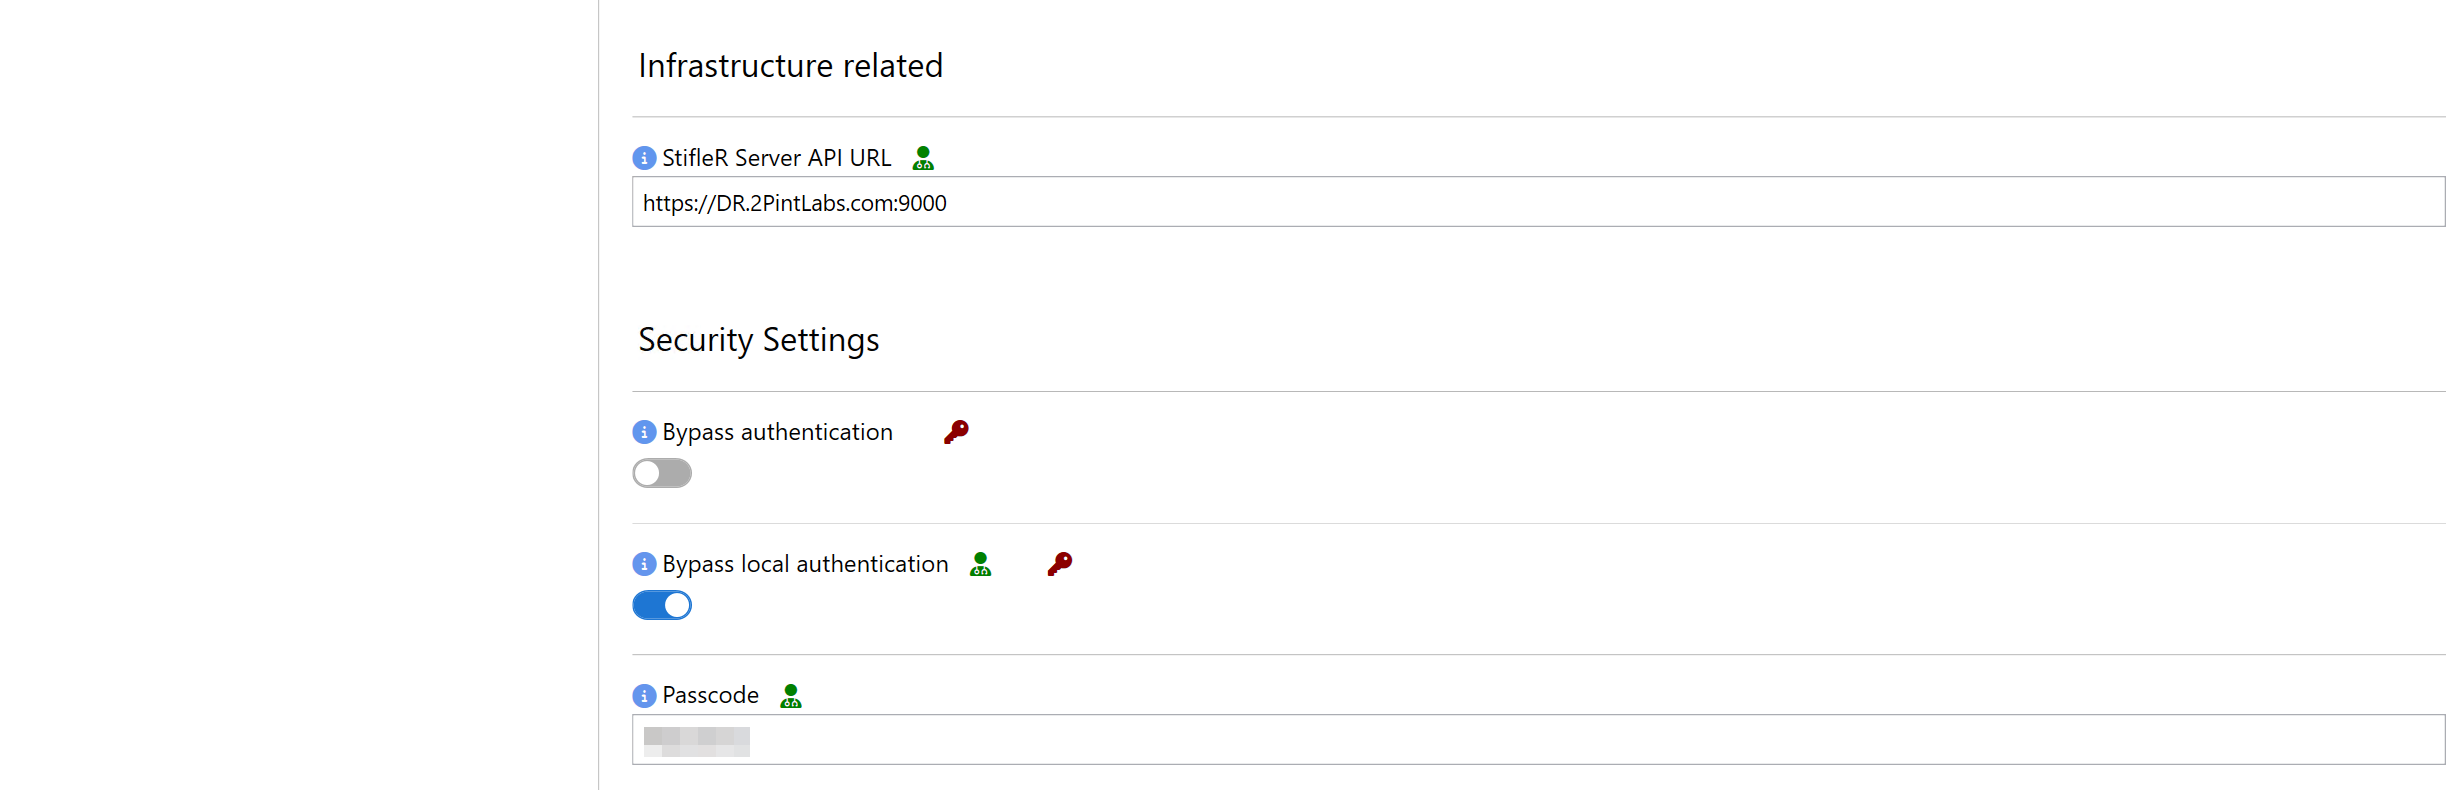
The Configuration Editor will then launch to configure DeployR.
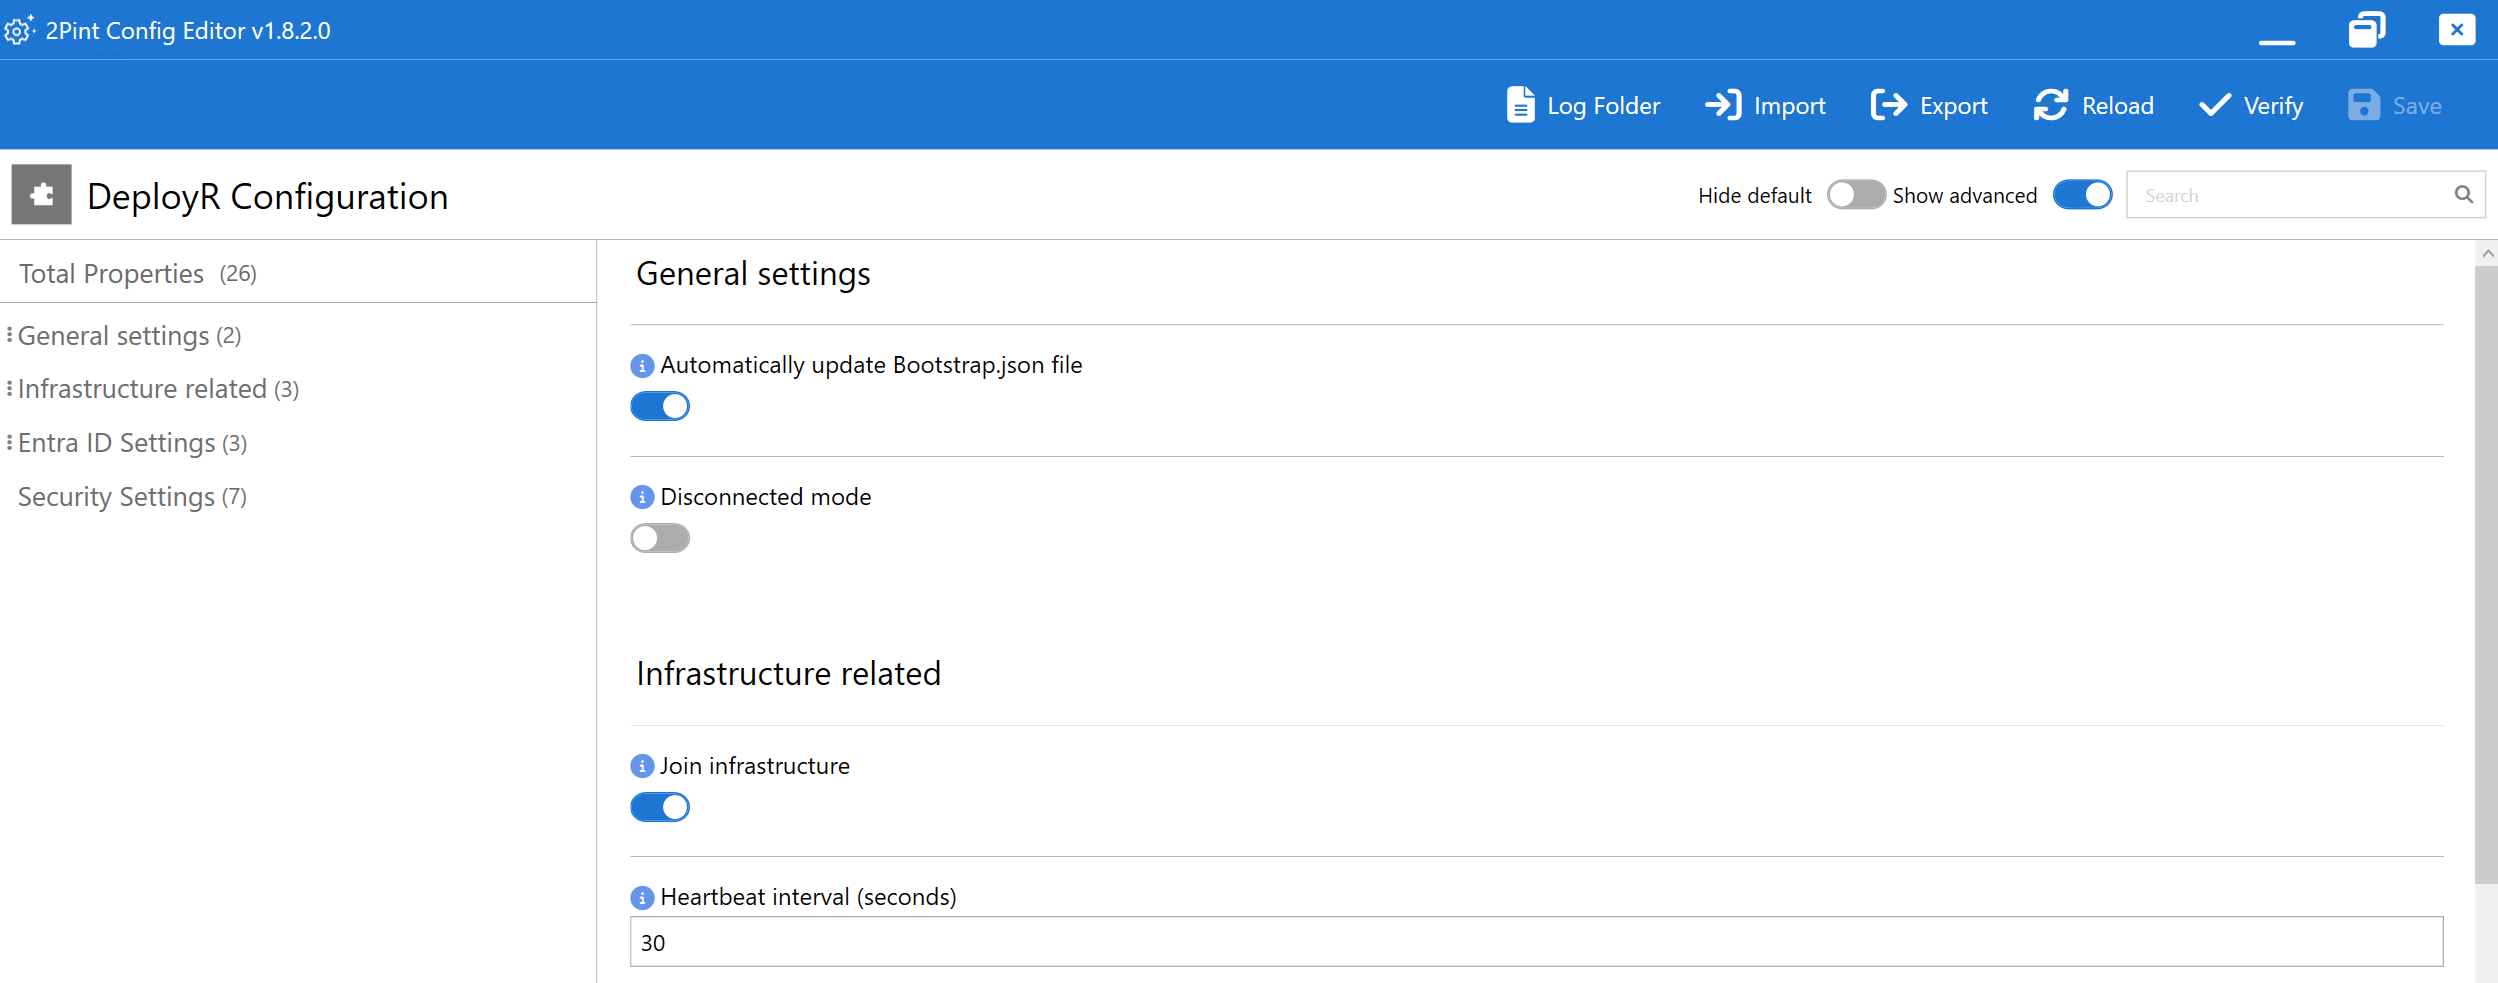
And Advanced Options
## Basic settings description
### **Certificate settings**
* **Certificate Store Location** — where DeployR looks for the TLS/SSL certificate. Typically left as `LocalMachine`.
* **Certificate Store Name** — the name of the certificate store (within the specified location). Typically left as `My`.
* **Certificate location mechanism** — how DeployR identifies the certificate to use:
* **CertificateSubjectName** — use this when the certificate is renewed frequently (thumbprint changes), so you don't need to update the DeployR configuration each time.
* **CertificateThumbprint** — the hex-encoded thumbprint of the certificate. If both are specified, the thumbprint takes precedence.
### **SQL Server configuration**
* **ServerInstanceAndDB** — provide the instance and database name separately:
* **SQL Server Instance** — default is `.\SQLExpress`, but this could be named anything during SQL setup.
* Format: `MyServer\SQLInstanceName`, e.g. `SQLHost\SQLExpress`.
* If SQL is installed locally on the DeployR server, just use `.\SQLInstanceName`, e.g. `.\SQLExpress`.
* **SQL Server database** — the database DeployR uses. If pre-created, enter its name; otherwise DeployR automatically creates a database named `DeployR` the first time the service runs.
* **Advanced** — provide a raw SQL connection string instead:
* **SQLConnectionString** — used for the two SQL databases DeployR relies on. Example (SQL Express, same server):
```
Server=.\SQLEXPRESS;Database=DeployR;Trusted_Connection=True;MultipleActiveResultSets=true;TrustServerCertificate=True
```
### **Content location**
* **DeployR Content Location Path** — where all DeployR-managed content is stored. Defaults to `%ProgramData%\2Pint Software\DeployR`, but can be any location the DeployR service can manage.
* Examples: `D:\DeployRContent\`, `E:\DRContent\`
* Do **not** use the root of a volume (e.g. `D:\` or `E:\`).
* **Note:** if you run into issues generating boot media, add security software exclusions for the DeployR Content Path.
### **Networking & StifleR integration**
* **DeployR Client URL** — the full URL client devices use to reach the DeployR server. The hostname must match the certificate; keep the default port 7281. Example: `https://contoso-server.contoso.com:7281`.
* **Join Infrastructure** *(Show Advanced)* — must be enabled so DeployR registers with the StifleR infrastructure.
* **StifleR Service API URL** — the URL and port (typically 9000) used to communicate with the StifleR service.
* **Heartbeat Interval (seconds)** — how often DeployR sends heartbeat events to StifleR when Join Infrastructure is enabled. Default of 30 seconds is recommended.
{% hint style="info" %}
More details about the different settings are discussed in the corresponding pages.
{% endhint %}
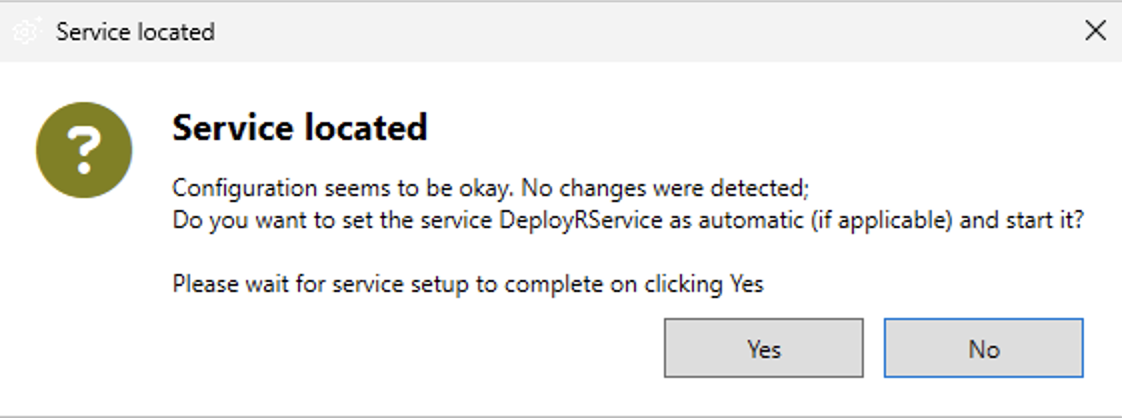
Once the needed settings are configured, click the Verify button to ensure the settings are valid. This will then prompt for confirmation:
Click Yes to enable and start the DeployR service.
## Post-installation checks
### **Confirming registration with StifleR**
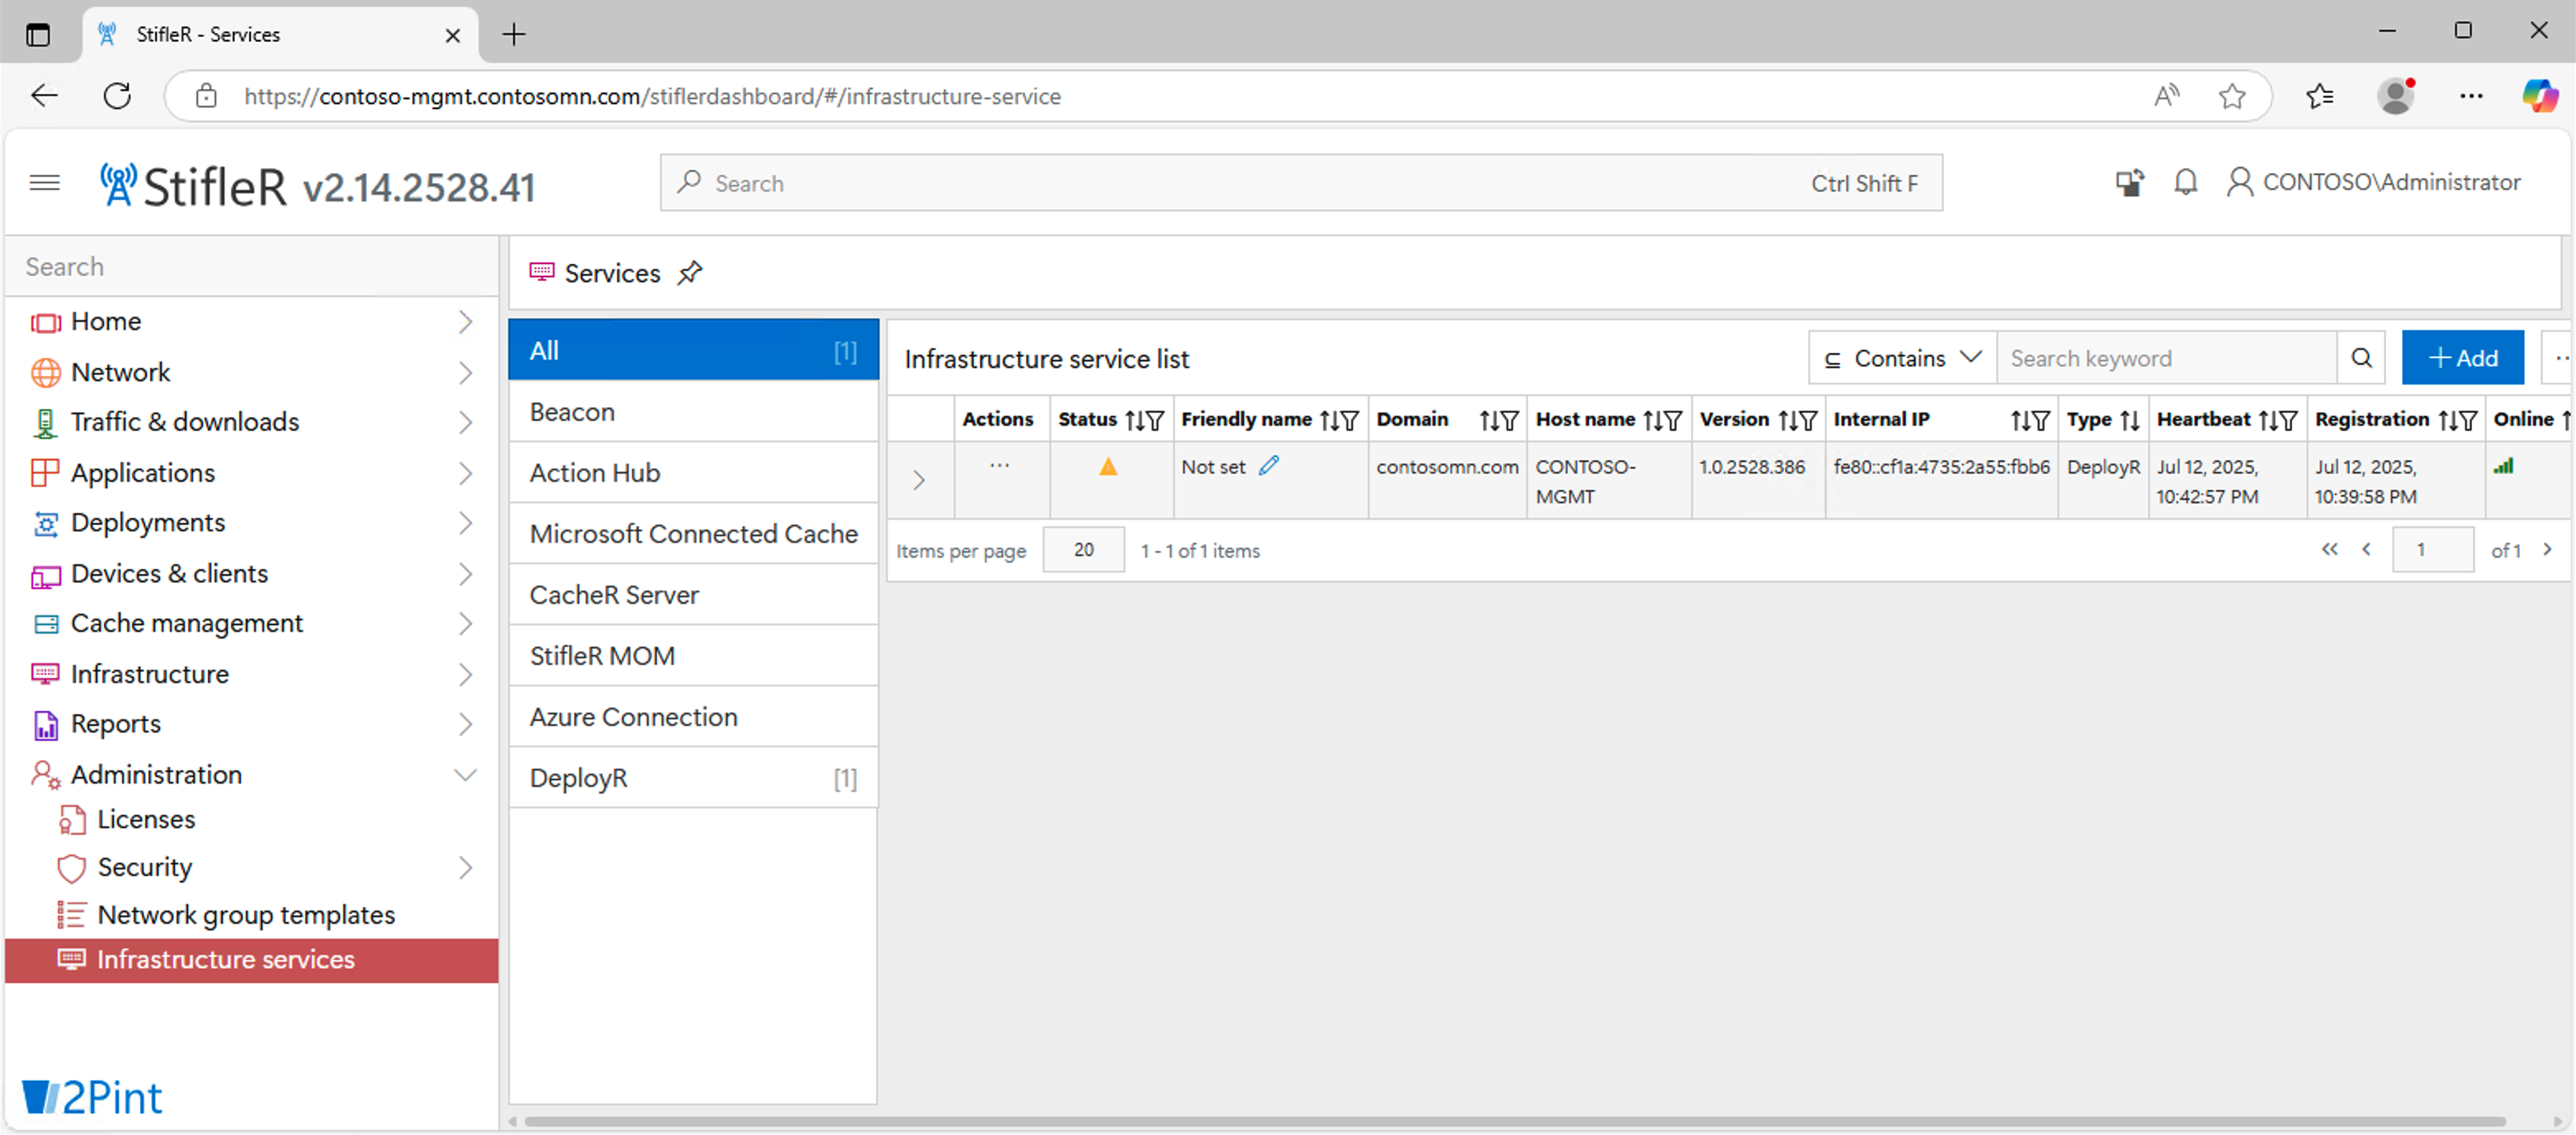
After the DeployR service starts, open the StifleR Dashboard and go to **Administration → Infrastructure services**. DeployR will initially appear with a status of "Not approved" (yellow warning triangle):
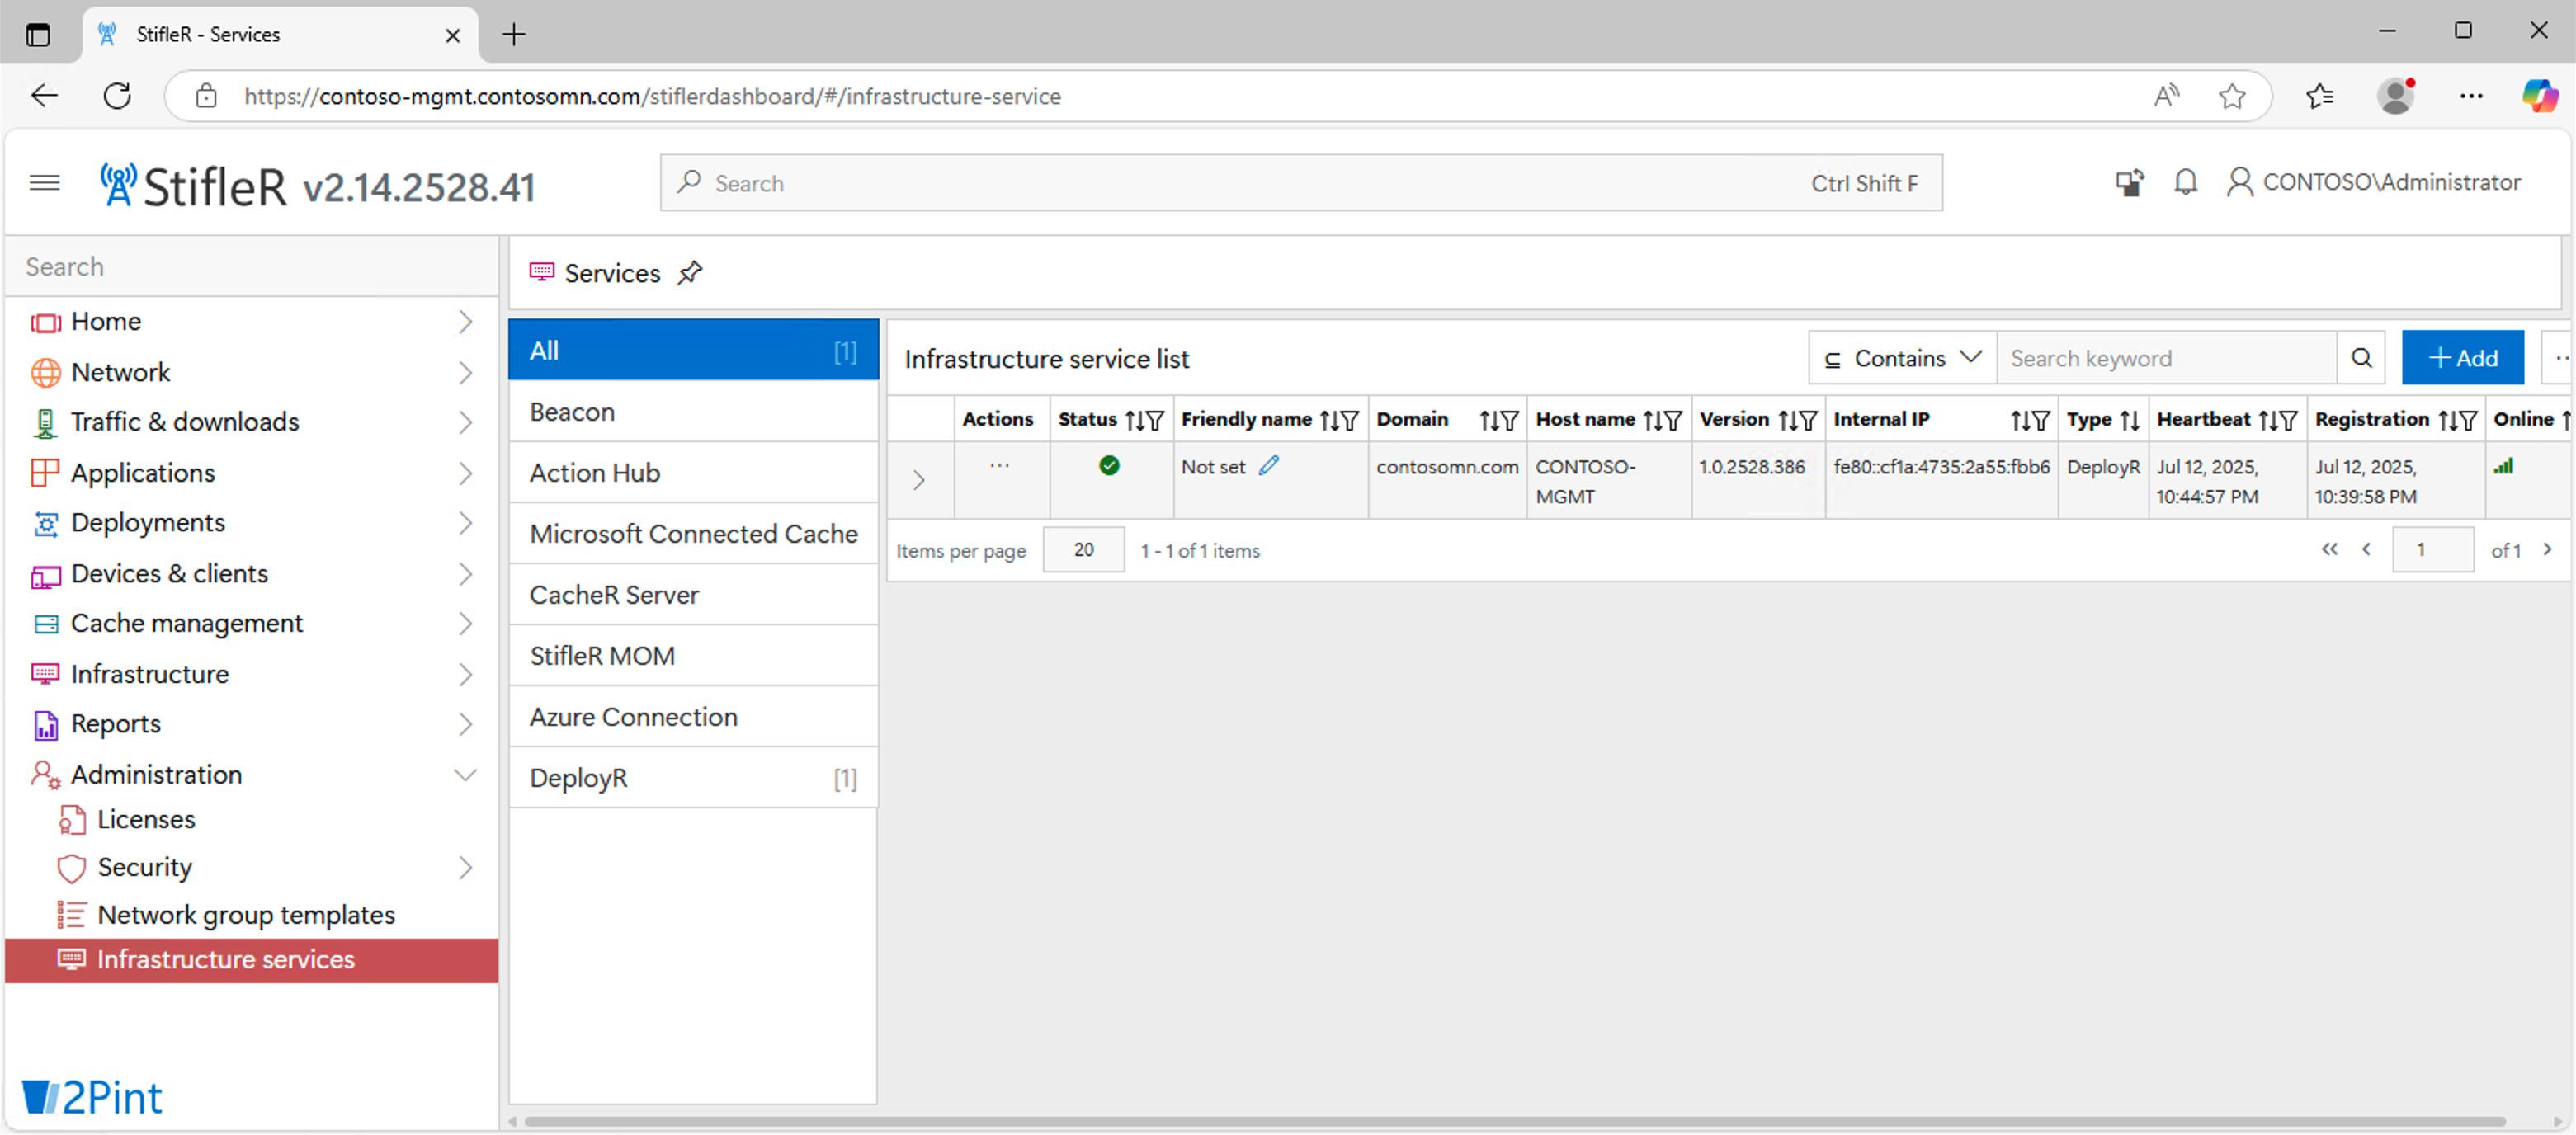
On the **Actions** menu, choose **Approve** to enable communcation between the two services. After approval, the status will change to a green checkmark:
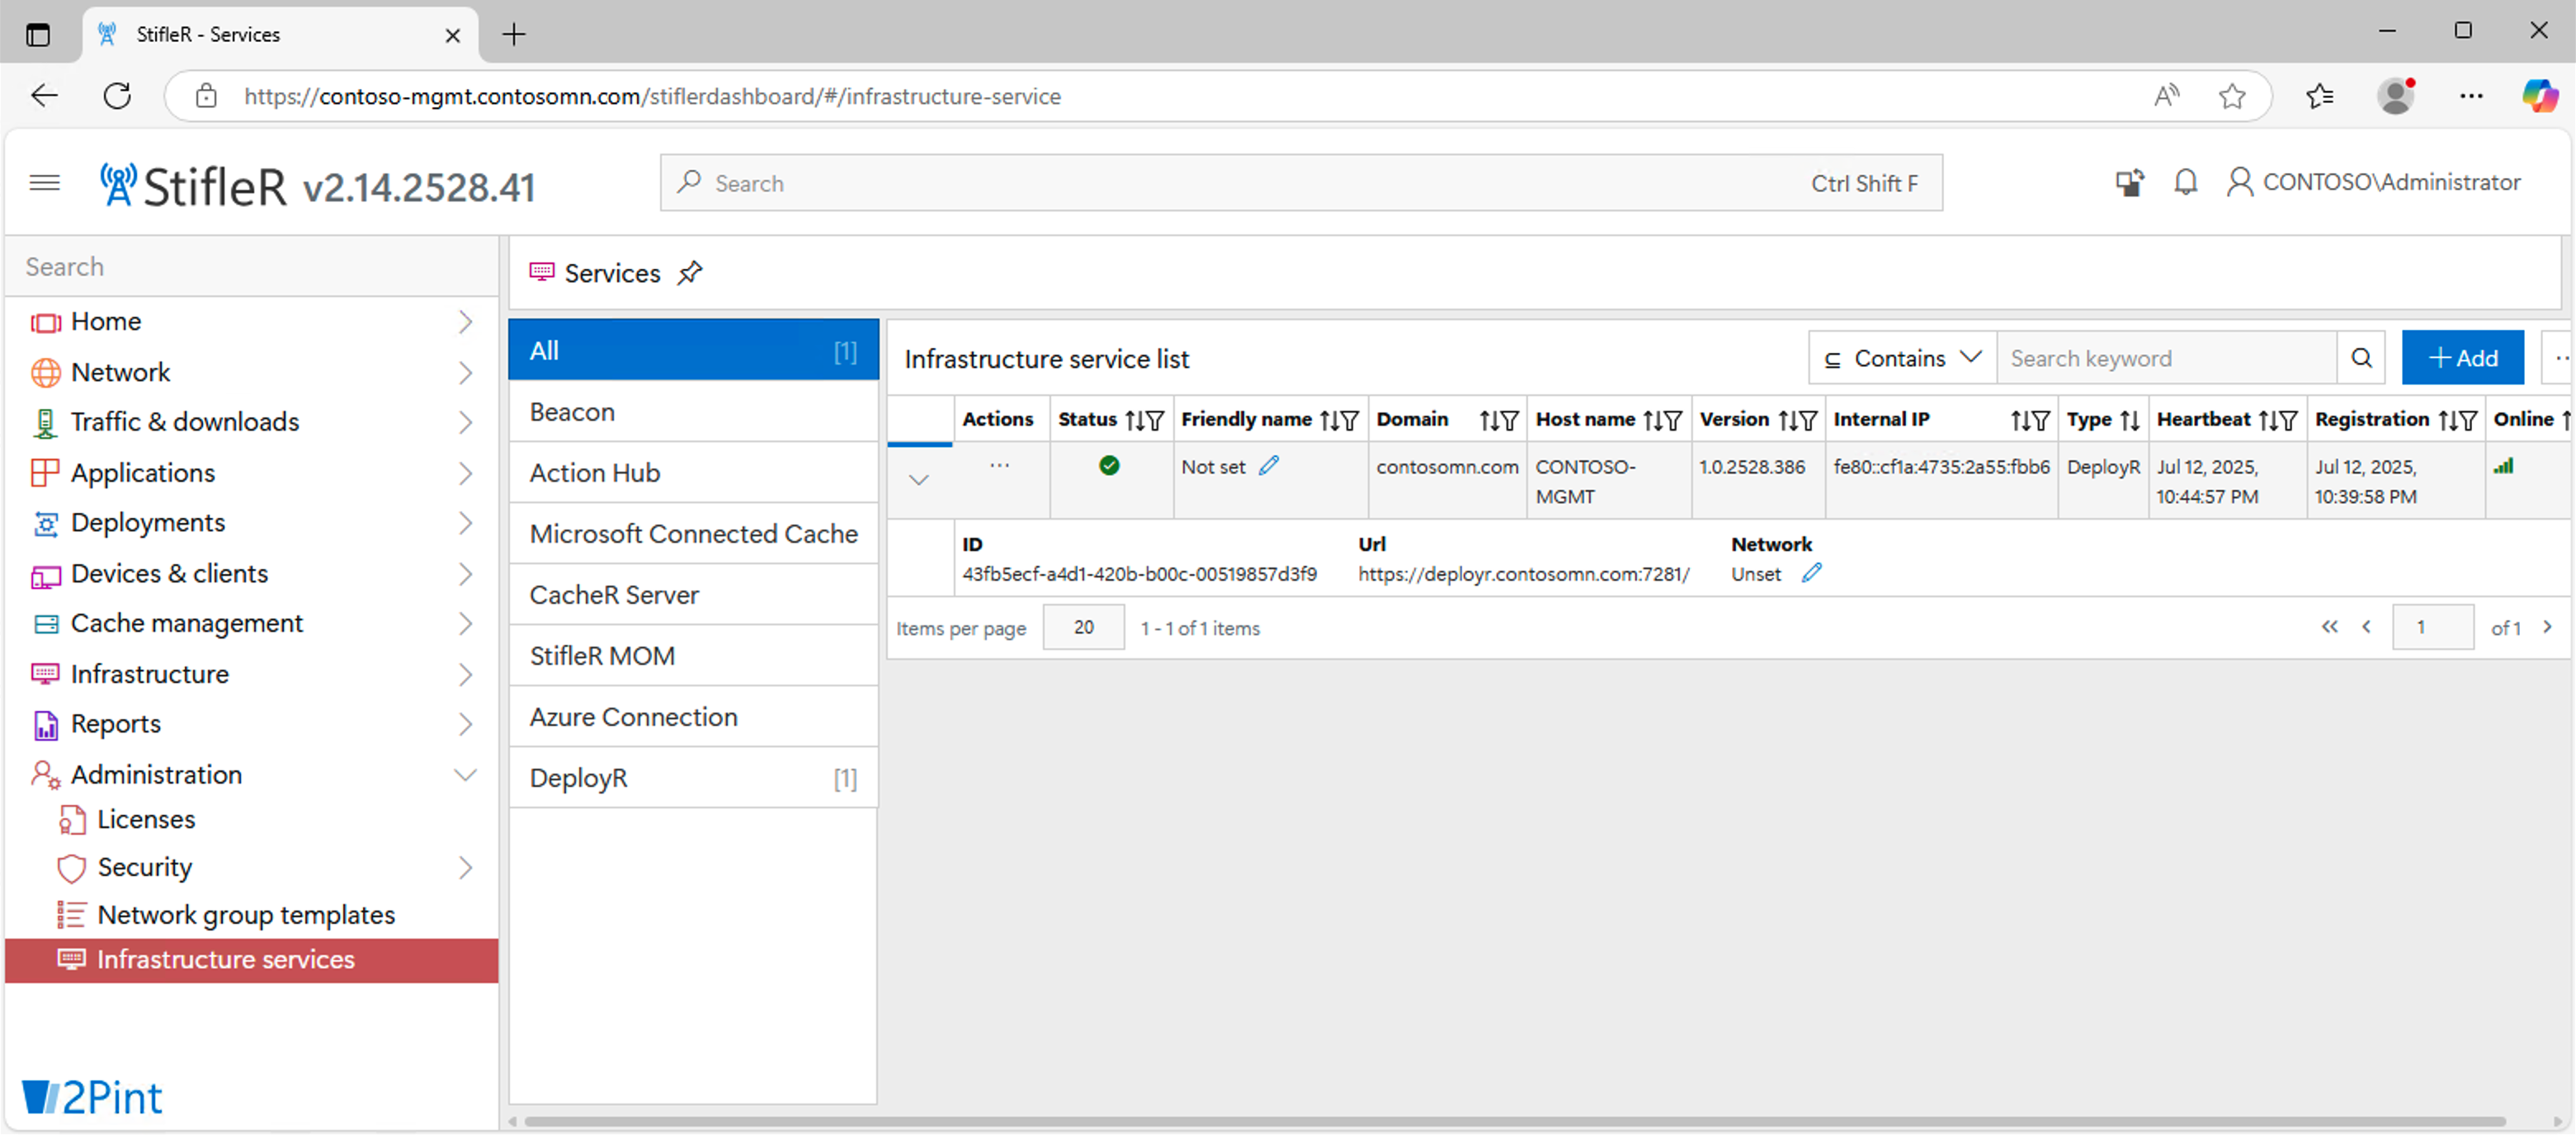
For confirmation that the correct URL is provided to the StifleR platform for communication with DeployR, expand the row by clicking the **>** at the beginning of the row to see the details:
### **Confirming task sequence communication**
Navigate to **Deployments → DeployR → Task sequences** in the StifleR Dashboard to confirm that communication between DeployR and StifleR is working.
---
# Agent Instructions
This documentation is published with GitBook. GitBook is the documentation platform designed so that both humans and AI agents can read, navigate, and reason over technical content effectively. Learn more at gitbook.com.
## Querying This Documentation
If you need additional information that is not directly available in this page, you can query the documentation by asking a question.
Perform an HTTP GET request on the following URL with the `ask` and `goal` query parameters:
```
GET https://documentation.2pintsoftware.com/deployr/deployr-enterprise/deployr-server-installation.md?ask=&goal=
```
`ask` is the immediate question: it should be specific, self-contained, and written in natural language.
`goal` is what the user is ultimately trying to achieve, the reason they need the answer. Sharing it helps GitBook give you a better, more relevant answer. A goal is most helpful when it describes the outcome the user wants rather than restating the question. For example, with `ask=how do I create an API token`, a goal like `automate deployments from our CI pipeline` lets GitBook tailor the answer to that use case.
The response will contain a direct answer to the question and relevant excerpts and sources from the documentation.
Use this mechanism when the answer is not explicitly present in the current page, you need clarification or additional context, or you want to retrieve related documentation sections.