> For the complete documentation index, see [llms.txt](https://documentation.2pintsoftware.com/llms.txt). Markdown versions of documentation pages are available by appending `.md` to page URLs; this page is available as [Markdown](https://documentation.2pintsoftware.com/deployr/customization/creating-a-step-definition/sample-set-theme-settings.md).
# Sample - Set Theme Settings
Setting the background image is not as straightforward as it was in Windows 7 and early versions of Windows 10. Today, you need to create a theme file and apply it to the default user profile. This is still possible to automate, making it a good use case for a step definition: the scripting runs in the background, while the GUI prompts the administrator to select an image file.
### Step Definition
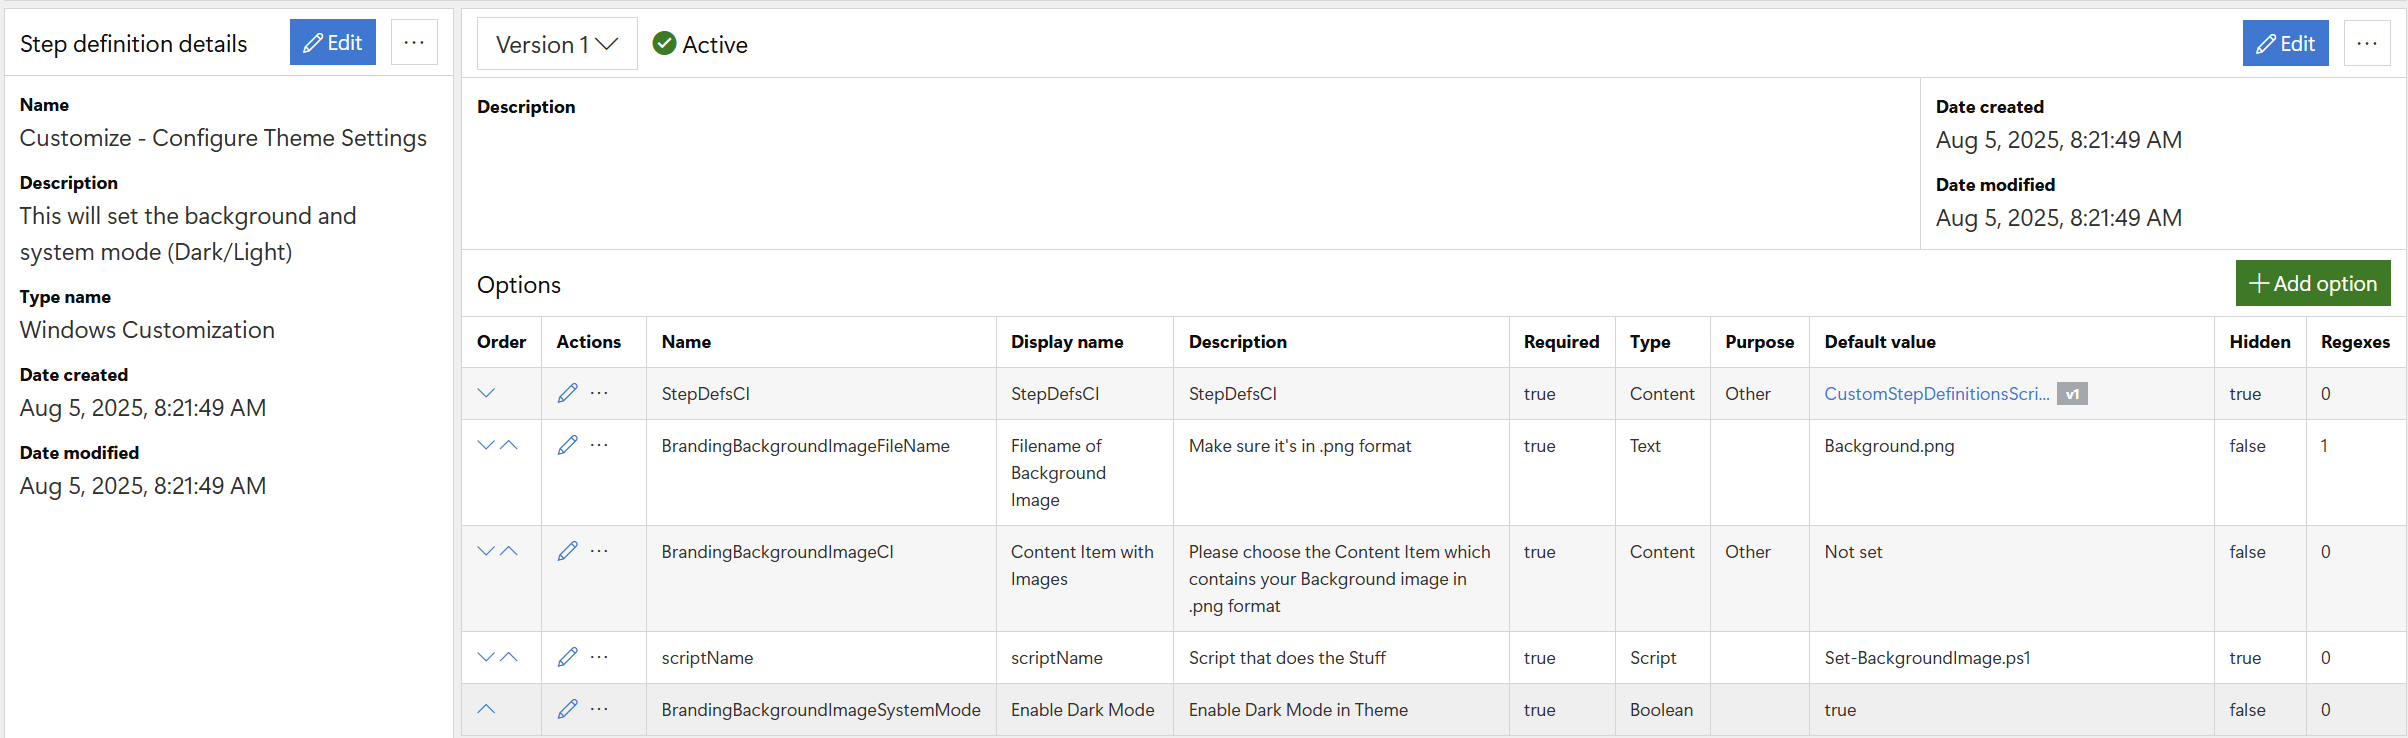
The step consists of several options. Two key options are the content item and `scriptName`. These options are hidden and provide the logic that runs behind the scenes during the task sequence.
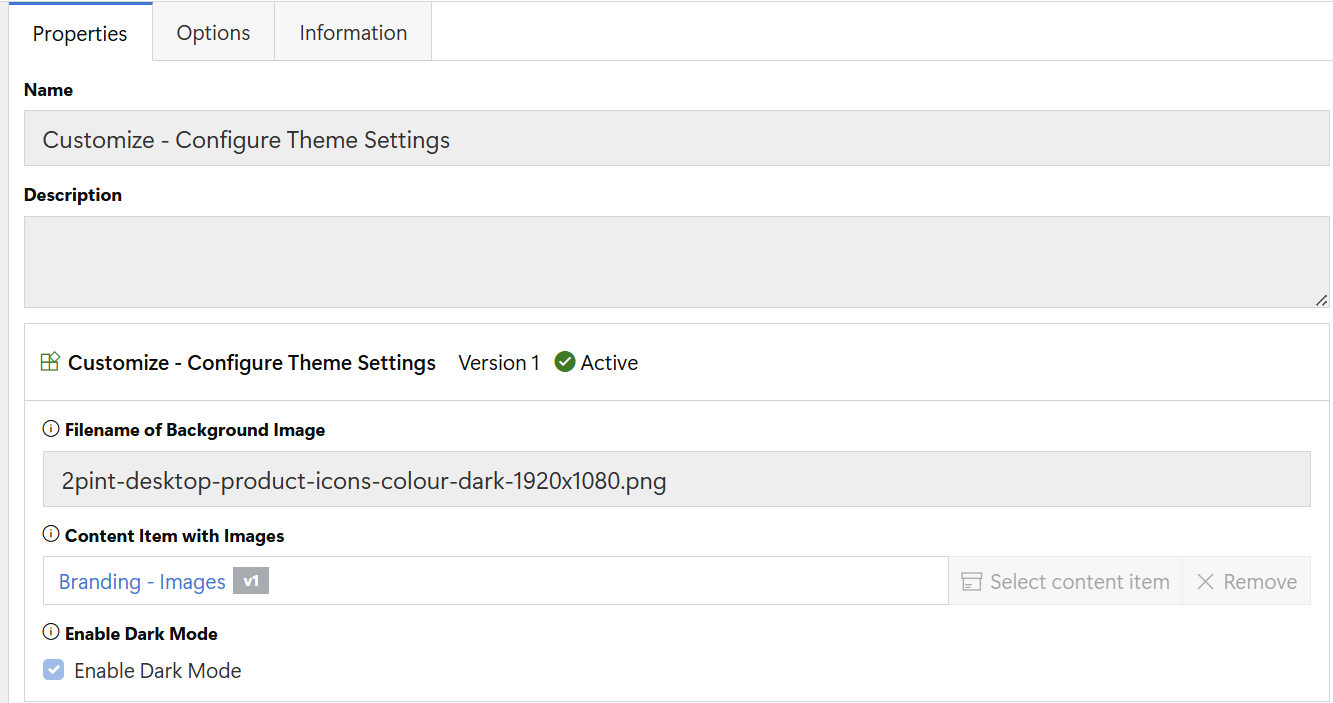
A text box lets the administrator enter the background file name, and a content item option lets them select the item that contains the image. There is also a check box to enable Dark mode, which is set to true by default.
StepDefsCI is the content item that holds the script run by this step. The other items end up being variables that feed into the script. The script is shown later on and should help to clear up how the parameters feed into it. In this sample the Content Item GUID = d819ff51-72a1-4e3c-bdf3-fcb69cf1bbab, which you will see more of later on this page.
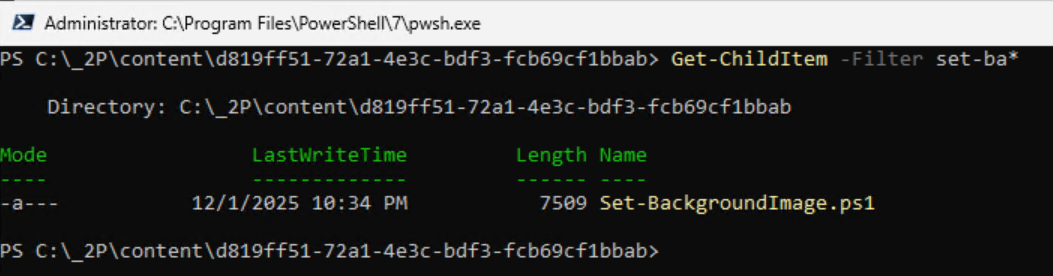
`scriptName` specifies the script in `StepDefsCI` that performs the work. If you look down further, you will see the script file inside of the content item that was downloaded. In this sample, the script name is Set-BackgroundImage.ps1.
In this sample, there are two content items: StepDefsCI, which hosts the scripts used in the step definitions and is preset to your content item, and a content item that the admin sets to the one containing your branding images, which is why it is not set in the definition.
In the task sequence editor, it all becomes clearer. The UI shows the admin what information the step needs: the name of the PNG file and the content item that contains it.
That is it: the step definition does all the hard work in the background using the script that gets called, leveraging the information provided in the UI.
### Task Sequence in Action
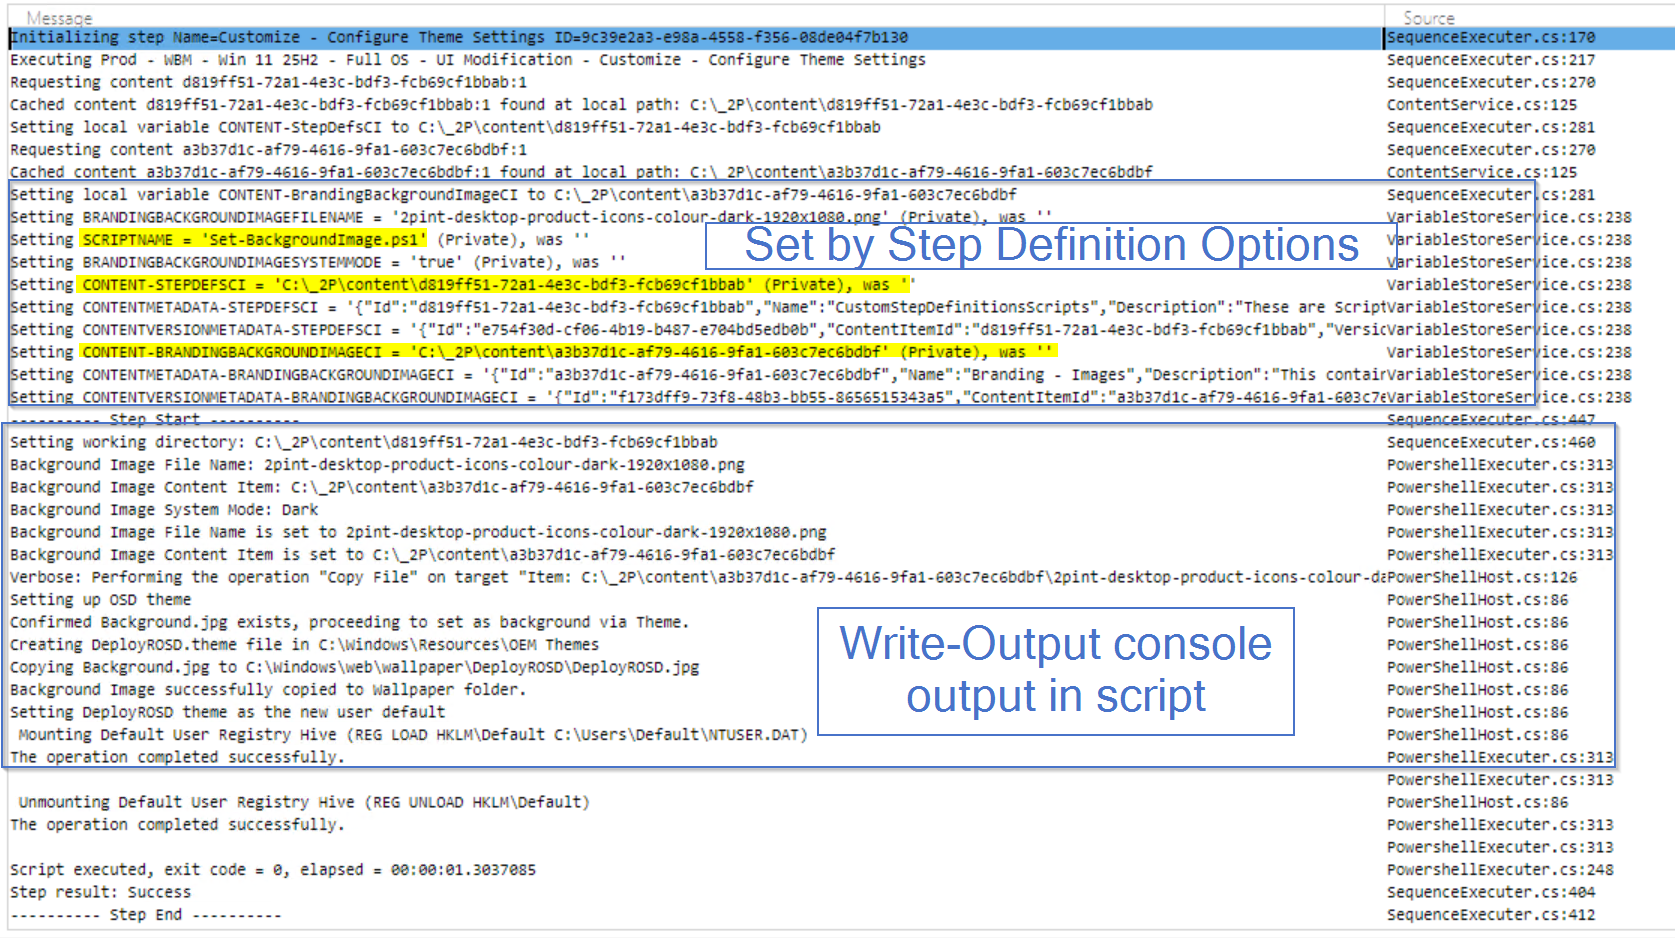
Here I have blocked out a couple of areas. The top area shows the step running and creating the variables based on the step definition. It also downloads the content items into the c:\\\_2P\Content location.\
Later in the log, you see the write-output messages that are from the script, as it logs what is happening. This is another good reason to add plenty of Write-Output messages to your scripts: it makes troubleshooting easier.
The content downloaded for that step, based on those first few lines, includes the script that needs to run:
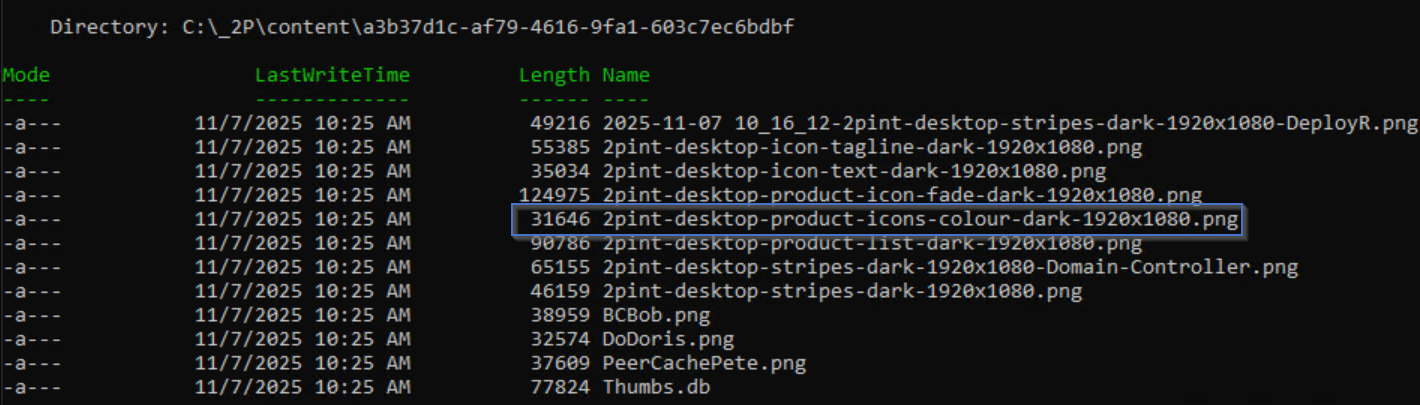
It also downloaded the content item with branding images, including the one specified in the step definition:
### Script
\[Script]
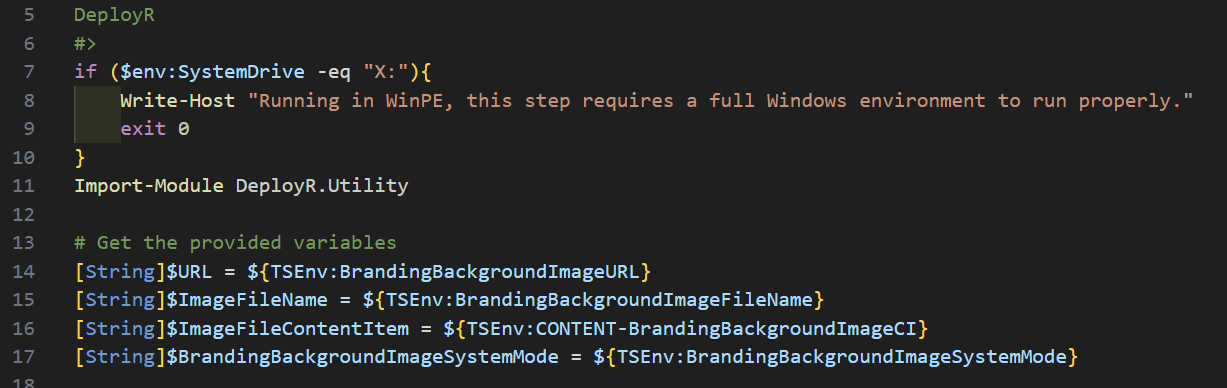
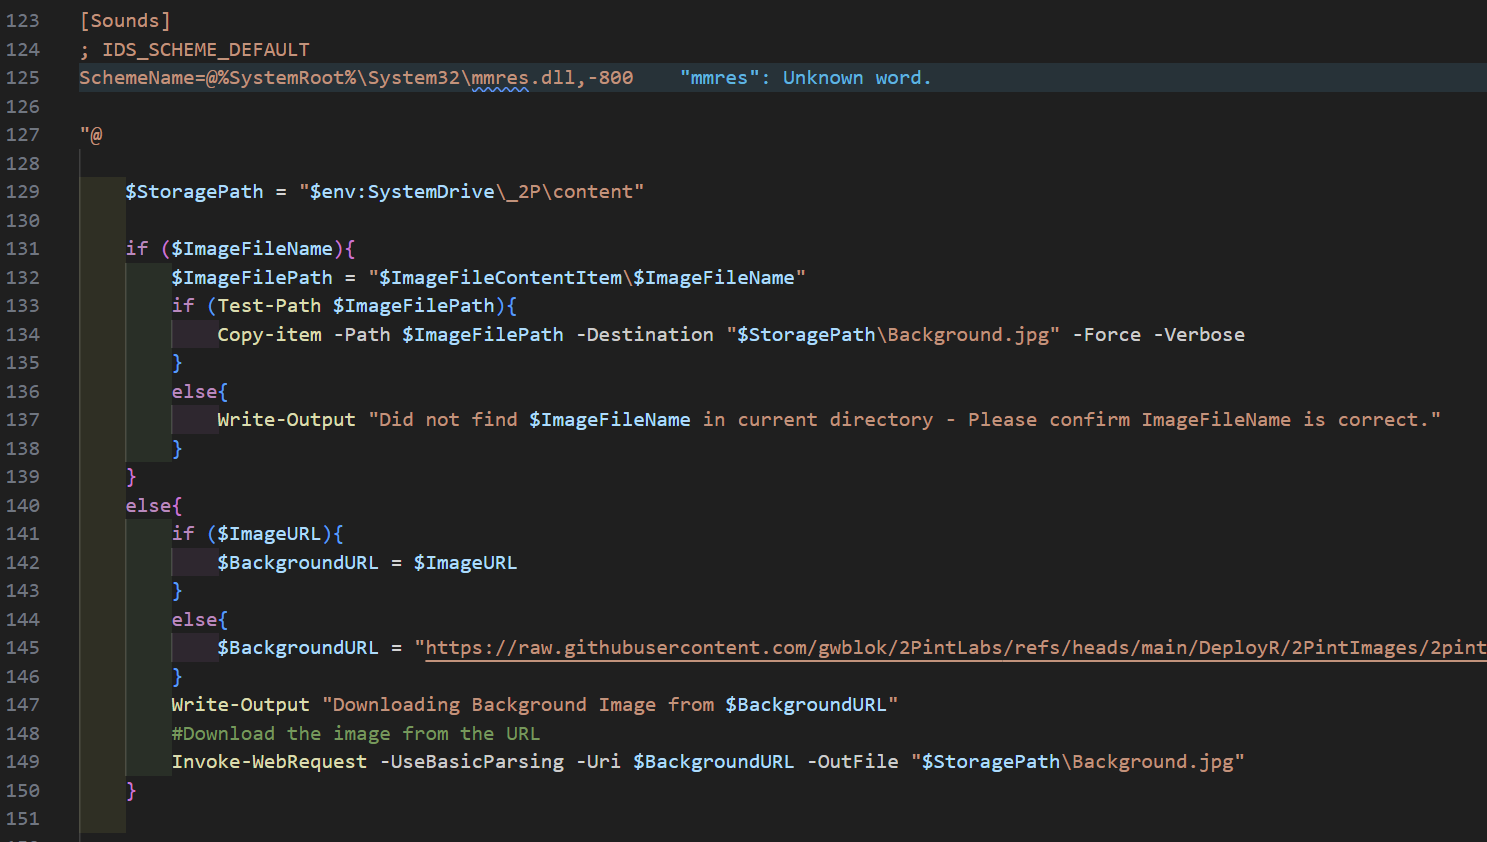
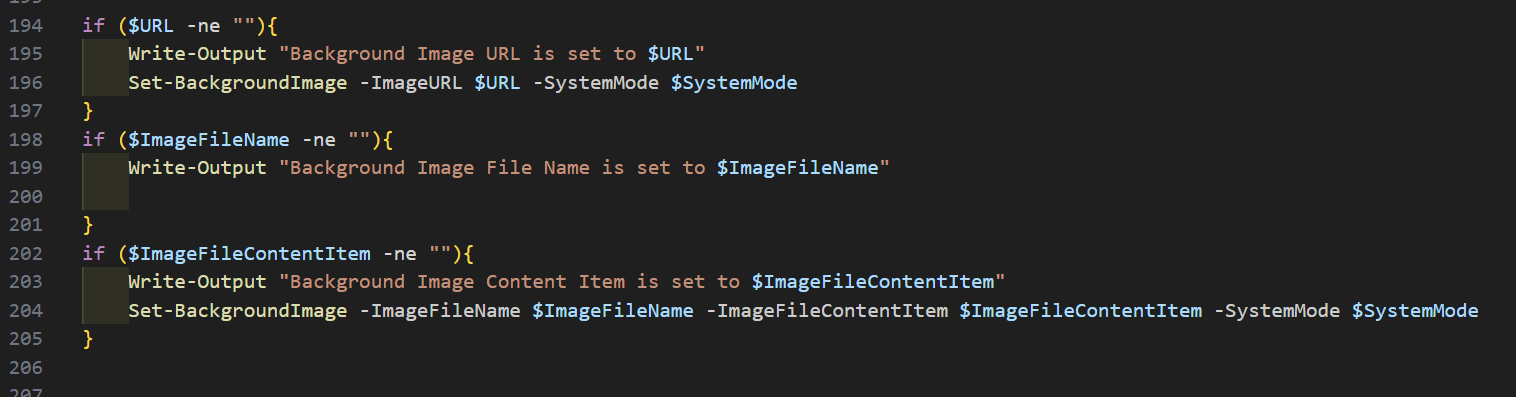
First, the script has a little logic built in, so if the step was added to the WinPE section of the task sequence, it will exit out nicely with a single message. If the admin wonders why it did not work, they can check the log. Next, the script reads the variables created by the step definition when it is running in the task sequence. In this example, there is an extra variable that does not yet exist in the UI; it could be used in a different step definition, or the UI could be modified to allow the admin to enter the URL of the image. But for now, it is the next three variables that matter, the name of the file, the content item that the file is contained in, and whether to enable Dark Mode.
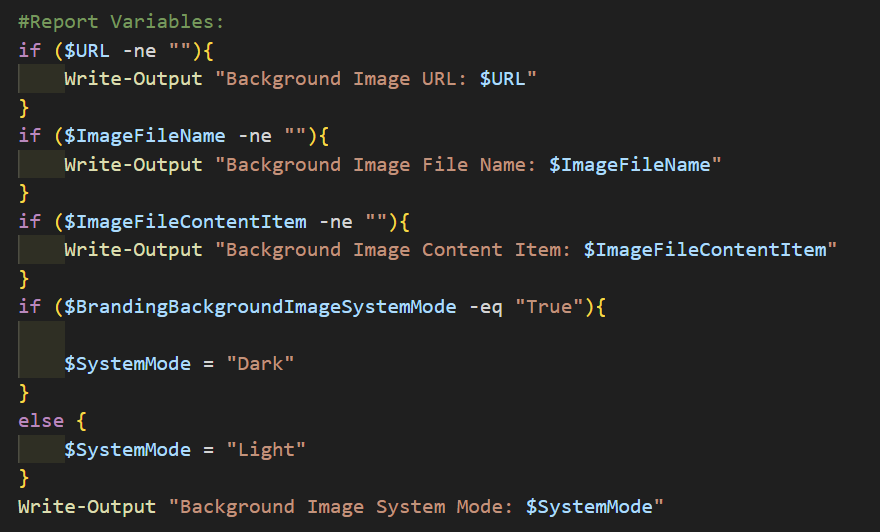
The script then writes out the variables, or converts them to the values needed later. For example, it converts the Boolean for dark mode into the string "dark" or "light", which is what the theme needs.
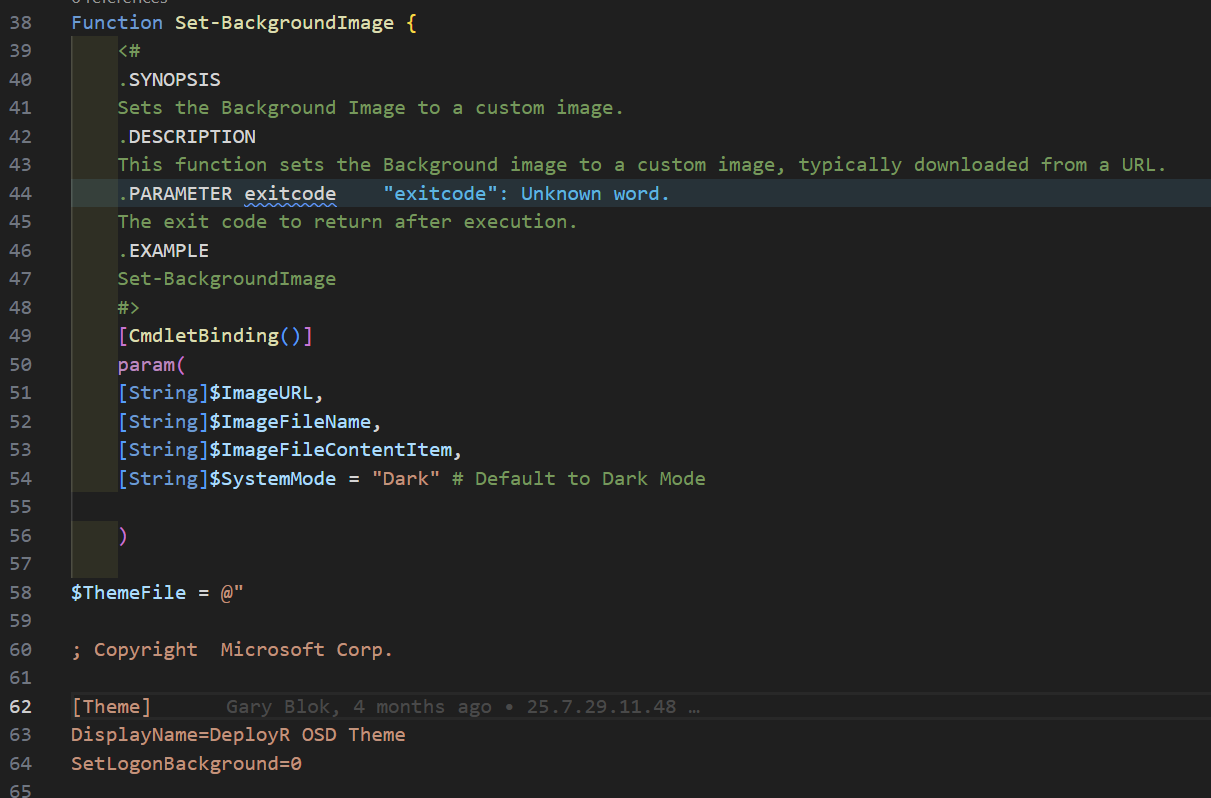
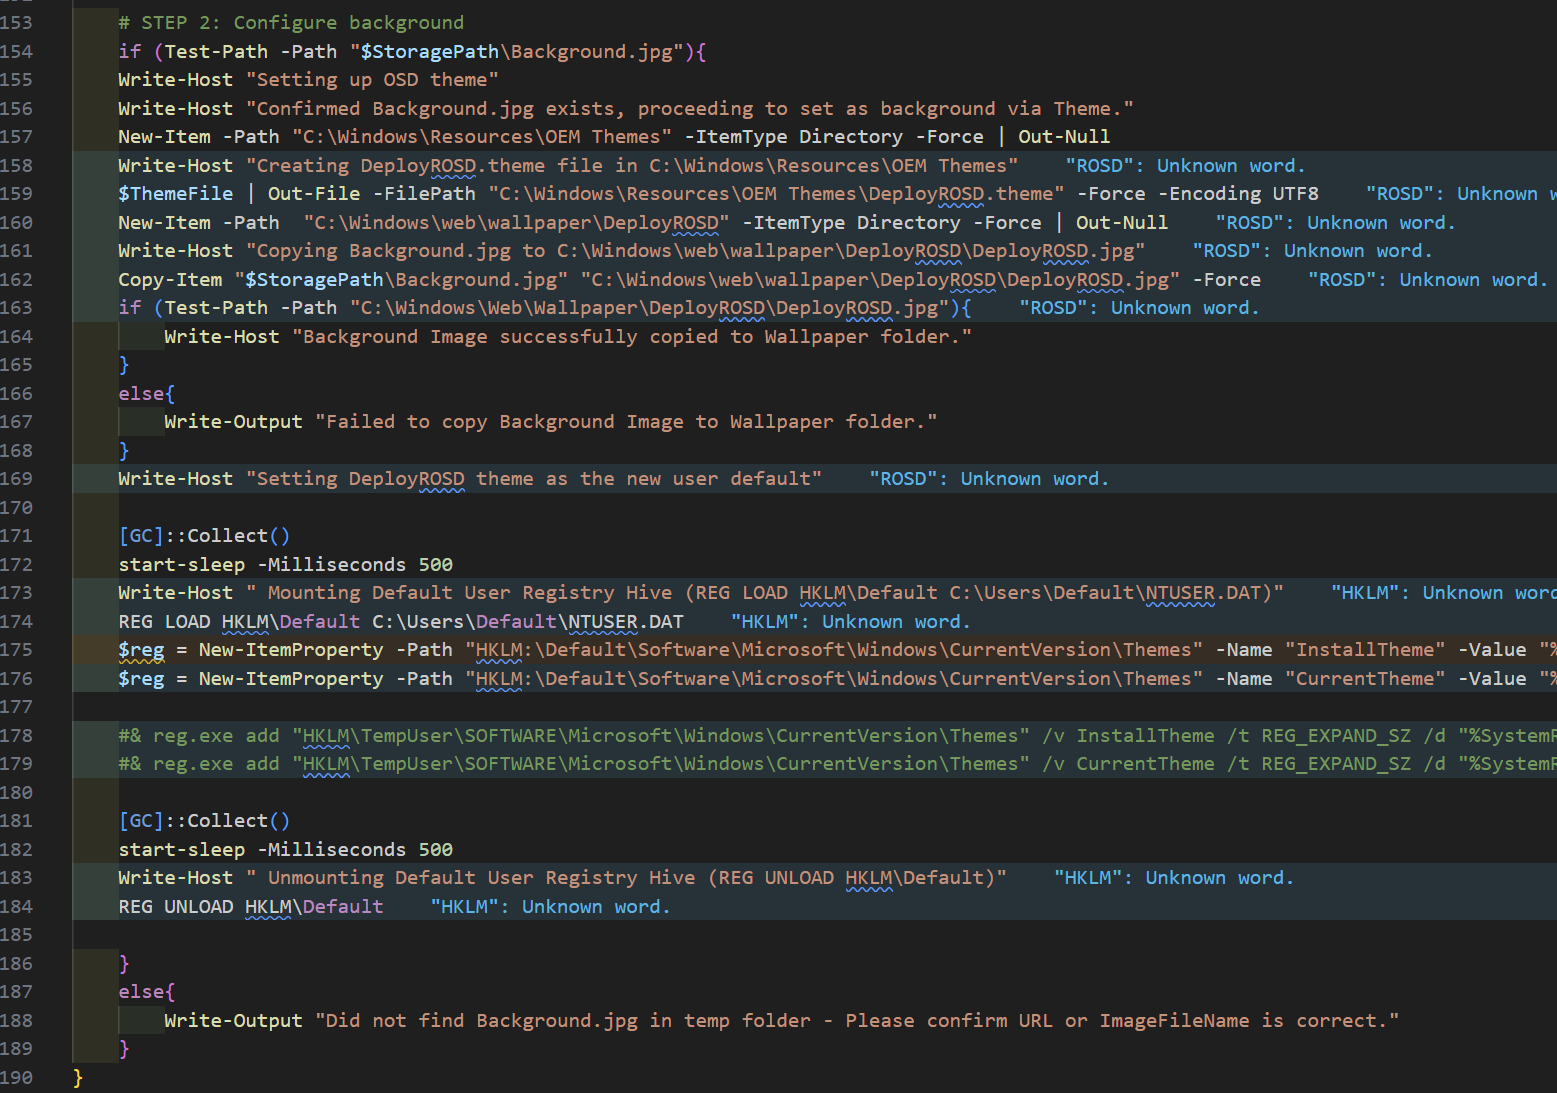
Next, a function creates the theme file based on the variables passed into it...
At this point, a variable contains the theme file information, and the background image that was supplied by the admin in the UI has been copied into the \_2P\content folder.
The function finishes by creating the OEM Themes folder and the theme file inside it, and copying the background image to the location where the theme file expects it. The script then mounts the default user registry hive and sets the new theme as the default.
The script then finishes with a little reporting, and calls the function to do all that work.
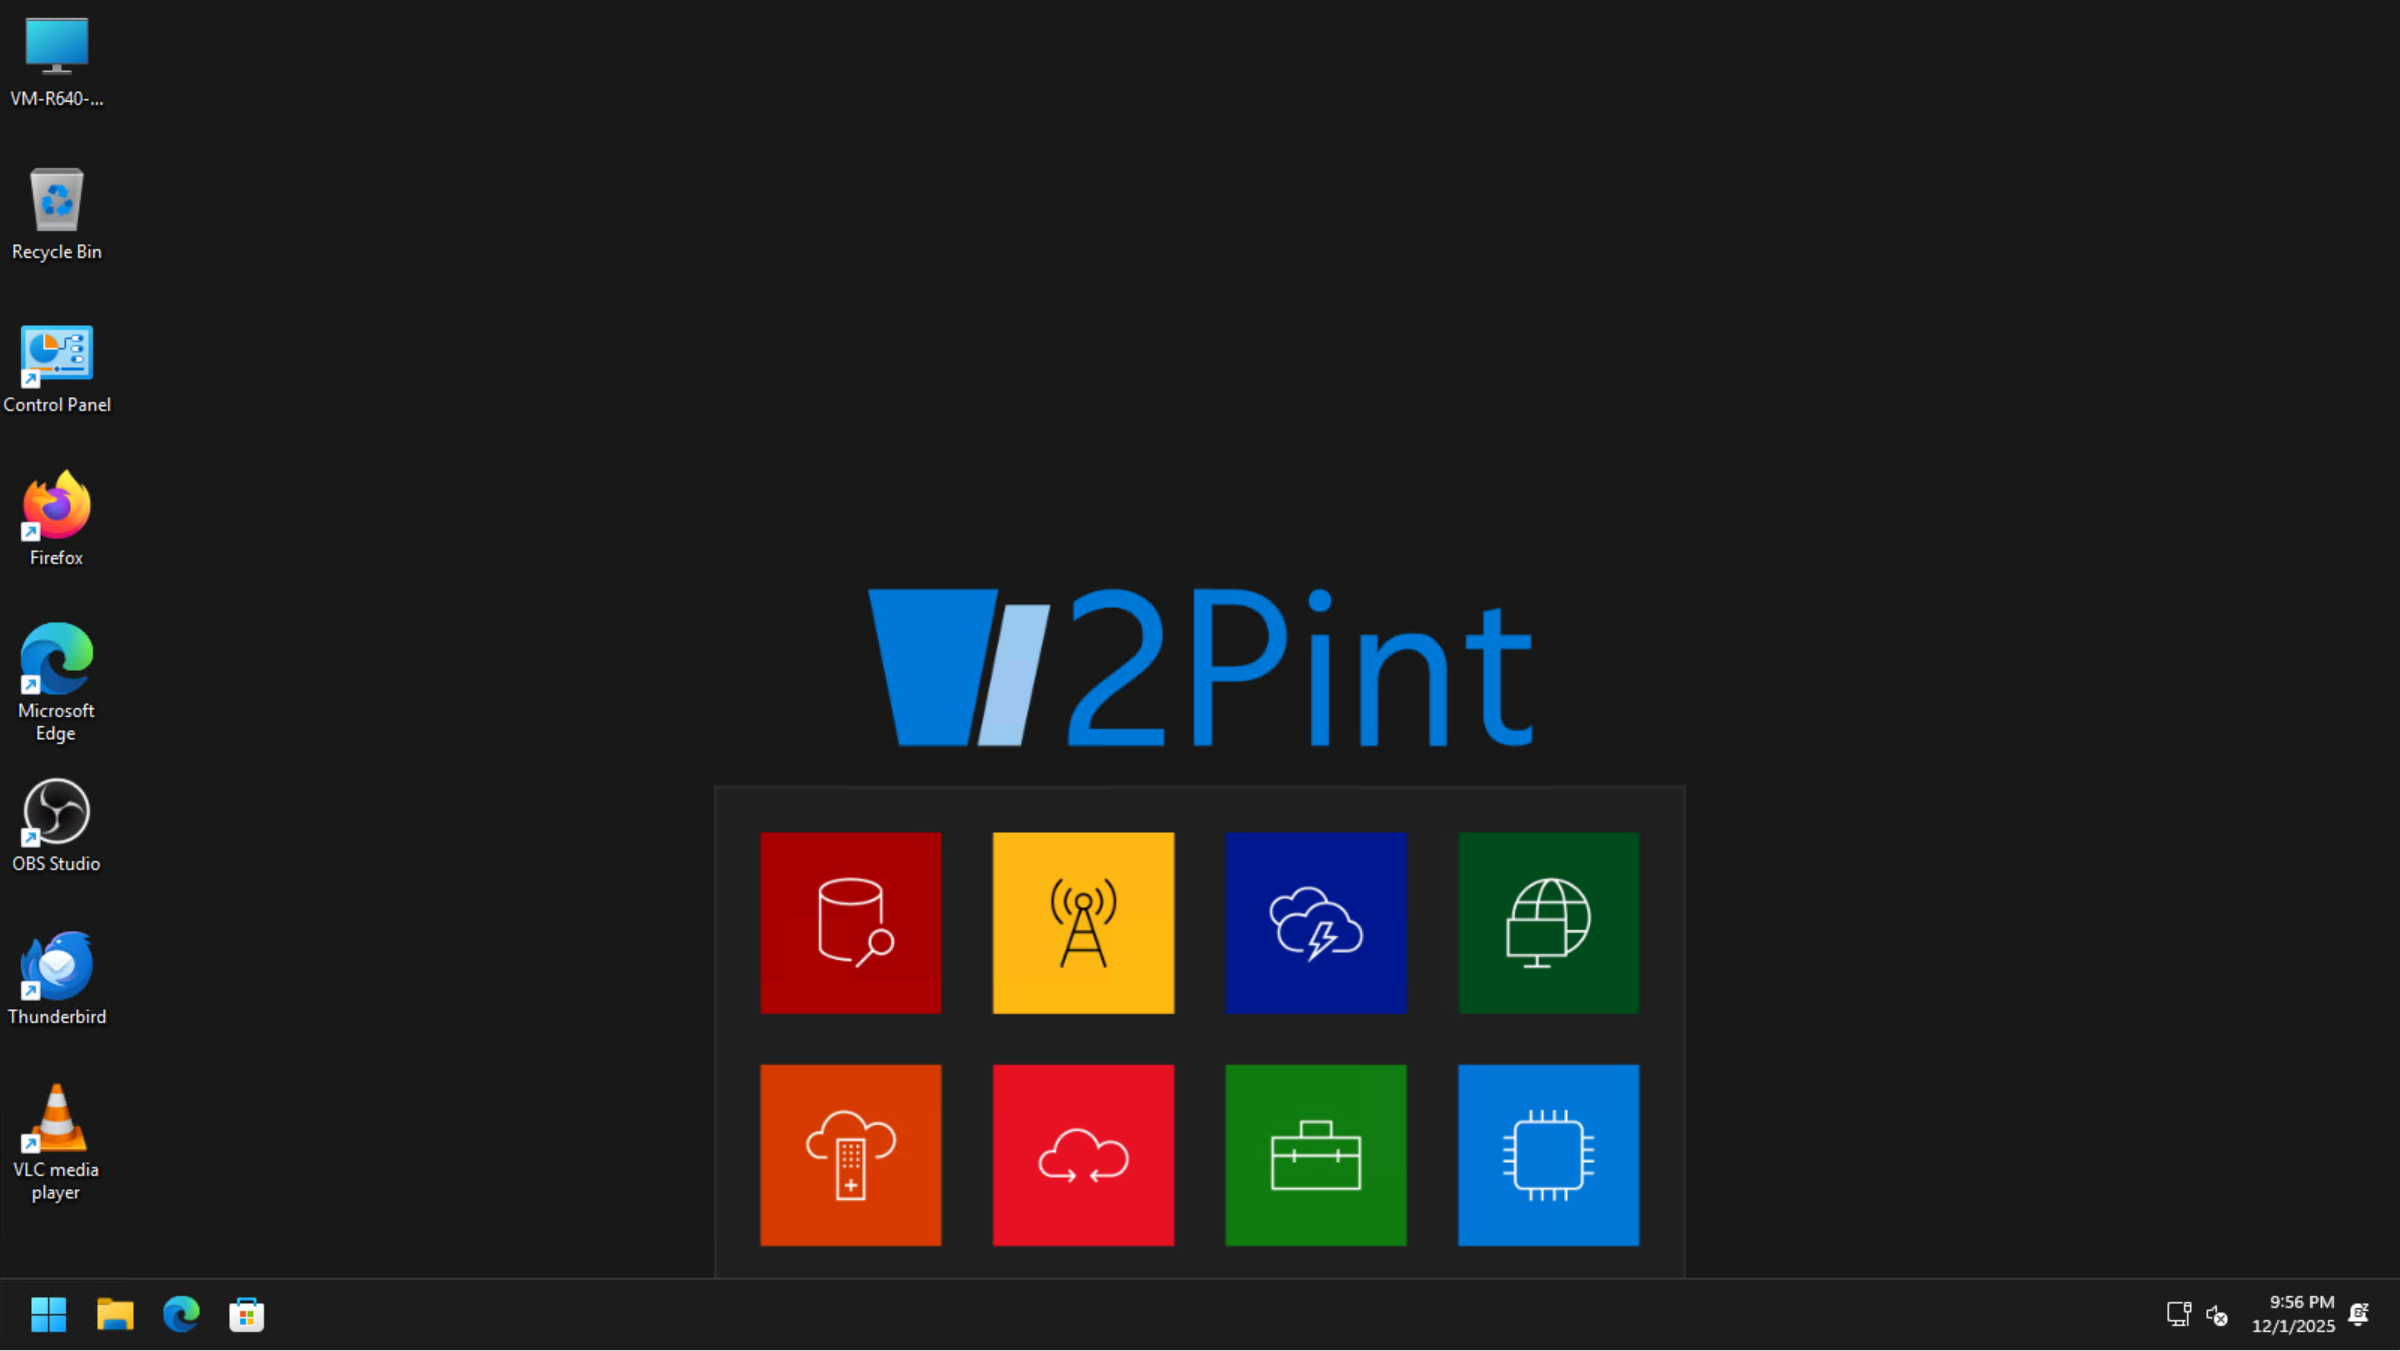
Now, when this step definition is added to your task sequence, the image will be set as the user's background when they log on.
---
# Agent Instructions
This documentation is published with GitBook. GitBook is the documentation platform designed so that both humans and AI agents can read, navigate, and reason over technical content effectively. Learn more at gitbook.com.
## Querying This Documentation
If you need additional information that is not directly available in this page, you can query the documentation by asking a question.
Perform an HTTP GET request on the following URL with the `ask` and `goal` query parameters:
```
GET https://documentation.2pintsoftware.com/deployr/customization/creating-a-step-definition/sample-set-theme-settings.md?ask=&goal=
```
`ask` is the immediate question: it should be specific, self-contained, and written in natural language.
`goal` is what the user is ultimately trying to achieve, the reason they need the answer. Sharing it helps GitBook give you a better, more relevant answer. A goal is most helpful when it describes the outcome the user wants rather than restating the question. For example, with `ask=how do I create an API token`, a goal like `automate deployments from our CI pipeline` lets GitBook tailor the answer to that use case.
The response will contain a direct answer to the question and relevant excerpts and sources from the documentation.
Use this mechanism when the answer is not explicitly present in the current page, you need clarification or additional context, or you want to retrieve related documentation sections.