> For the complete documentation index, see [llms.txt](https://documentation.2pintsoftware.com/llms.txt). Markdown versions of documentation pages are available by appending `.md` to page URLs; this page is available as [Markdown](https://documentation.2pintsoftware.com/deployr/customization/creating-a-step-definition/sample-m365-office-installer.md).
# Sample - M365 Office Installer
Step Definition sample for creating a step to install MS Office 365 (from Cloud) using a custom step definition
This step uses a script stored in a content item to perform the installation. The script reads the variables configured in the task sequence, downloads the Microsoft 365 Apps installer, and starts the installation using the options selected by the administrator in the step definition.
### Step Definition
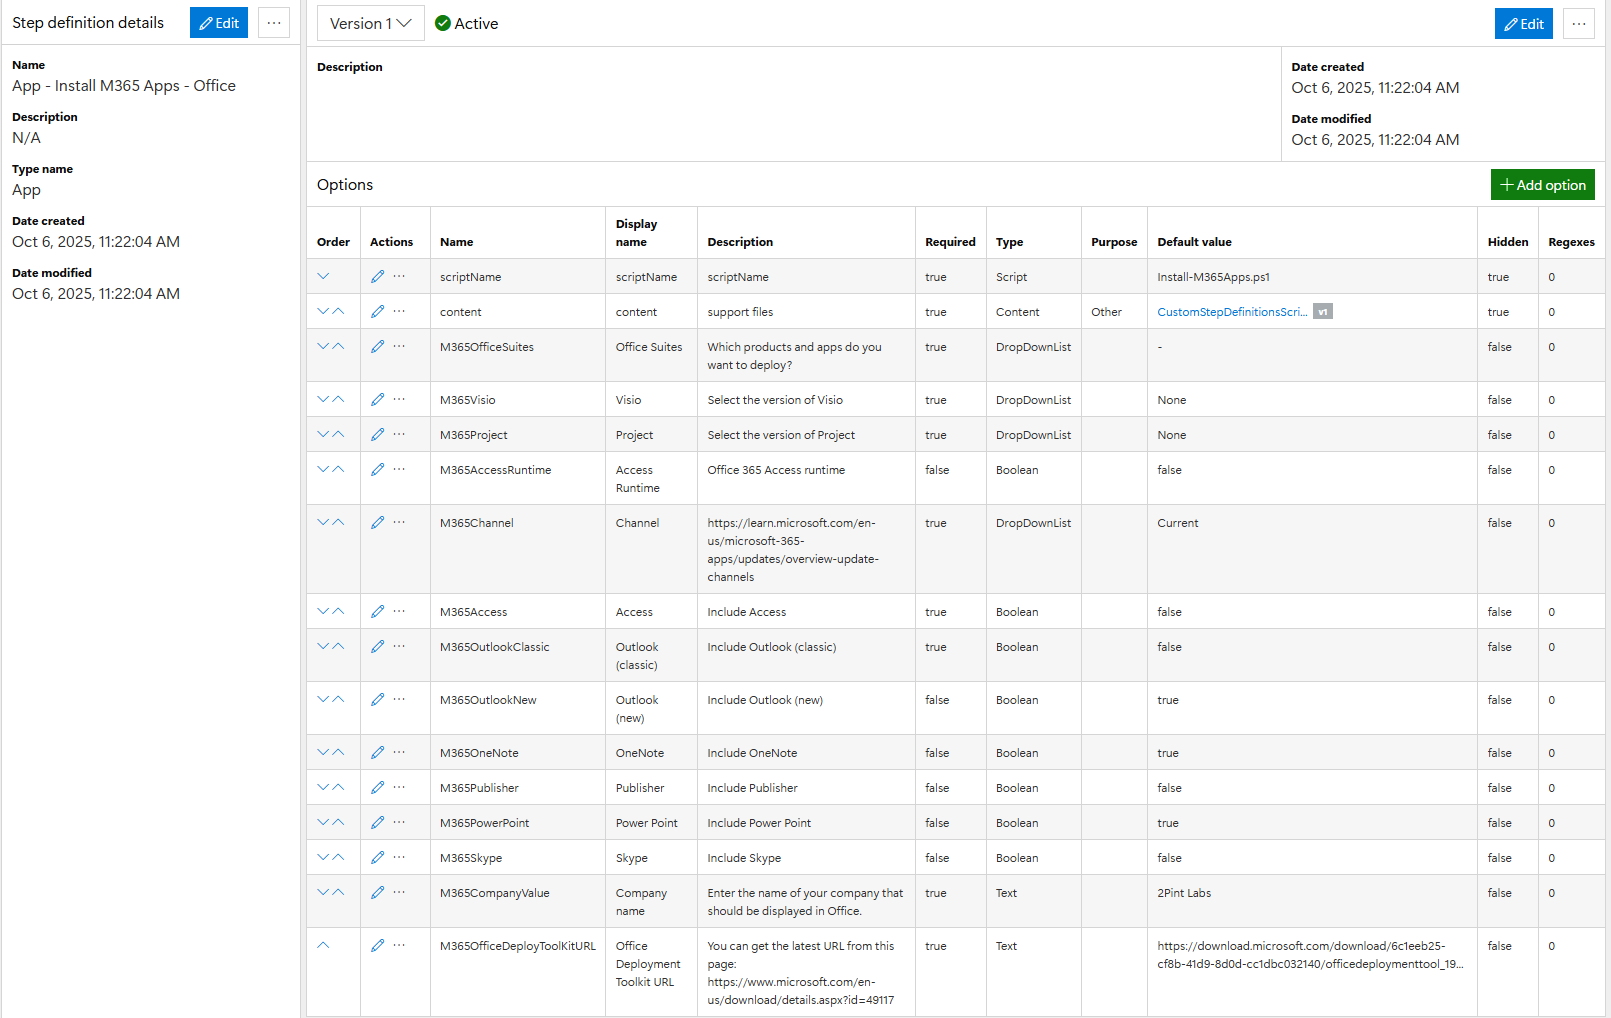
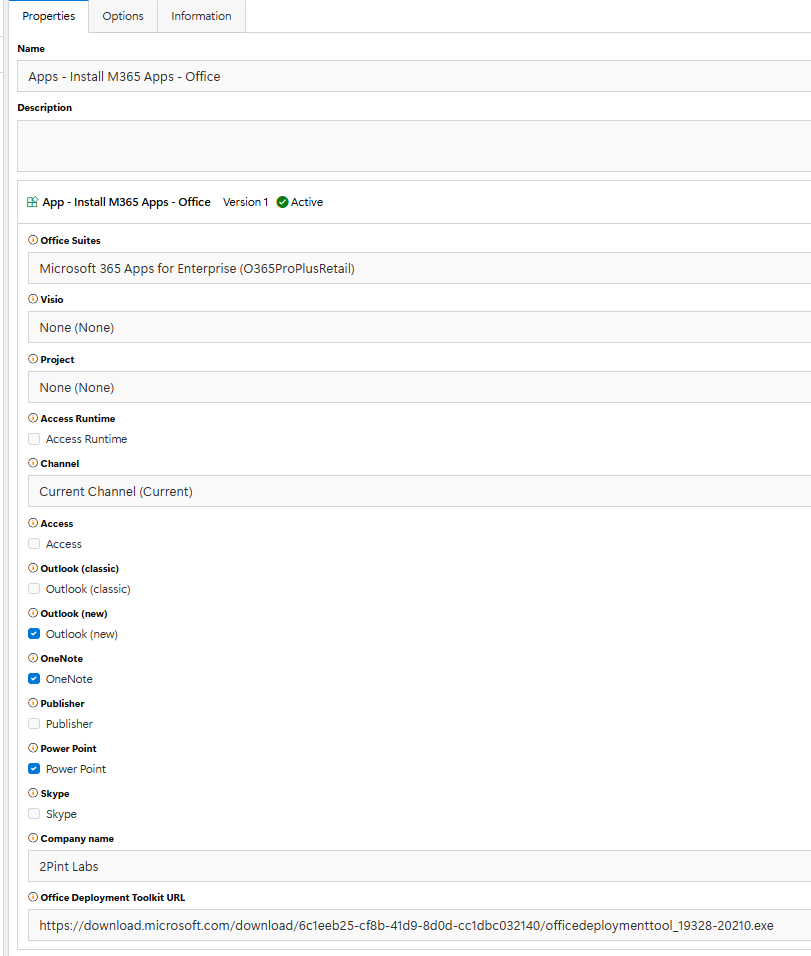
The following screenshot shows the step definition. There are many options added to gather details about the setup of Office that is required to be installed during OSD. During OSD, each **Name** value becomes a task sequence variable that the script can use.
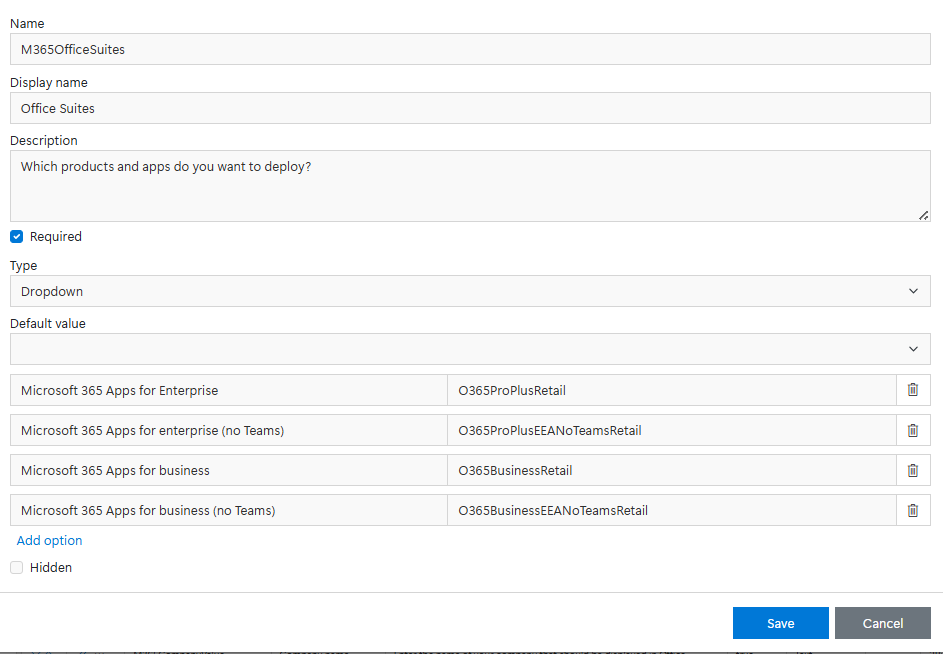
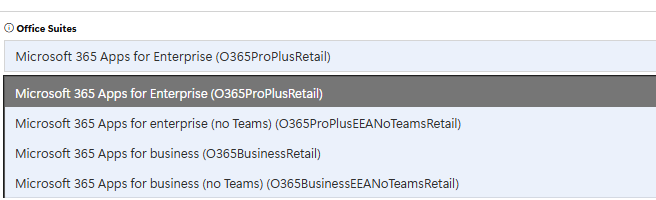
Here are a few of the options, starting with the Office Suites drop-down list. Here you can see the name of the option is "M365OfficeSuites", which will be the variable created in the task sequence, and its value will be the selected drop-down value (O365ProPlusRetail, etc.).
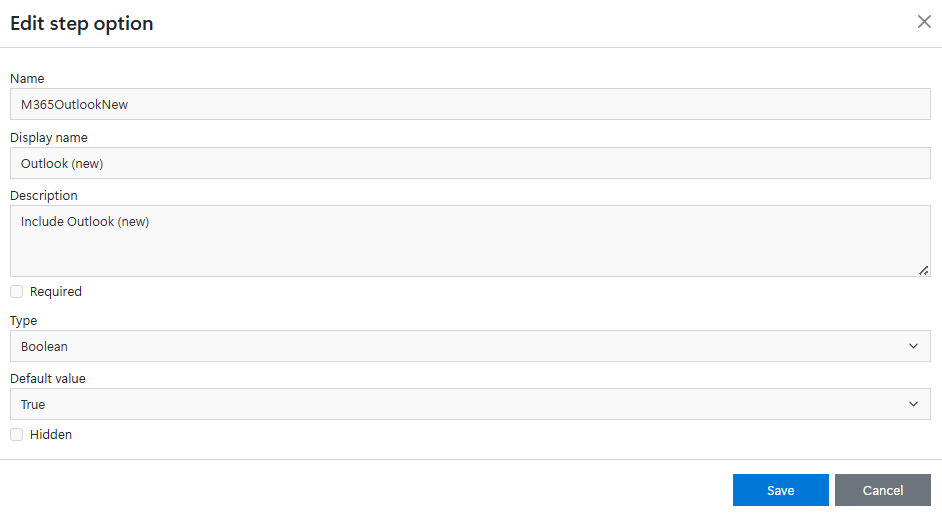
Next is a Boolean (check box). Its default value is already set to True, so by default, Office will install the "new" Outlook version unless unchecked by the admin.
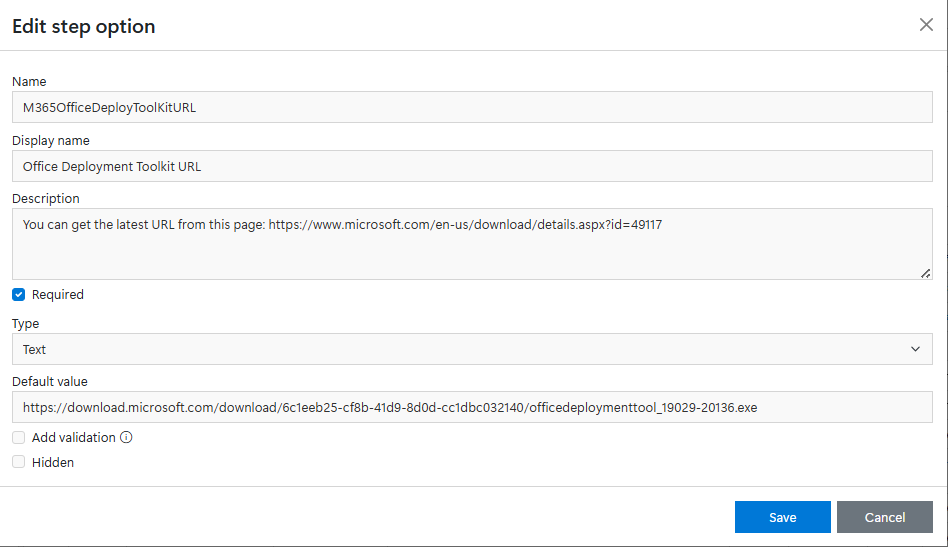
Next is a text input: the URL that the script uses to download the Office Deployment Tool, extract it, and start the Microsoft 365 Apps installation. A default value is set, so the step works as is. However, Microsoft often updates this URL, so check whether it has changed and update it if needed. This option is a good candidate for "Add validation", to ensure that when the admin changes the URL, it still contains and .exe.
### Task Sequence Editor
Once in the task sequence editor, if you add this step to your task sequence, this is what you see. Based on the selections of the admin, those option values will be returned as the variables to the task sequence engine.
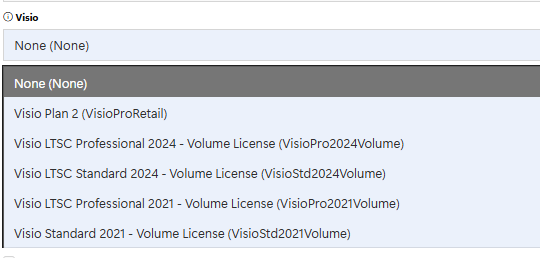
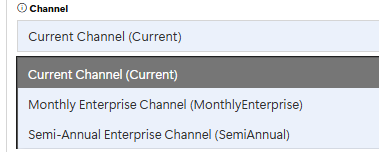
There are several drop-down lists in the step, to help guide the admin through the available options:
Some have defaults already set, and some do not. The first time you add the step into the task sequence, there are items that the admin must set, or the step will not save, as it has required options that need to be set.
Several Booleans (check boxes) are also used to include or exclude different parts of Office 365. By default, the script that is used will always install Word & Excel, so there are no check boxes for those.
Looking back at the definition, there are 2 options that are hidden that the admin does not see:
These are the scriptName (Script type) and content (Content type) options.
Script:
The content is an "other" content item filled with PowerShell scripts and other files that are used in custom step definitions. The scriptName is then the name of the script inside that content item that needs to run during this step.\
Content Item
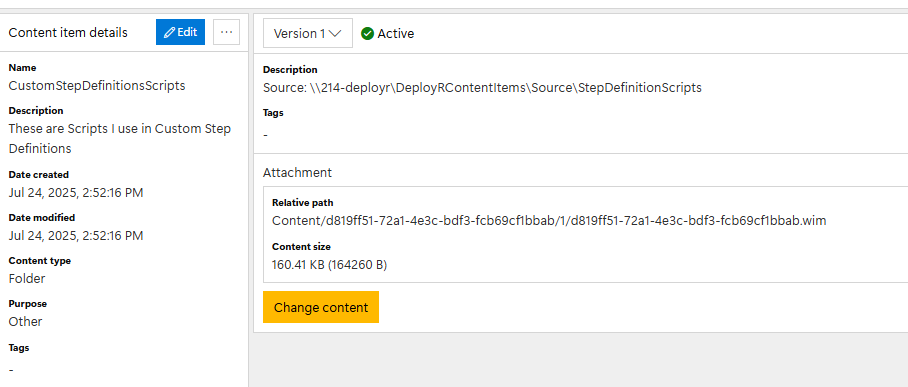
#### Content Item:
This is the content item that contains the scripts for the custom step definitions. In the description, I put the path to where I keep my source files as a reminder.
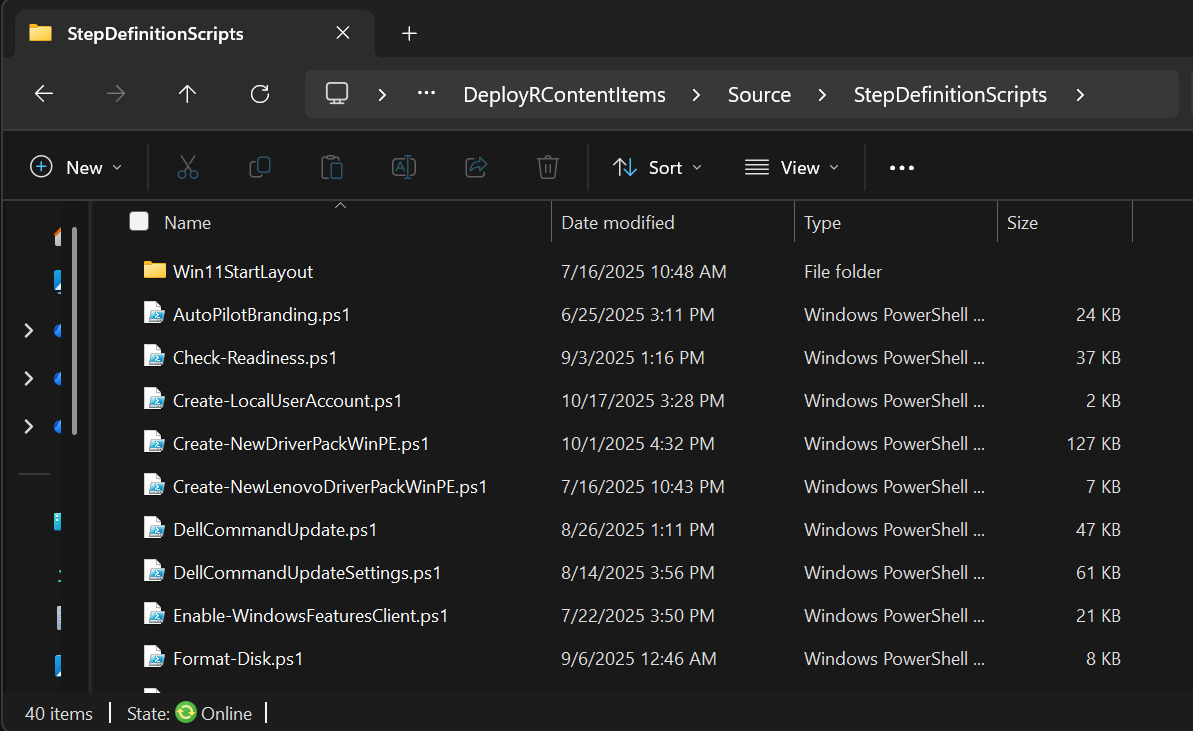
The source files are a collection of scripts and other files used in the custom definitions.
### Task Sequence in Action
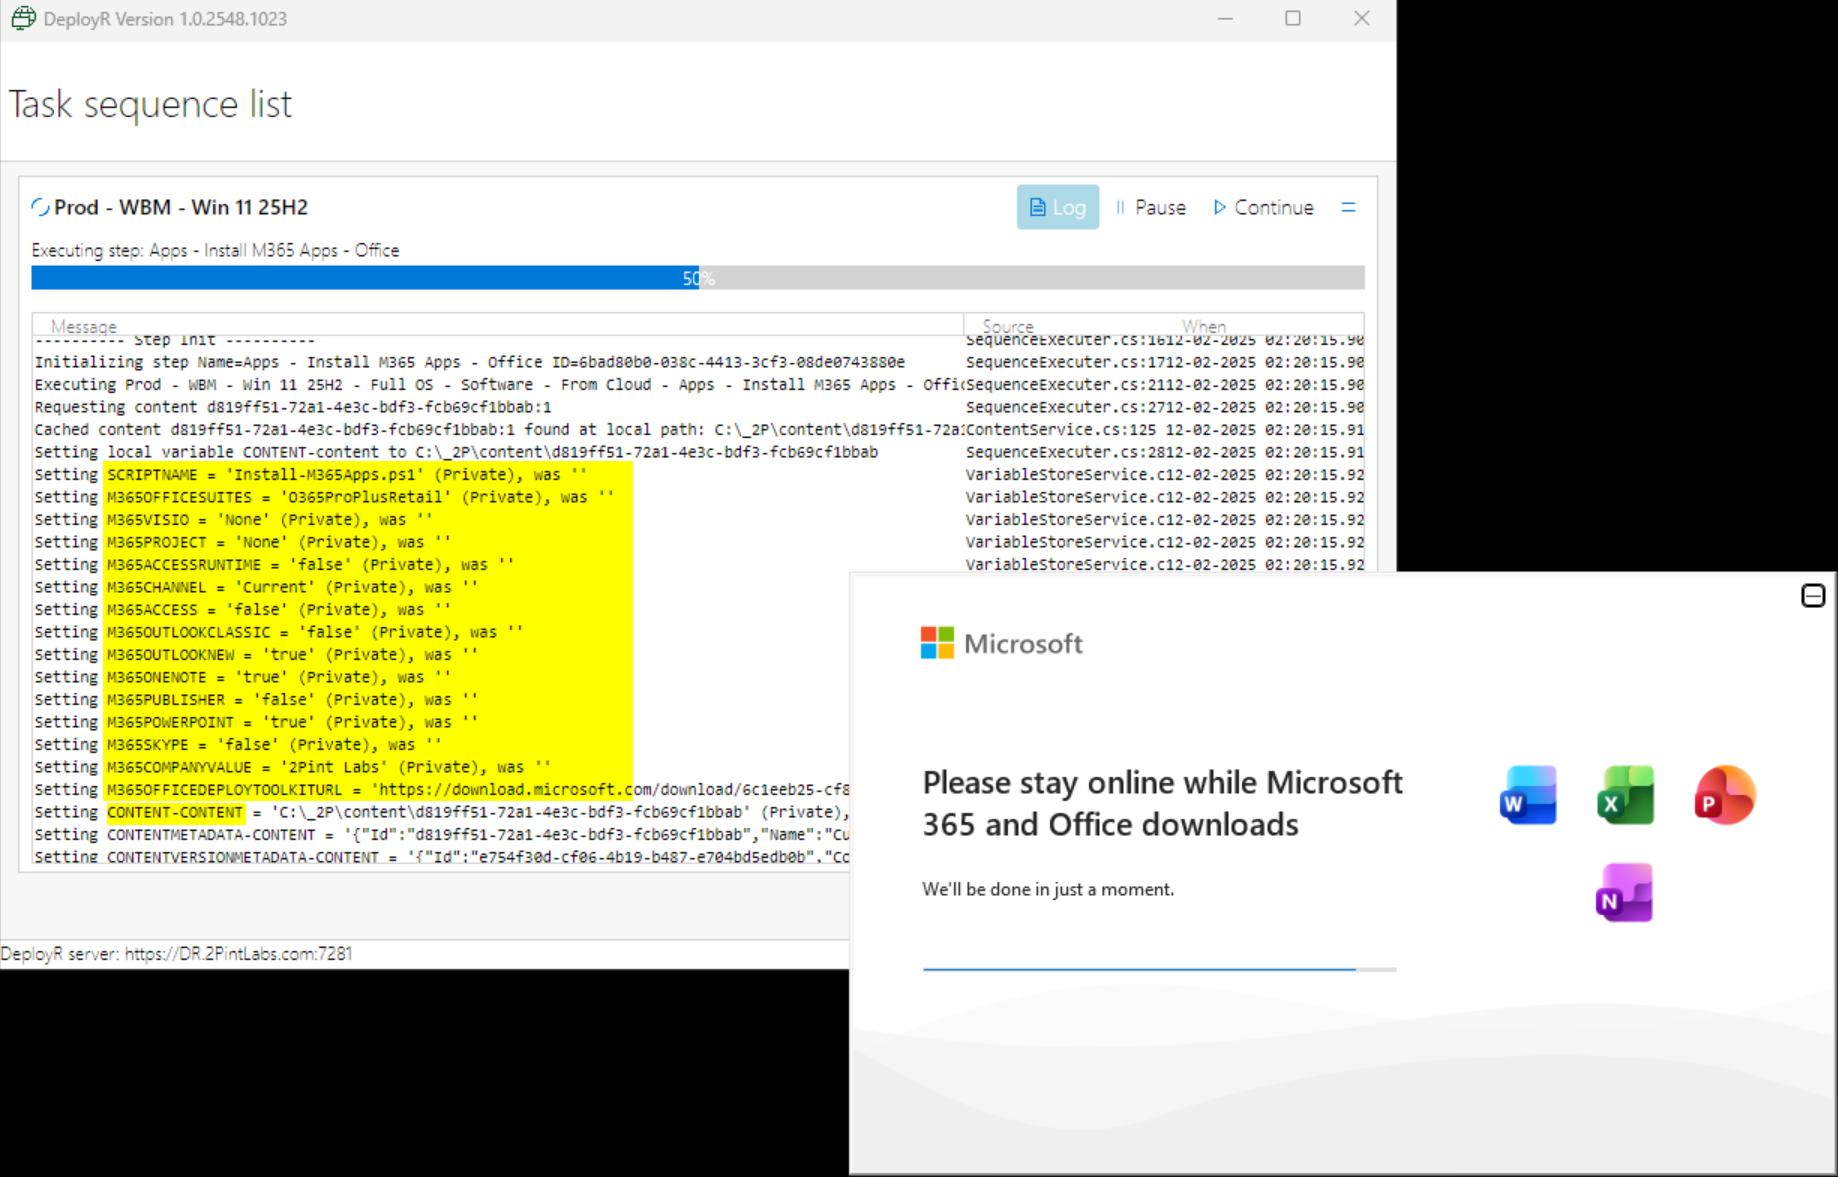
Here you can see the step is setting all of those variables which the script can then consume and know what to install.
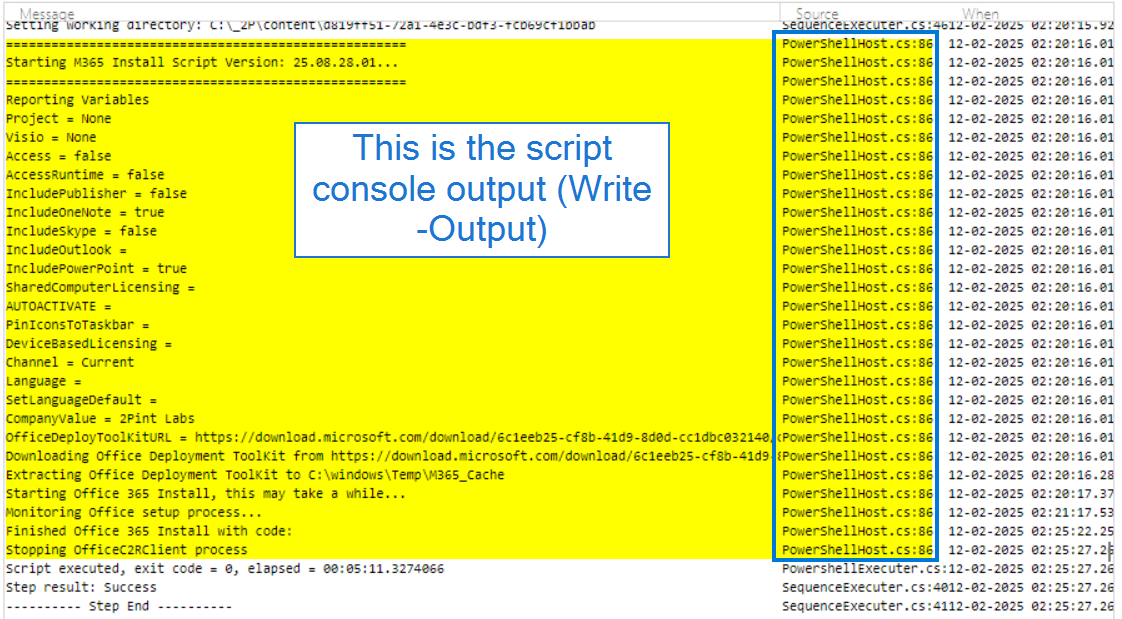
In the script, anything written with Write-Host or Write-Output shows up in the DeployR log, with the Source as "PowerShellHost" vs the task sequence engine components.
### The Script, how it pulls it together
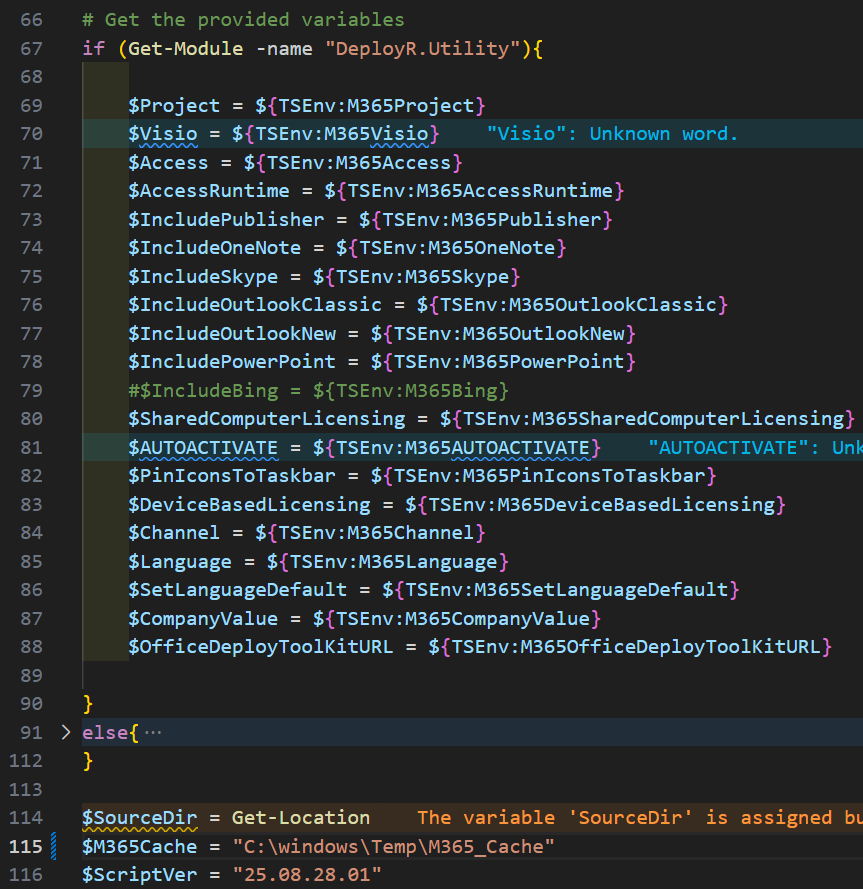
The script pulls in the variables by leveraging the TSEnv environment, which is only available during the task sequence, much like ConfigMgr task sequences. Here I am pulling them into simplified name variables for later use in the script. This script also has an "else" to allow for manual testing outside of the TS environment.
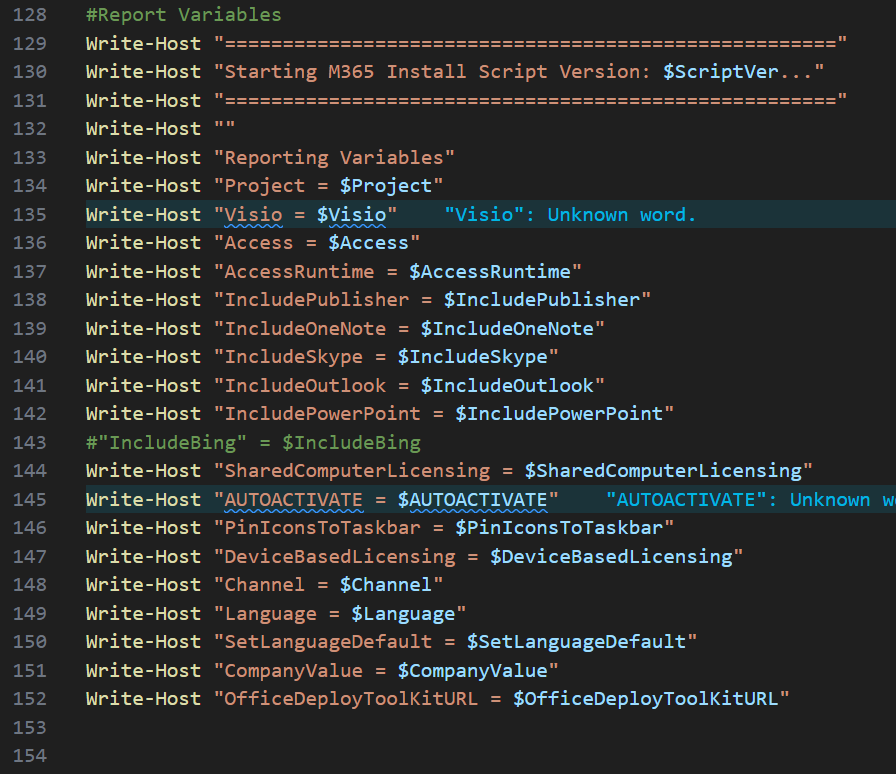
As shown in the log, the script then writes out all of the information for easy reporting:
The script then downloads and extracts the Office Deployment Tool from the URL that was in the variable ${TSEnv:M365OfficeDeployToolKitURL}
Then the script builds the Office XML file starting with a base XML template embedded in the script. It will go through the variables created in the step definition and update the XML to create the desired configuration for the Office installation.
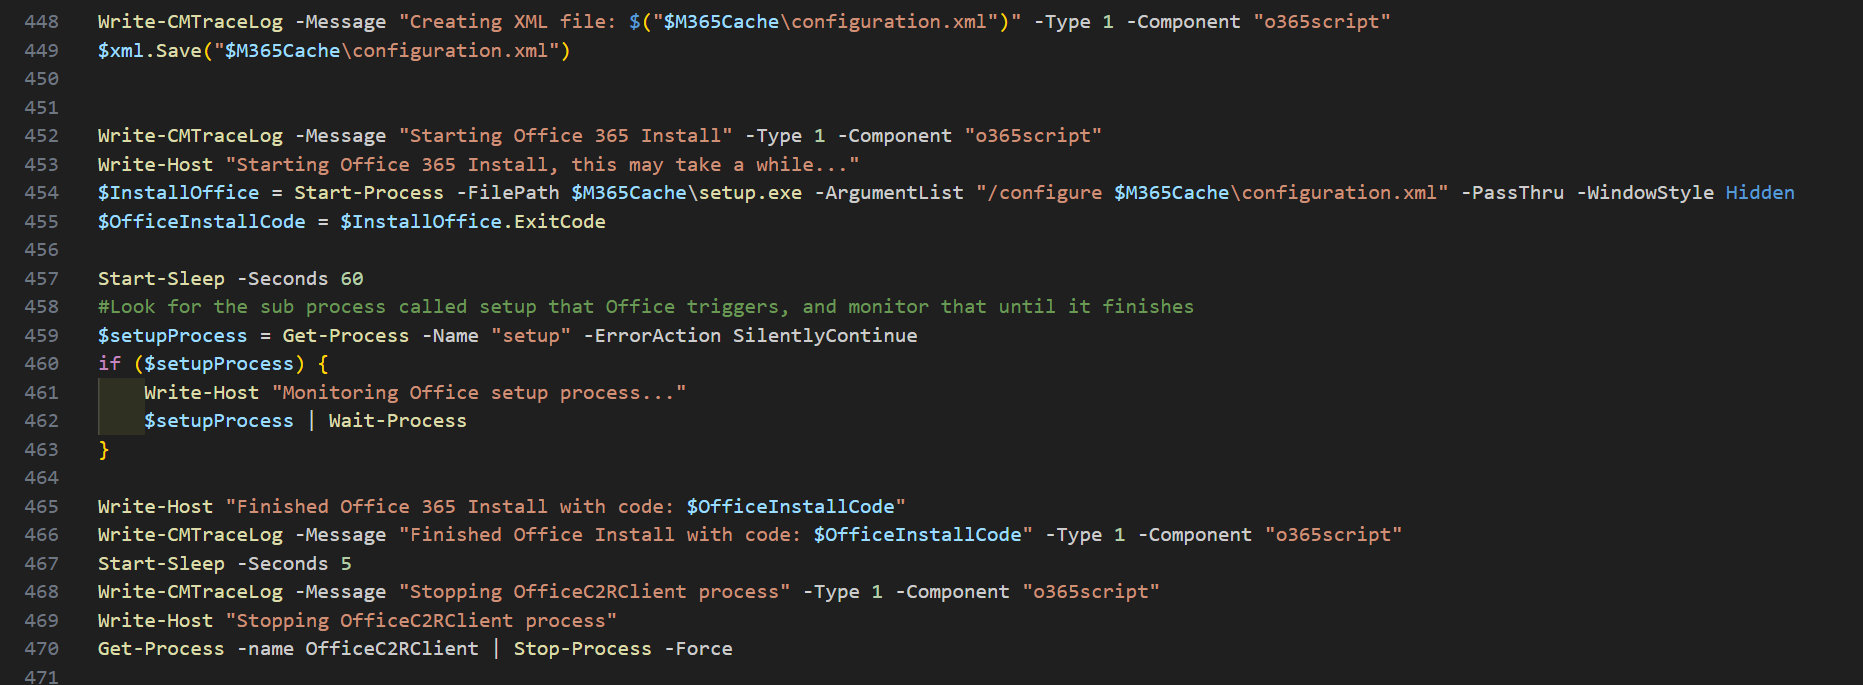
After it builds the XML, it creates the XML file on the file system, and starts the install process
That is an advanced sample of how powerful your step definitions can be: the engineer can control the process behind the scenes, giving the admins the ability to do customization without breaking things.
---
# Agent Instructions
This documentation is published with GitBook. GitBook is the documentation platform designed so that both humans and AI agents can read, navigate, and reason over technical content effectively. Learn more at gitbook.com.
## Querying This Documentation
If you need additional information that is not directly available in this page, you can query the documentation by asking a question.
Perform an HTTP GET request on the following URL with the `ask` and `goal` query parameters:
```
GET https://documentation.2pintsoftware.com/deployr/customization/creating-a-step-definition/sample-m365-office-installer.md?ask=&goal=
```
`ask` is the immediate question: it should be specific, self-contained, and written in natural language.
`goal` is what the user is ultimately trying to achieve, the reason they need the answer. Sharing it helps GitBook give you a better, more relevant answer. A goal is most helpful when it describes the outcome the user wants rather than restating the question. For example, with `ask=how do I create an API token`, a goal like `automate deployments from our CI pipeline` lets GitBook tailor the answer to that use case.
The response will contain a direct answer to the question and relevant excerpts and sources from the documentation.
Use this mechanism when the answer is not explicitly present in the current page, you need clarification or additional context, or you want to retrieve related documentation sections.